Satay Ayam Recipe – Malaysian Favorite
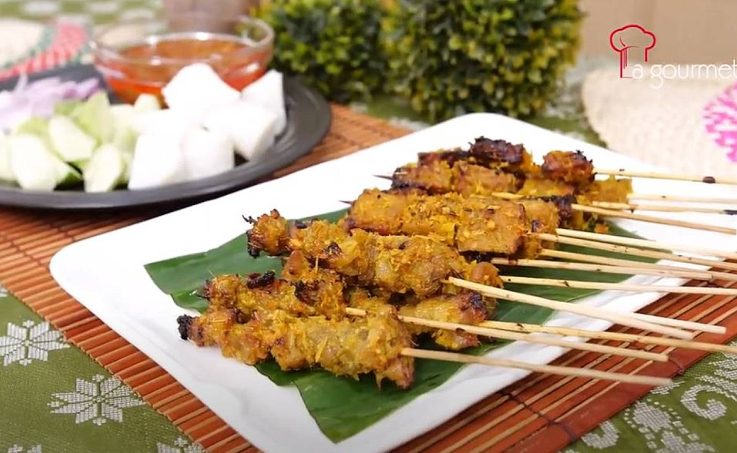
Satay ayam or chicken satay is the most amazing road food in a minuscule town called Kajang in Malaysia. Because of its notoriety, many satay stores in different urban areas attempted to piggy ride on the name and called their satay ‘Kajang satay’ to draw in clients.
The tastiness of satay is flawed when not presented with sauce. An exceptional element of Malay satay is that it is eaten with nut sauce. Nut sauce is produced using finely beat or coarsely beat peanuts to taste. Ingredients utilized, for example, flavours, peanuts, coconut milk, dried chillies, cooking oil and a little mushroom seasoning. Earthy coloured brown sugar can likewise be added to satay sauce to improve the variety and taste of satay sauce.
Original satay ordinarily utilizes chicken or beef. The meat is marinated and afterwards barbecued over a charcoal fire. The fragrant smell during the barbecuing system would imply that resisting them will be difficult.
Satay, viewed as a public dish of Indonesia, is a famous Southeast Asian road food that generally includes a marinated meat being pierced and barbecued, then, at that point, presented with a basic sassy plunge. Contingent upon the area, there are endless varieties of satay, with various types of meats, marinades, flavours, and even stick material.
We’re utilizing tasty chicken thigh meat here, however, you can substitute anything from chicken breast meat to beef, or even tofu and vegetables, however, cooking times will fluctuate. What’s more, that peanut sauce? It is important to the eating experience. It’s a definitive partner to satay, containing every one of the fragrant notes of lemongrass, coconut, fish sauce, and new lime zing.
Here’s how to make this satay ayam:
INGREDIENTS
Meat/tempeh preparation
- Boneless Chicken Thigh – cube 400gm
- Tempeh – cube 400gm
- Honey 3 Tbsp
- Marination mixture
- Cumin Seed 1 Tbsp
- Fennel Seed 1 Tbsp
- Coriander Seed 1 Tbsp
- Tumeric 2cm
- Ginger 1.5cm
- Lemongrass Stalk 2 nos
- Garlic Clove 2nos
- Galangal 1.5cm
- Red Onion 2 nos
- Salt 1 Tbsp
- Pepper 3 Tbsp
Peanut Sauce
- Roasted Peanut (without skin) 300gm
- Red Onion 2 nos
- Ground Chili ¾ cup
- Palm Sugar 2/3 cup
- Cooking oil ½ cup
- Water 2 cup
- Salt 1 tsp
- Lemongrass stalk 6 nos
- Mushroom seasoning 1 tbsp
- Galangal 2cm
- Ginger 1.5cm
- Sides dishes
- Cucumber – rough chopped ½ Nos
- Red Onion – rough chopped 2 Nos
- Rice Cubes 5 Nos
Satay Method:
- Pan-fry coriander, fennel seed & cumin seed on low heat without oil until fragrant.
- Grind coriander seed, fennel seed & cumin seed with La gourmet Healthy Glass Food Chopper.
- Add in remaining marinade ingredients except for salt & pepper, then grind together.
- Washed then cut tempeh and chicken into cubes then add in ground marinate.
- Add salt, pepper, mushroom seasoning, oil & honey to season.
- Mix the marination mixture with chicken and tempeh and let it marinate for 3 hours or more.
- Put chicken & tempeh onto skewer sticks.
- Preheat La gourmet Turbo Roaster at 175 ˚C for 5 mins.
- Cook with the 2-in-1 method (chicken satay top and tempeh satay bottom) until fully cooked. (Est time: 30 mins, Temperature: 175˚C)
Peanut Sauce Method:
- Finely chop roasted peanuts using La gourmet Healthy Glass Chopper and keep aside.
- Combine red onion, garlic, ginger, galangal and lemongrass stalk and finely chop using a chopper.
- Using La gourmet Healthy Electric Pressure Cooker, turn on the “Open-Lid Cooking” function.
- Add in chopped ingredients and stir-fry the mixture until fragrant then add in ground chilli and fry until the oil separates.
- Add in finely chopped ground peanut then add in water. Then add in brown sugar, salt & mushroom seasoning to taste.
- Let boil and simmer well for 30 mins. The ideal satay sauce is a mix of sweet, zesty, sharp and pungent. However corrosive sums for the littlest measure of volume in a satay sauce, it is likely the most significant on the grounds that it overpowers through the richness of the peanut taste.
Satay Ayam Recipe Tip
To make a lemongrass brush, just pound the bulb of a tail of lemongrass until it frays into brush-like.
Type of chicken meat for satay
Most ordinarily utilized is the chicken bosom. It is boneless, in this way exceptionally simple to work with. Nonetheless, the chicken bosom may be excessively dry assuming it is over-cooked. I’d suggest chicken thighs for certain fats and skin if you have any desire to make flavourful delicious chicken satay.
What to eat satay ayam with?
Continuously serve satay ayam along with compacted rice ‘nasi impit’, a few crude onions cuts, cucumber and obviously, the incredibly flavourful satay peanut sauce for a perfect and healthy meal. It’s also great to be eaten with our other famous Malaysian recipe such as egg popiah.
Barbecuing satay ayam on a barbecue skillet
Chicken satay or any kind of satay besides is best barbecued on a charcoal barbecue. Nonetheless, on the off chance that that is unimaginable, a barbecue container isn’t that terrible of a thought. Check it out making them in your kitchen.
Not long prior to barbecuing, preheat the dish at medium to high hotness for 5 minutes. The barbecue skillet must be truly hot for the meat to sizzle as it is laid on the container. While barbecuing, brush some oil onto the meat with a swollen tail of lemongrass for outright scent.
Wash hands carefully when dealing with raw meat
Whenever you manage raw meat, particularly chicken, utilize a different cutting board, ensure no fingers are licked while dealing with it, and that everybody cleans up in soap water subsequently.
Don’t touch the turmeric with your hands
Use utensils to throw together the chicken and turmeric, unless having yellow-stained hands has generally been a secret wish of yours. Turmeric is an extraordinary normal colour for novices. It yields a warm gold tone on undyed regular cotton textures, silk and fleece. A note of mindfulness: The variety will blur rapidly whenever washed regularly.
Soak the skewers before cooking the satay ayam
In the event that you don’t have a grill, you can sear the meat in the broiler on a cooking skillet or baking sheet. To do as such, place satay ayam close underneath the warming component and turn the meat at regular intervals until cooked (make certain to drench your wooden satay sticks in water prior to piercing).
Absorbing them warm water for 10 to 30 minutes prior to stringing will hold the sticks back from being cooked alongside the food.
Check out our La gourmet website for ongoing promotions!
Chili Crab Recipe Malaysian Style
Chili Crab Recipe
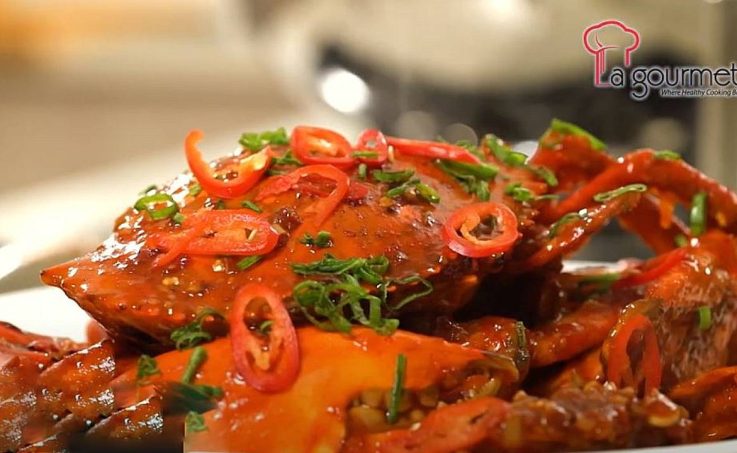
Crabs are served in an immense puddle of pureed tomatoes that is sweet, hot, tart, and frequently thickened with egg. However the shells have been pre-crushed, you must dive in and utilize anything that instrument you can find, similar to chopsticks or fingers to suck out each piece of delicious, sweet crab flesh.
In the event that you don’t know how to clean the crab, you ought to get the Dungeness crab in Asian stores. They generally give the cleaning and cleaving administrations.
Utilize a mortar (or other comparable kitchen apparatuses) to break the shells of the crab prior to cooking. You can likewise involve this formula for cooking crab claws.
Assuming you do, ensure you break the claws prior to cooking so the flavours seep into the meat.
There are 3 main parts to this mouth-watering Chili Crab:
The crab – Fresh, live mud crab is the conventional crab utilized, valued for its sweet and substantial tissue. Yet, any large crabs can be utilized;
The chilli sauce – Somewhat like a Thai curry, the foundation of the sauce is made with new chillies and aromatics, all blitzed up to deliver the new flavour; and
The sauce – Many things go into it yet three legitimate, key fixings that push the sauce to take off flavour statures: the saved crab tomalley from inside the (“crab mustard”), anchovies stock granules and ketchup. These additional ingredients can be added as to your preference.
Here’s how to make this chili crab recipe:
Chili crab ingredients
- 2 – 2 ½ kg crabs
- 1 cup tapioca flour
- 3 cloves garlic (minced)
- 3 shallots (chopped)
- 2 stalks of lemongrass (crushed)
- 2 – 3 tbsp oil
- 2 cups water
Blended chilli
- 3 red chillies (deseeded)
- 3 dried chillies (soaked)
Seasoning for the chili crab
- 1 tbsp oyster sauce
- 1 tbsp light soy sauce
- 2 tbsp chilli sauce
- 2 tbsp tomato sauce
- 1 tbsp lemon juice
- 1 tbsp Ikan Bilis stock granules
Steps to make the chili crab recipe:
- Combine all the seasoning sauce – oyster sauce, light soy sauce, chilli sauce, tomato sauce, lemon juice and Ikan Bilis stock granules in a bowl and stir well.
- Toss the crabs in tapioca flour to coat evenly.
- Deep-fry the crabs in hot oil for 3 to 5 minutes. Drain from the oil using a skimmer. Transfer them to the plate.
- Heat oil in the wok and fry the shallots, garlic and lemongrass until fragrant.
- Add blended chillies and combined seasoning. Fry for a while until aromatic.
- Add the crabs and continue to fry until well coated with the sauce and the gravy is thick. Dish out and serve immediately.
Generally, Chili Crab is served with a pile of brilliant mantou buns. These steamed and broiled, soft Chinese buns make the ideal vessel for cleaning up all that lip-smacking sauce. The nice crusty exterior of the bread with a soft inside is perfect to be munched with the delicious savoury chilli crab sauce. These can be difficult to source, however, so a baguette, dried up a portion or even delicate dinner rolls are completely great other options.
However, in the event that you need the best, make handcrafted brioche. Think – delicate rich bread dunked in hot flavour stacked sauce.
Rice is another food item that goes incredibly well with chilli crab. Also, give egg popiah a try! It goes well with the sauce of chili crab too!
What other food combination goes perfectly well with chilli crab?
The chilli crab is absolutely perfect by itself – all gooey with egg, fiery and sweet, stacked with stew and ketchup. You can also enjoy the Chili Crab sauce in or on a wide range of food from fries, Prata, chicken wings, Xiao Long Bao, bao to fried fish and French fries.
Is A Male Or Female Crab Better To Eat?
Both are incredible and their meat tastes notwithstanding. Male crabs have bigger hooks than females which some like, but many like females as their eggs can be utilized in dishes, for example, chilli crab to make a delicious sauce – crab caviar!
How and how long can you store crab?
You’ll need to cook live ones the day you get them. For the short time frame that you will store them, put them in an open compartment fixed with wet paper, in the refrigerator or a cooler. Try to keep them moist, not wet, and cool.
Keep new crabmeat refrigerated and eat it no less than two days after getting it, or, in all likelihood freeze it. Moreover, keep frozen crab frozen until you’re prepared to warm it.
Pasteurized crab has an eight-to 18-month time span of usability in the can; actually, look at the date on the can. It’ll save for as long as seven days subsequent to opening, as long as it visits cold in your cooler, Stavis says.
Yet, by and large, all crab tastes best the sooner you eat it.
More tips to make chili crab
Very much like some other Southeast Asian dish, making chilli crabs ought to be done the ‘agak-agak’ way. This implies you don’t need to be precise with regard to your ingredients. It’s a pretty common way of cooking for nyonya food as well.
Rather, you ought to rely upon your feeling of smell, taste and eyes while cooking. All things considered, eye-balling the whole cycle is the manner by which the best cooks get it done.
Furthermore, you can really control the zestiness level of your chili crab. The formula here calls for new chillies and dried chillies. Assuming you need it spicier, you can expand the number of dried chillies or utilize bird’s eye chillies (cili padi) for that additional mouth-numbing kick.
You can supplant your preferred crabs with any fish, similar to lobster, prawns or shellfishes. It will in any case come out well and fine.
On the off chance that you’re veggie-lover, you can consider making this with vegetarian prawns or even tofu. Simply cover your tofu with flour or breadcrumbs and pre-fry them prior to adding them to the sauce at the stage where we add the crabs.
Fans of Singapore chilli crab may love this recipe as well. It has a local Malaysian twist to it. Give it a try and let us know how it goes!
For more fantastic cookware promotions, don’t forget to check out our website!
Egg Popiah Recipe – Mouth-watering In Every Bite!
Egg Popiah Recipe
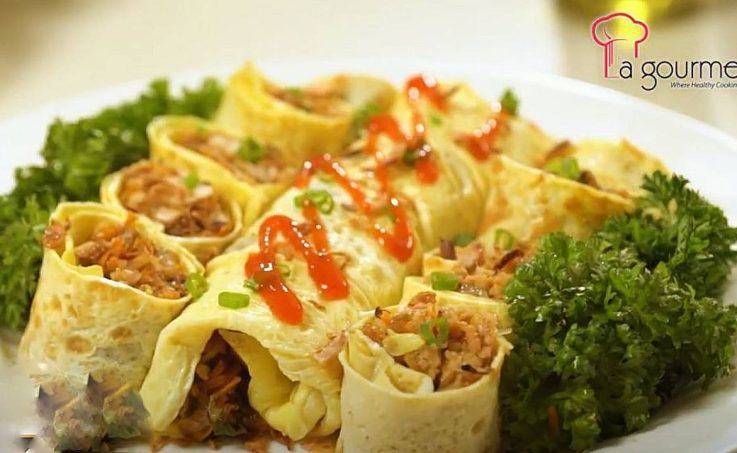
Egg Popiah are a mouth-watering light tidbit that is famous to the point that each ethnic gathering in Malaysia – be it Chinese, Malay, or Indian has its own translation of egg rolls. However, there are numerous varieties of the seared popiah (the common ones involving spring roll wrapper) it is by and large acknowledged that spring popiah recipe is a blend of vegetables and meat enclosed by slender cake sheets southern style to an excellent brilliant brown.
Sounds basic, however, takes a specific arrangement of abilities to make, as wrapping it also firmly will bring about a busted roll and wrapping it also freely will make it unroll itself when you’re cooking it in the oil. However, the most amazing aspect of the tidbit is that one is rarely enough, so you’d be very much compelled to make them in mass. Furthermore, as it’s been said, careful discipline brings about promising results, so you can develop your skills in making it as you go!
Here’s the popiah recipe:
Ingredients
Egg popiah skin
- 6 eggs
- 1 ¼ cups water
- ⅛ tbsp salt
Filling of egg popiah
- 2 bundles of glass vermicelli (mung bean threads)
- 450g jicama (peel and grate into fine strips)
- 1 large carrot (peel and grate into fine strips)
- Ground chicken (225g) + 1 tbsp soy sauce + ¼ tsp ground pepper
- 2 tbsp vegetable oil
- 1 onion (peeled and thinly sliced)
- 2 cloves garlic (minced)
- ½ head cabbage (finely sliced ) about 450g
- 1 tbsp salt
- ¼ tbsp ground pepper
- 3 green onions (finely sliced)
- Vegetable oil for deep frying
- Sweet chili sauce for serving
Steps for this popiah recipe:
- Soak glass vermicelli in warm water for 20 minutes to soften.
- Heat up the vegetable oil.
- Add onion and garlic into the wok and cook for 2 minutes.
- Add grated jicama, carrots, cabbage and seasoned ground chicken. Stir to get everything well mixed. Pick turnips or jicama that are more modest in size with perfect or smooth skin that are firm to the touch and weighty for their size. Bigger turnips will generally be woody and unpleasant tasting. Little to medium size turnips are best. Wash and clean completely the skin prior to peeling the jicama. Strip the skin off the turnips with a vegetable peeler or little paring blade. Continuously hold on until you’re prepared to cook the turnips before you peeling them. This is to keep the turnips as fresh as possible prior to cooking.
- Add in glass vermicelli, stir well.
- Add salt and pepper and continue to cook for about 5 minutes.
- Turn off the stove and allow the filling to cool.
- Beat in eggs into a large mixing bowl. Gradually pour in water to mix. Stir in salt.
- Heat a non-stick frying pan and lightly grease the pan with cooking oil.
- Pour 2 to 3 tablespoons of the egg mixture into the pan. Swirl around to get an even circle.
- When cooked, edges will curl and begin to release from the pan. Flip out and leave it on a clean plate.
- Place a sheet of egg popiah skin on a clean cutting board or big flat plate. Place a little filling on the egg popiah skin.
- Fold the pointed end over the filling. Then fold in both the right and left sides of the wrapper.
- Roll and seal. Repeat with remaining wrappers and filling.
- Serve the egg popiah hot with your desired sauces. This customization is what makes this popiah recipe a delight.
This popiah is perfect to be eaten as it is. But, if you’re not sure what sauce to go with it, try out our chili crab too!
Miscellaneous tips
What’s the most effective way to store eggs at home?
Most coolers have an egg extra room in the entryway, however, this isn’t the most ideal spot to keep them. Eggs are best put away in the container they were bought in, inside the principal region of the cooler, where the temperature is generally predictable. This is ideal over the refrigerator entryway, which opens and closes and can change temperature and dampness levels. New eggs normally last around a month and a half in the ice chest yet can endure considerably longer. To test in the event that your egg is spoiled, tenderly add it to a fine-looking specimen assuming it sinks, you’re great, however on the off chance that it floats, throw it.
Does egg size important?
Egg size can rely upon an assortment of reasons, similar to a chicken’s variety or diet, however, the main component is age, with more seasoned hens laying bigger eggs. While egg size doesn’t affect quality, it can have an effect assuming you’re baking or setting up a formula that utilizes a ton of eggs. An enormous egg commonly weighs around 2.5 oz and a little egg is just around 1.5 oz, so the distinction can include rapidly in a formula. Eggs in a solitary container ought to for the most part be close in size, yet there can be some differences. Eggs are reviewed by absolute container weight, so infrequently you will see more modest eggs in with bigger ones, yet they ought to never all be little.
How to Tell if an Egg is Fresh (Just by Picking it Up)
There really is a method for telling assuming an egg is new without breaking it or drifting it in a glass of water. You should simply pick up the egg and shake it.
That is all there is to it.
An egg that has been lounging around for a spell can slosh around and you’ll feel the yolk shaking around inside.
That is on the grounds that as an egg age, the air sac toward one side develops as air leaks in through the shell and vanishes the dampness in the egg white. So there’s unfilled space and the internal parts begin moving around.
Yet, when you shake a new egg, you won’t feel anything wiggling. Just to err on the side of caution, it’s generally really smart to break each egg into a little bowl to be certain it hasn’t turned sour prior to adding it to your popiah recipe, cake blend or pancake batter or skillet.
How long can you keep popiah?
They can be put away in the fridge for as long as about fourteen days. Warm them utilizing a steamer. Simply steam over high hotness for 1 minute or so until they are mellowed.
Do you like this popiah recipe? It’s a nice party food along side with satay ayam too!
Swing by our website for ongoing promotions and offers!
Tofu In Creamy Egg Sauce
Tofu In Creamy Egg Sauce
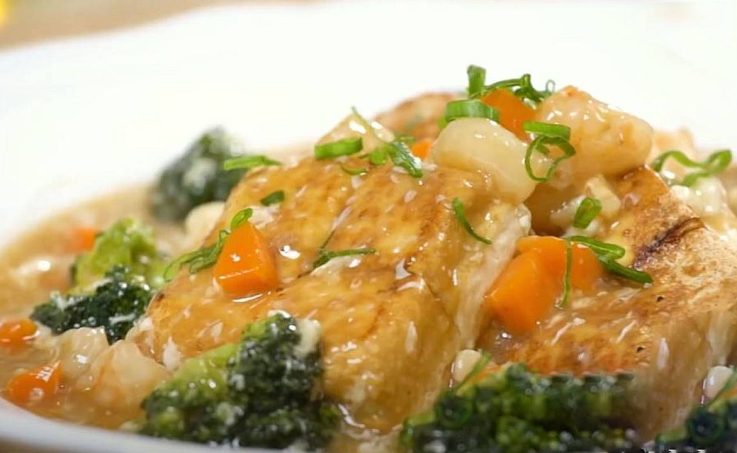
In this recipe, you can use the usual block tofu or Japanese tofu. Certain people call it Japanese tofu or scallop tofu since it comes in a tube structure and is much of the time cut into thick round circles like a scallop. In any case, what we love the most about this tofu is the slight eggy flavour and its smooth surface. It’s ideal to sear since you’ll get that fresh outside with a delicate, lavishly smooth inside!
The egg tofu might be somewhat difficult to come by at your normal supermarkets, yet you ought to have the option to track down them at your nearby Asian general store. It ordinarily arrives in a cylinder structure, enclosed by a straightforward bundling.
Egg tofu tastes rich and fragrant like fried eggs when sautéed. It is less fragrant when bubbled in soup or steamed however it has a sleek delicate surface that is delicate and like luxurious tofu.
Here’s how you make this delightful tofu in creamy egg sauce:
Ingredients
- 4 blocks of tofu
- 80 g of broccoli florets
- 80 g carrot (diced)
- 1 tbsp chopped garlic
- 100g prawn meat (diced)
- 300 ml water
- 1 tbsp Chinese wine
- ½ tbsp oyster sauce
- 1 tbsp chicken stock powder
- 1 tbsp light soy sauce
- 1 tbsp sesame oil
- ½ tbsp pepper
- 1 tbsp cornflour water
- 1 egg white
Steps to make this tofu in creamy egg sauce
- Blanch the broccoli florets in boiling water for 2 minutes. Drain away water. Set aside.
- Heat some oil pan-fried tofu till golden brown on all sides. Remove and place on serving plate.
- Leaving 1 tbsp oil in a wok, add garlic and fry till fragrant.
- Add in prawns and fry till they turn pink.
- Add in water and seasoning.
- Add in carrot and broccoli florets, and stir well. Bring it to boil.
- Add cornflour water to thicken the sauce.
- Turn off heat and add in egg white. Stir it around.
- Garnish with chopped onion leaves. Serve hot.
How to serve this recipe?
At the point when you buy cold tofu from the market, its capacities as an ingredient (you need to cut, cook, and so on do something to the block tofu to make it into a dish).
However, when we make new and hot tofu at home, it’s capacities as a dish (you don’t need to do a lot of extra prep work).
At the point when the block tofu comes hot out of the liner, you can just put a little soy sauce on a top, spoon and eat warm! It’s great to such an extent that way.
In some cases, we like to broil shallots and season them with salt. Then spoon that all around the hot tofu. Shower in soy sauce and sesame oil. Top with green onions and eat away!
Or on the other hand, you can involve it as an addon. Take huge scoops of the tofu and add them to any soup, stew, or stock to make it a total dinner. This tofu in creamy egg sauce is also perfect as sides to chili crab. It’s smooth and calming and certain to neutralize the strong chili crab taste.
Step by step instructions to prepare the tofu
Tofu is regularly cut into blocks or cut into solid shapes prior to cooking and serving. While egg tofu isn’t quite as delicate as silky tofu, you ought to be delicate with it or it might break or go to pieces.
To prepare the tofu:
Cut the plastic packaging open along the specked lines. Assuming that there are no spotted lines on your plastic tub, cut along the most limited side of the container.
Pour the water out and rinse it with water.
Cut or solid shape the tofu as per how you need to serve it. When cutting it, try not to cut more slender than a large portion of an inch (a little more than 1 cm) or the tofu may be excessively slim and may break apart during cooking.
Store Tofu Up to a Week in the Refrigerator
In the event that you will eat the tofu in somewhere around seven days, you can refrigerate it. Cover the tofu with cool, ideally sifted, water and store it in a firmly fixed compartment or the tub it came in covered with saran wrap. Change the water every day to keep the tofu wet and new.
For Longer than a Week, Store Tofu in the Freezer
On the off chance that you won’t utilize extra tofu somewhere around seven days after when the compartment was opened, the best spot to store it is in the cooler. Frozen tofu can keep going for as long as 90 days. Cut it into cubes and freeze on a material lined baking sheet until strong, then, at that point, move to a sealed shut cooler holder or sack. Thaw out in the fridge and press out any overabundance fluid prior to cooking.
Tofu that has been recently frozen will have a sturdier, spongier surface than a few cooks really like to new tofu – particularly when you intend to marinate it.
Is egg tofu vegetarian?
No, egg tofu isn’t vegetarian since it has eggs in it. It is significant not to mistake egg tofu for vegetarian egg tofu scrambles where you substitute tofu for the egg in a scramble. They are two distinct ideas. Egg tofu is vegan in the event that you consume eggs in your vegetarian diet.
So in case you’re looking for alternative tofu in this tofu in creamy egg sauce recipe, take note of this.
How to clean your broccoli properly?
Consider three extraordinary ways of cleaning new broccoli before your next feast.
Under running water: The least complex method for washing broccoli (or any new produce) is to hold it under running water. Utilize a colander to hold your broccoli florets and afterwards get every floret separately to focus on soil or bugs out of the cleft of every broccoli head.
Soaked in water: You can absorb broccoli water for five to ten minutes to give it a legitimate wash. Basically, fill a huge bowl or attachment a perfect sink with a plug and top it off with water. Both virus water and warm water will work, for this reason, however, try not to utilize boiling water to clean broccoli. You will in any case have to wash the broccoli in running water whenever you are finished splashing the broccoli.
Soaked in a white vinegar solution: If you realize your broccoli heads have aphids or cabbage worms, you can kill them with an answer that is 10% white vinegar and 90% water. Either load this blend into a splash jug and point it into the hole of the broccoli florets or let the broccoli absorb the solution for a couple of moments.
Give this tofu in creamy egg sauce a try!
Don’t forget to check out our website for more cookware and kitchenware promotions.
Yam Ring Basket With Celebrity Chef Amy Beh
Yam Ring Basket By Celebrity Chef Amy Beh with La gourmet Pressure Cooker
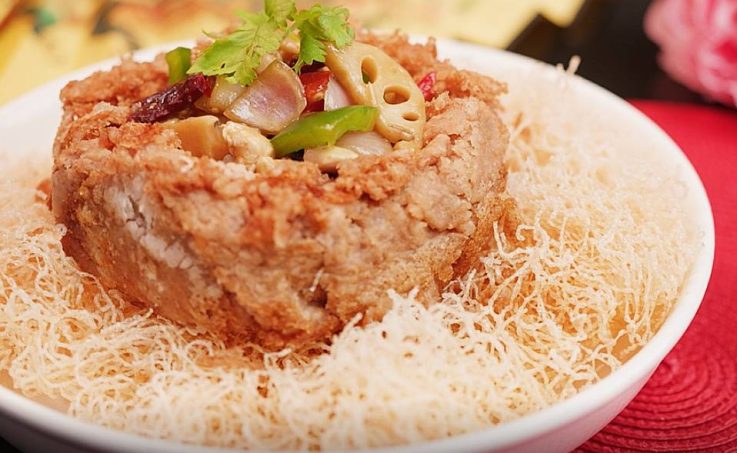
Mashed yam paste is formed into a ring and afterwards singed and loaded up with pan sear chicken and vegetables or any filling of your decision and served on a bed of fresh rice stick noodles. This is a well known Chinese New Year food you can without much of a stretch make at home.
The recipe may seem difficult to do but with our recipe guide here featuring celebrity Chef Amy Beh, you’ll catch on in no time!
Prosperity Yam Ring is a dish to start off any festival. It’s generally served in the Spring Festival 金芋满堂喜迎春, Jīn yù mǎntáng xǐ yíng chūn. Like some other food served during Chinese New Year, it has an auspicious significance. The yam ring basket or fatt putt is filled to the edge imply a spilling over of fortune (phoon woon put woon 盘满钵满 in Cantonese)
The yam ring basket gets its name from the Buddhist alms bowl (fatt putt). It is no big surprise the yam ring basket bears similarity to this said bowl.
This is a conventional dish that is normally served at weddings or Chinese New Year. The primary ingredient is yam which normally forms into a ring and is afterwards deep-fried.
The yam ring basket is then put on top of a bed of fried noodles, commonly used is rice vermicelli. With respect to the filling, it’s ordinarily a combination of sautéed meat, sea produce, and a variety of brilliant and delightfully cut vegetables.
Fresh outwardly and delicate substantial yam inside loaded up with appetizing meat as well as vegetable pan-fried food is actually a crowd-pleaser. Plus, the fancy deep fried rice vermicelli forms a beautiful nest where the yam ring will sit.
Here’s how to make this:
Ingredients for golden yam ring basket
- 300 grams yam (cut into thin slices)
- 60 grams wheat starch
- 1/2 tsp baking powder
- 1/2 tbsp 5 spice powder
- 1 tsp sugar
- 1 tsp salt
- 30 grams shortening
- 90 ml hot boiling water
- 1 piece deboned chicken whole leg (cubed)
- 20 grams red capsicum
- 20 grams green capsicum
- 100 grams local lotus roots (sliced)
- 20 grams big onion (cubed)
- 3 dried chilis (cut into sections)
- 1 tsp light sauce
- 1/4 tsp dark soy sauce
- 1 tbsp oyster sauce
- 2 – 3 tbsp water
- 1/2 tsp chicken stock powder
- dash of pepper
- 1/2 tsp sugar
- 30 gram rice vermicelli
- adequate cornflour slurry
- dash of shaoxing wine
Instructions for golden yam ring basket
1. First, add water into the stainless steel pot of La gourmet pressure cooker. Then, put the yam in for steaming.
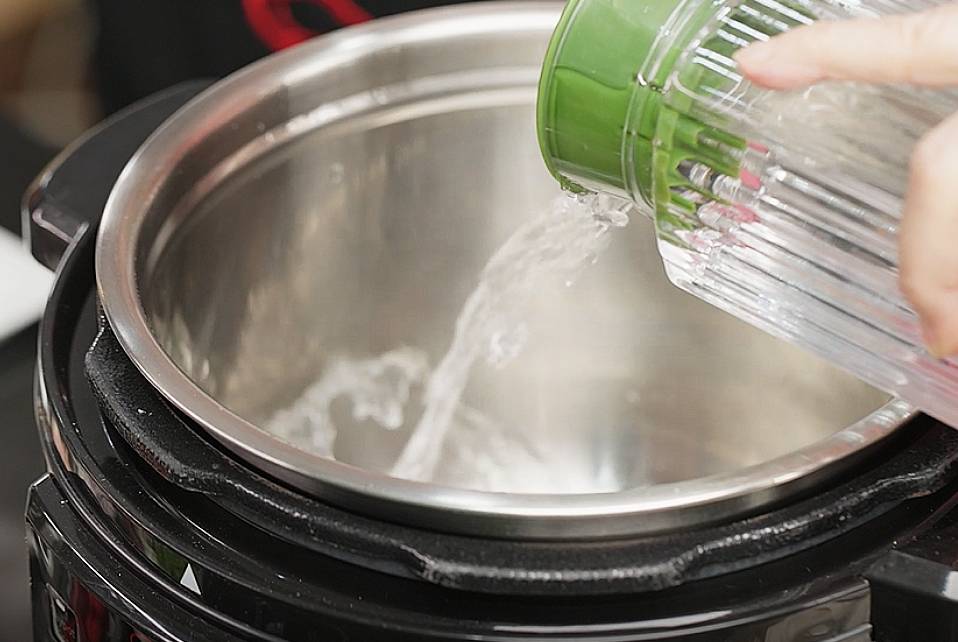
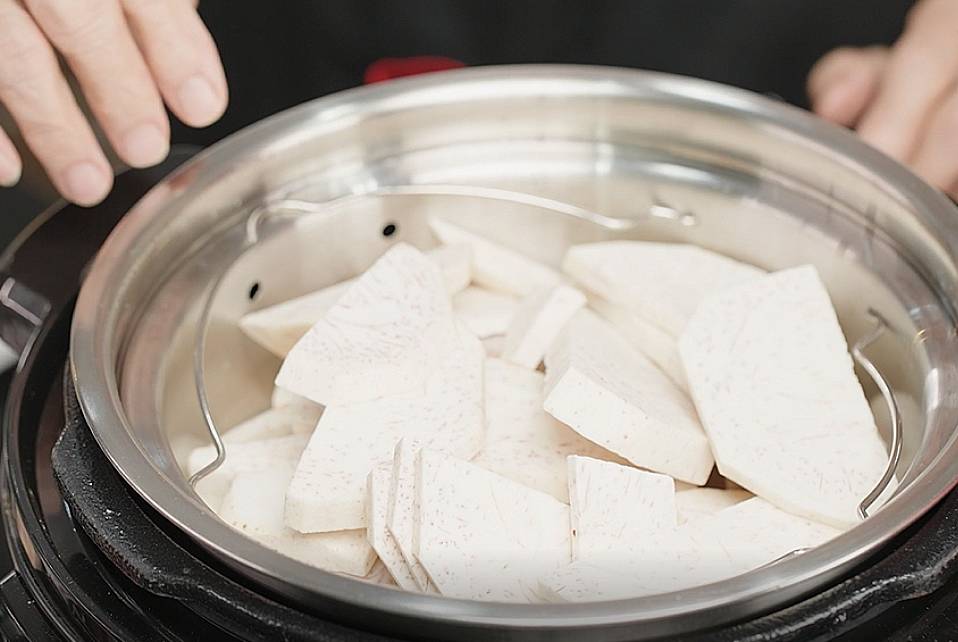
2. Lock the lid of the pressure cooker then. Press the “Steaming” button. The pressure cooker will start the cooking process on its own.
While waiting for the yam to be steamed, we will do the filling for the golden yam ring basket.
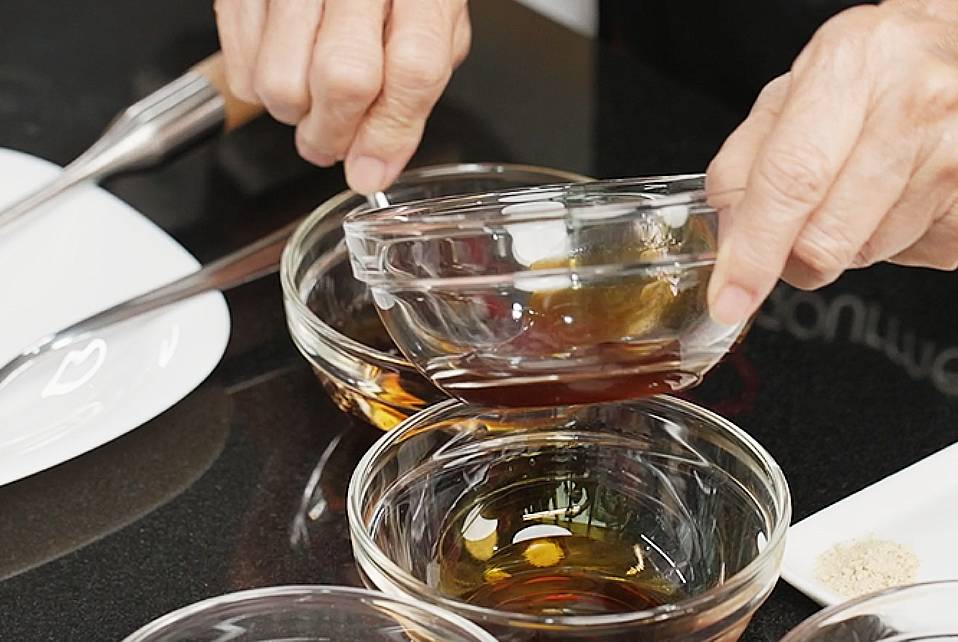
3. Add in light soy sauce, oyster sauce, dark soy sauce, pepper, chicken stock and sugar into a bowl and mix. Dark soy sauce has a light taste yet it is vastly used in cooking mainly for the color.
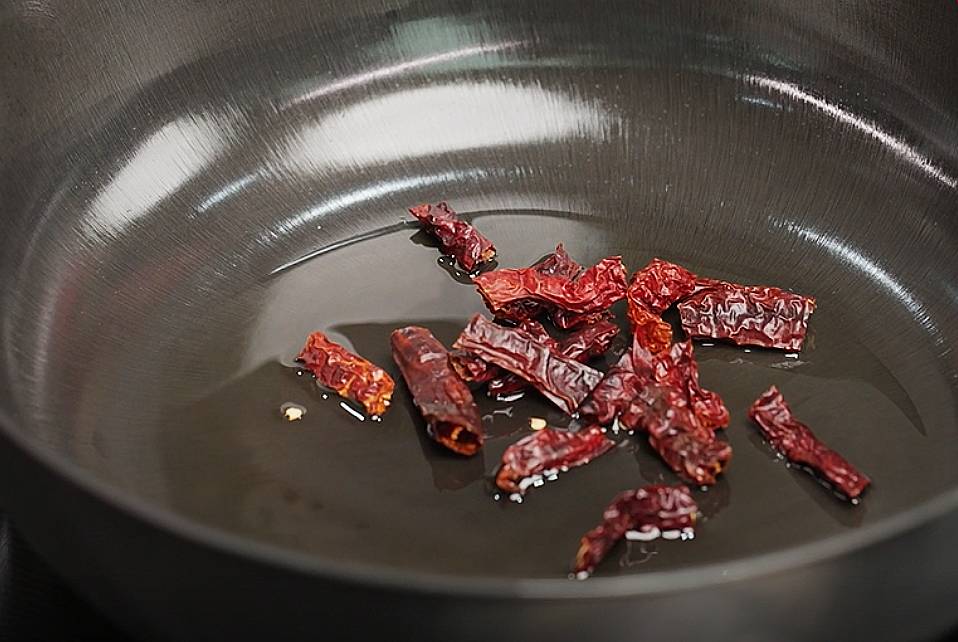
4. Heat the oil and add in the dried chilli. Lightly stir fry it to get the fragrance and spiciness out.
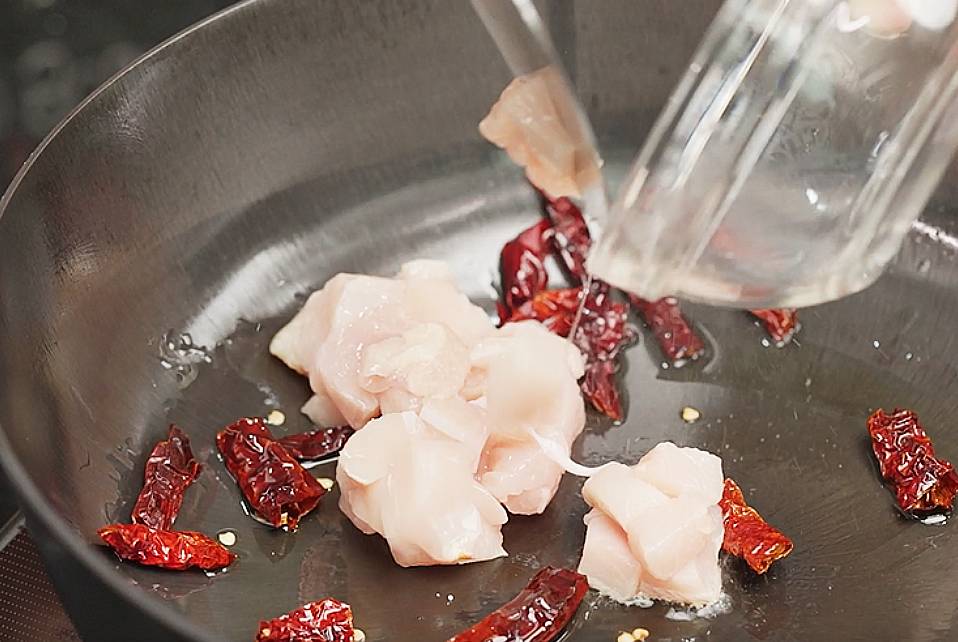
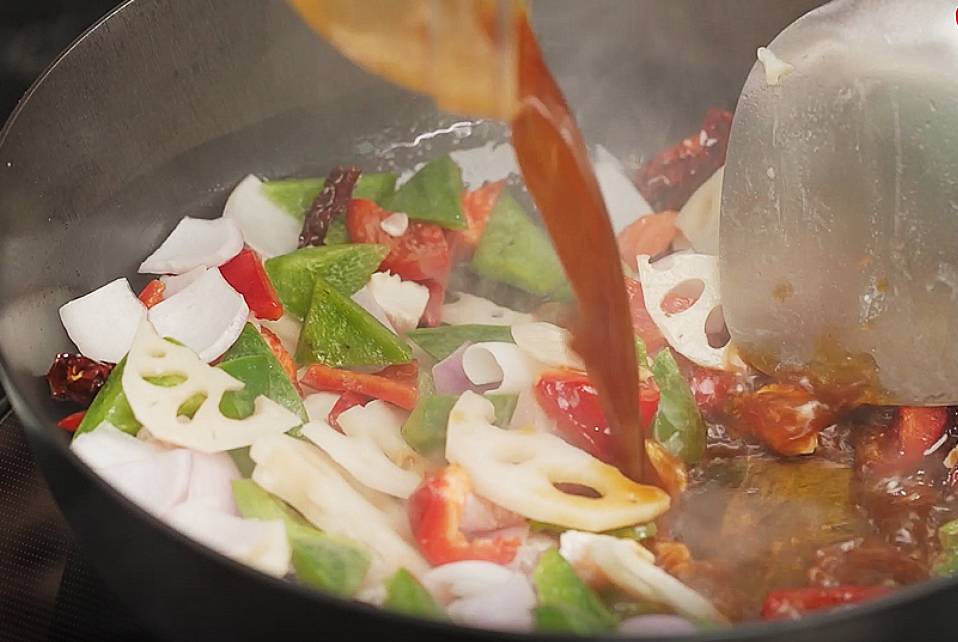
5. Then, add the chicken, lotus root, red capsicum, green capsicum, red onions and sauce. Stir fry together until they are well-combined.
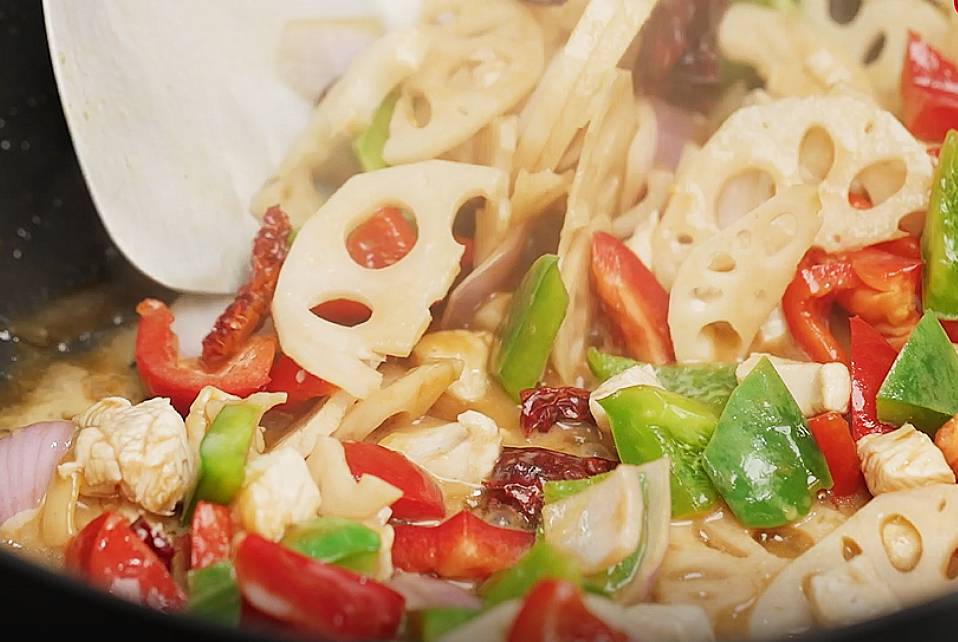
6. Add in the corn starch slurry gradually while stirring continuously.
Next prepare the wheat starch paste. Take the steamed yam out from the pressure cooker.
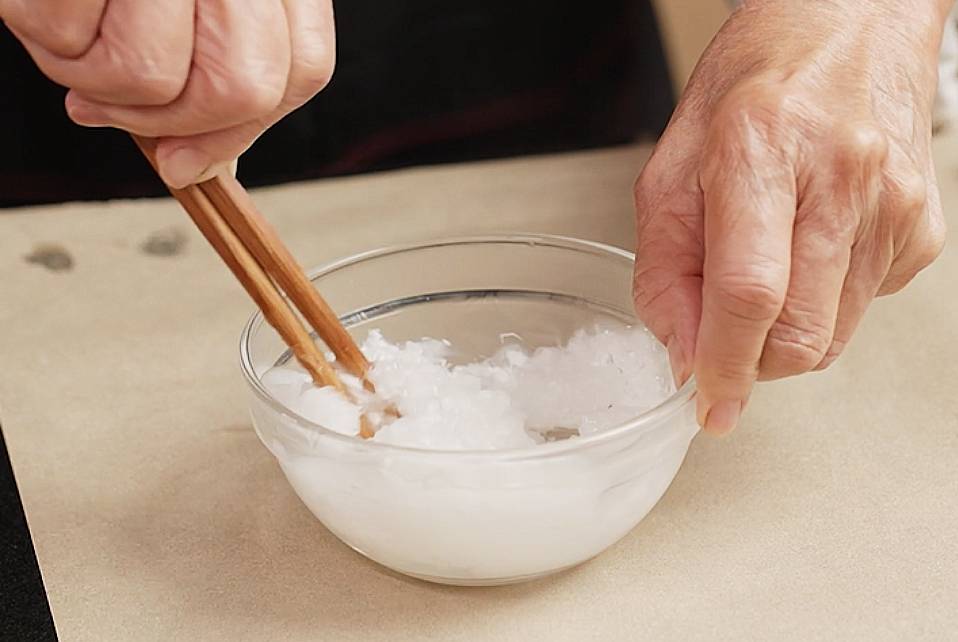
7. Add boiling water into the bowl of wheat starch to make the paste.
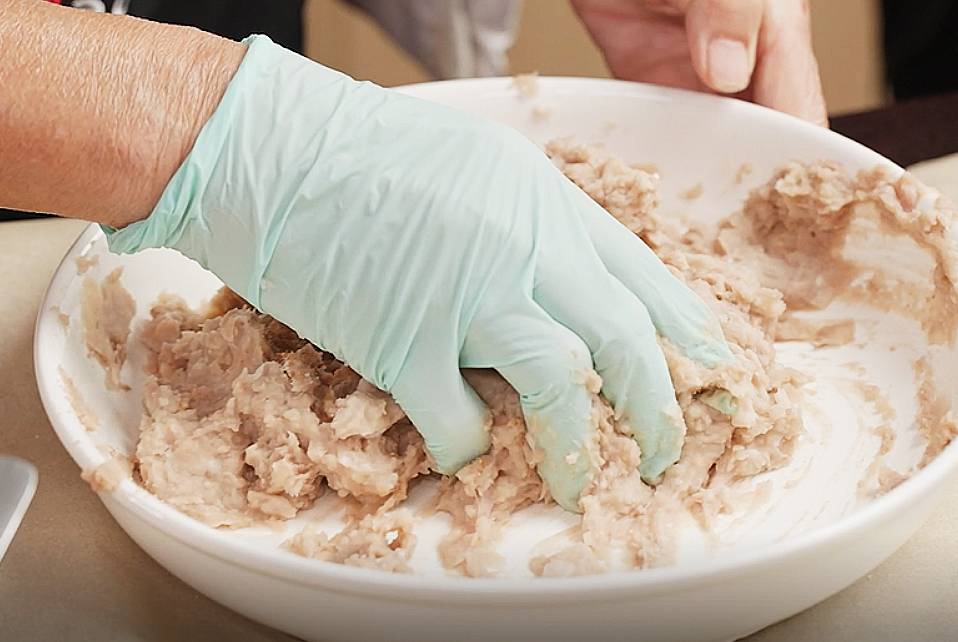
8. Mash the steamed yam. Then add the wheat starch paste and mix it together.
Add 5 spiced powder, baking powder, salt and sugar into the paste and mix them well. Add in shortening and continue mixing it.
9. Transfer the paste onto the parchment paper to shape the yam ring so it will be easier to work with.
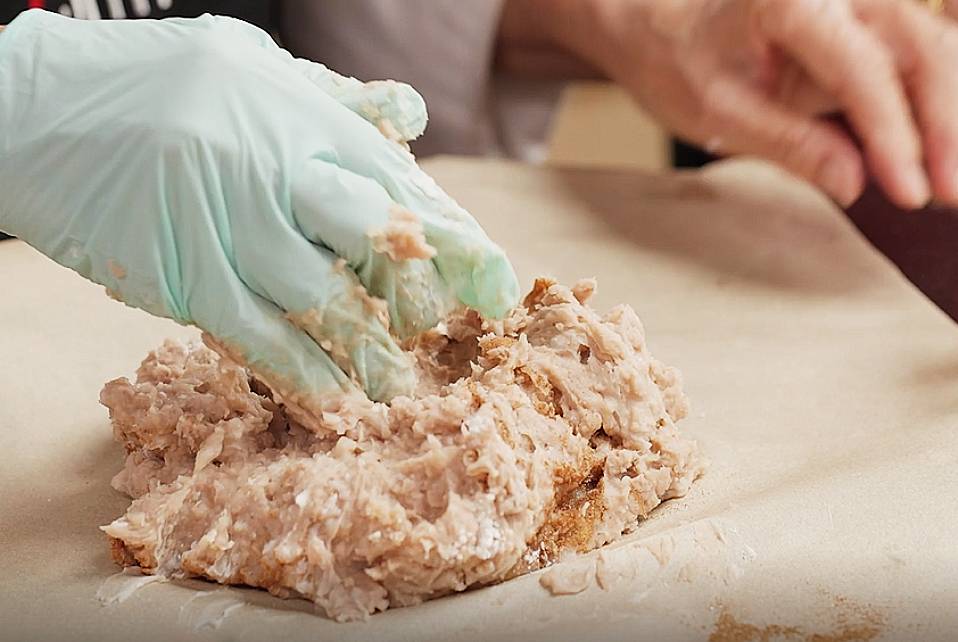
10. Put a cling wrap on top and roll it with a rolling pin. The cling wrap will prevent the paste from sticking to the rolling pin.
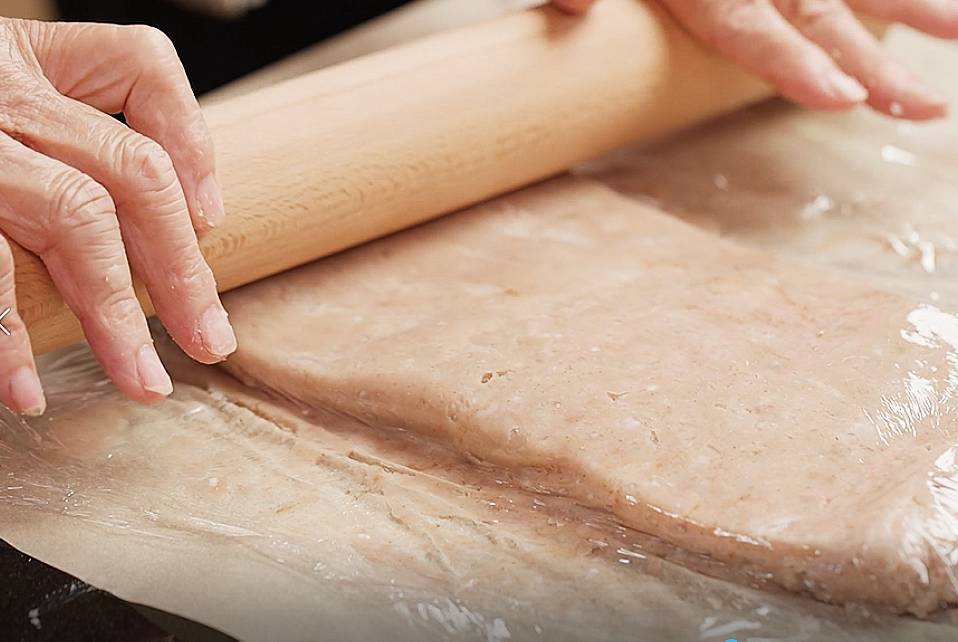
11. Form a rectangular block that is slightly thick. This will then be rolled to form the yam ring basket shape. After shaping it, cover it with parchment paper and leave it in the freezer for about an hour. Freezing it will help the yam ring to keep its shape.
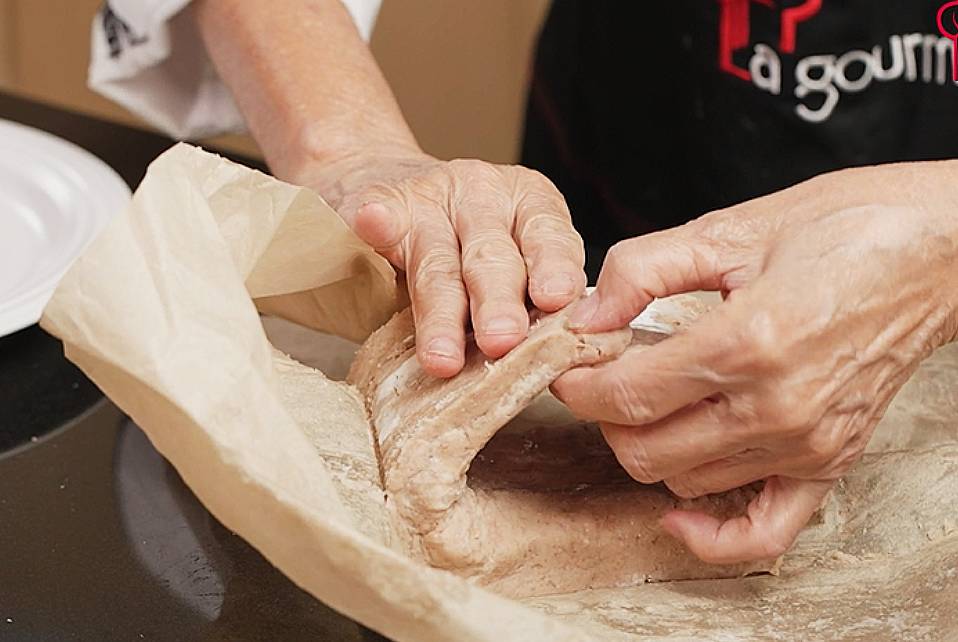
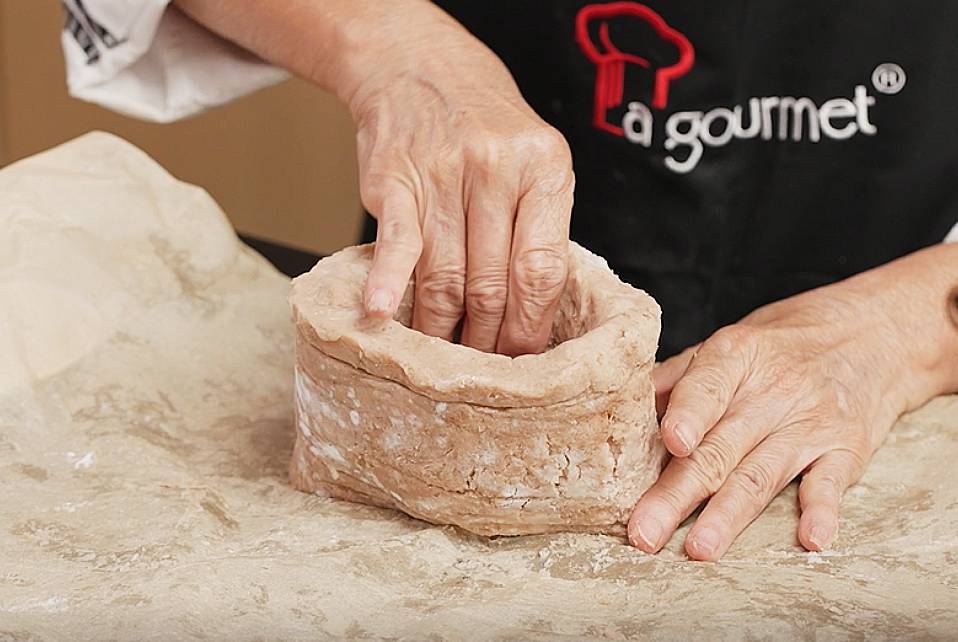
12. After that, take it out and form the yam ring basket shape. Stick the paste from end to end to form a cylindrical ring.
13. Heat the oil in the Nitrigan cast iron wok for deep-frying. To test if the oil is hot enough, stick a wooden chopstick into the oil, and on the off chance that you see huge air pockets conformed to the chopstick, it’s hot and ready. The bigger the air pockets, the higher the oil temperature is.
You can also drop a piece of rice vermicelli onto the oil. If it’s hot enough, the rice vermicelli will get fried and float to the top.
14. Dip the frying strainer into the hot oil before placing the yam ring basket on it so it won’t stick.
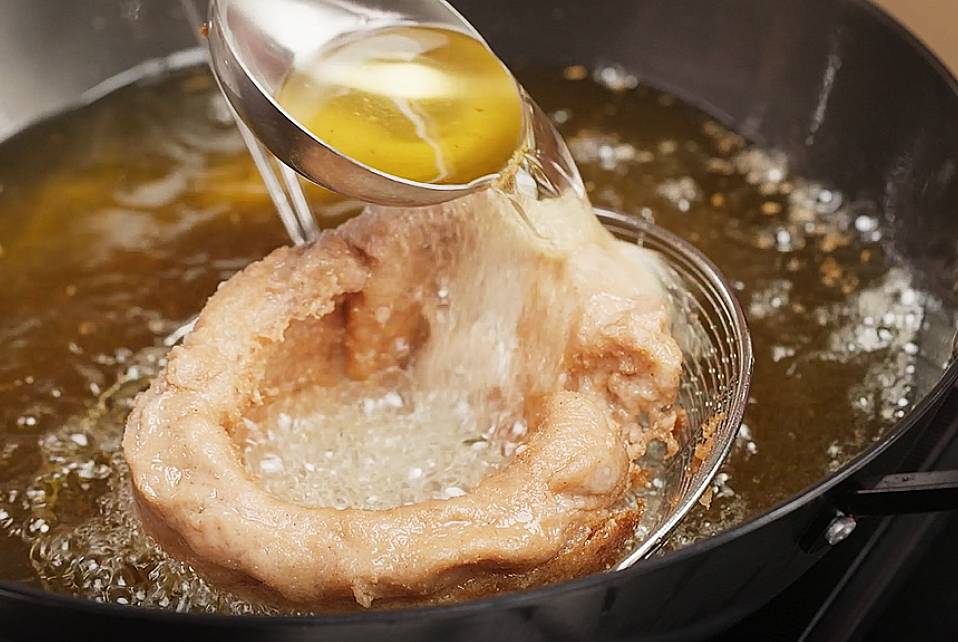
15. Then, move the yam ring basket onto the frying strainer carefully, then dip it into the hot oil.
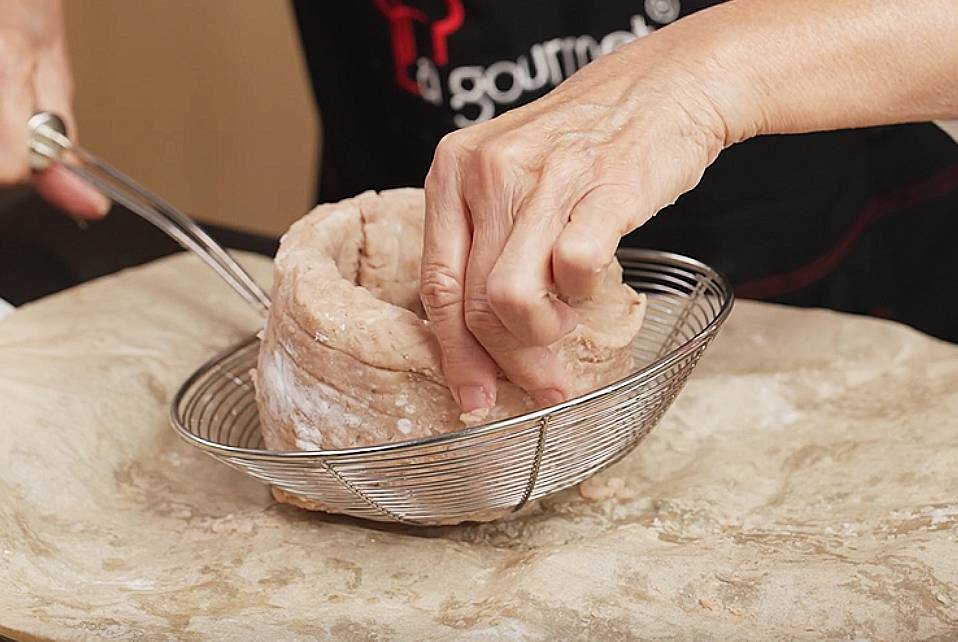
In the event that your oil doesn’t cover the entire yam ring basket, utilize a spatula to spoon the hot oil over the highest point of the ring. Fry until it turns golden brown.
16. After that, we will fry the rice vermicelli. Wait for it. It will blossom and float to the top. The rice vermicelli is, even more, a “style” purpose as it were. Albeit certain people might eat them, they are very tasteless. It’s probably better to have additional sauce or ingredients to go along with it. So it is truly discretionary to include this in the dish.
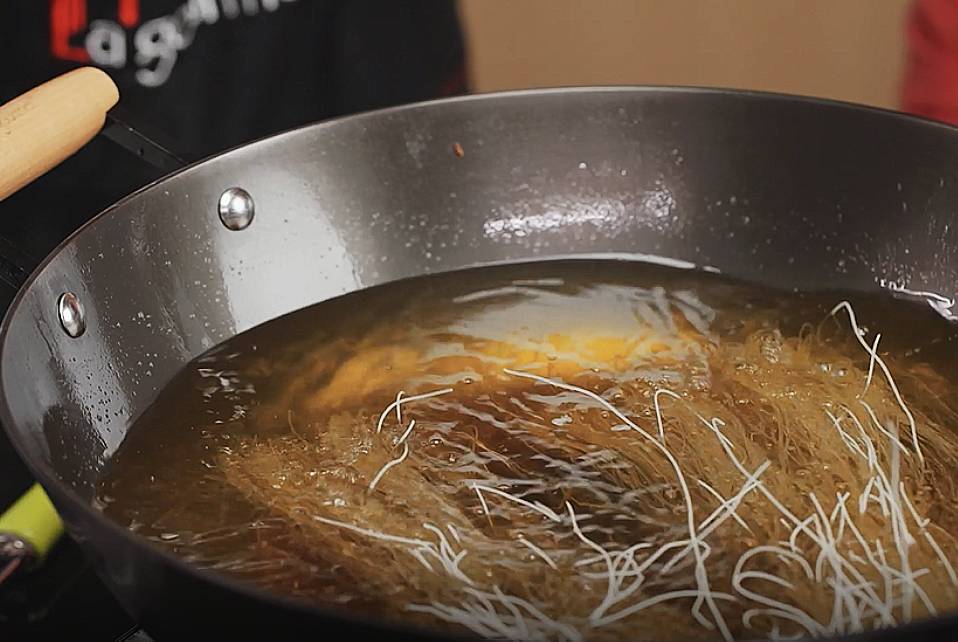
The rice vermicelli will quite often become brown as well. To prevent this, the oil would be exceptionally hot and when they are solidified, quickly take them out of both oil once they float.
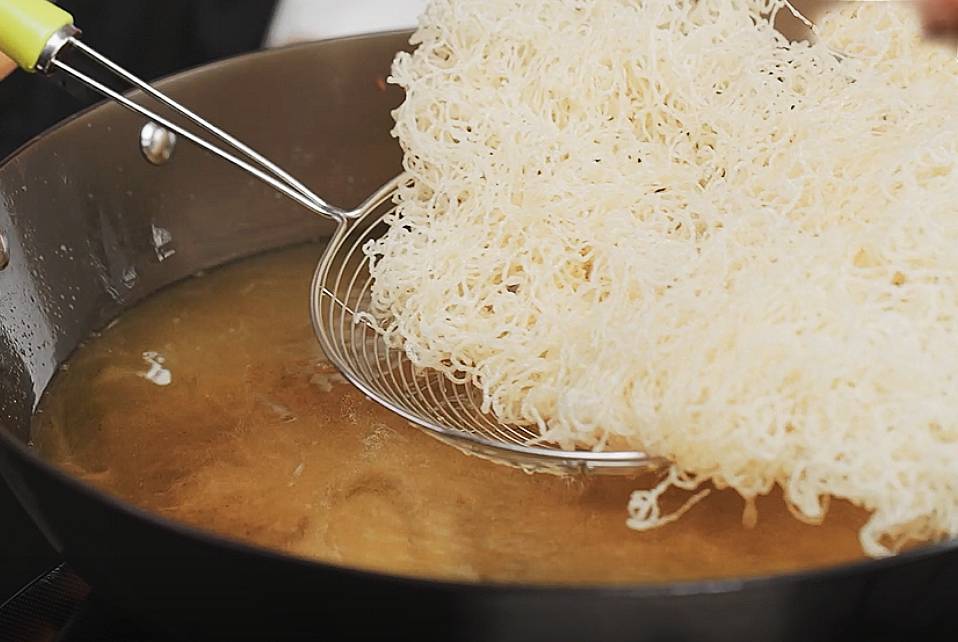
17. Scoop the fried rice vermicelli onto a plate. Then, place the fried yam ring on top of it.
18. Fill in the inside of the ring with the filling prepared earlier. Add garnishing with coriander leaves. Enjoy this Instagram-worthy dish!
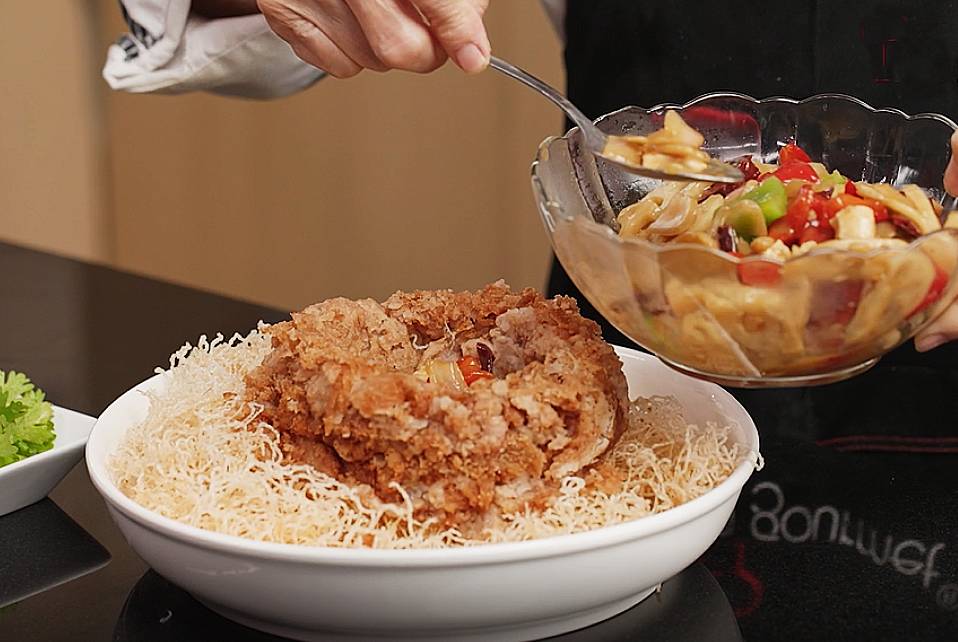
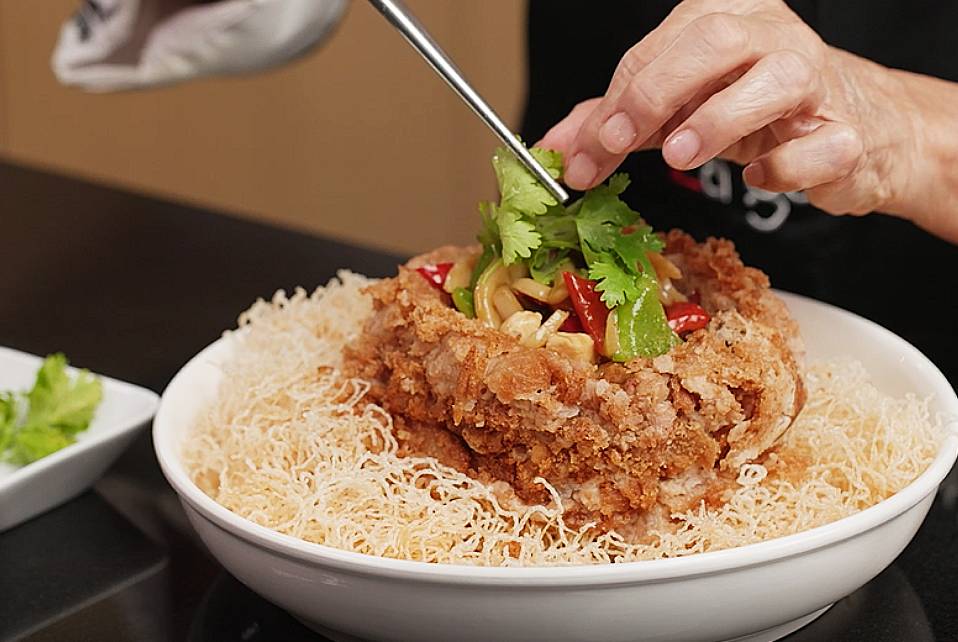
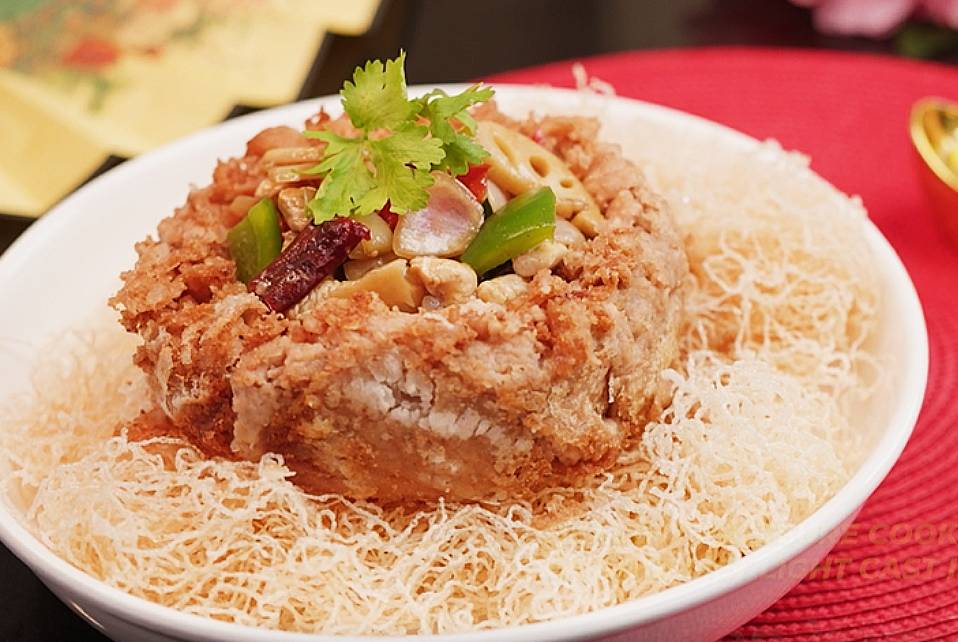
Serve while it’s hot!
Don’t forget to check out our ongoing cookware promotions on our website!
Longevity Noodles Recipe By Celebrity Chef Amy Beh
Longevity Noodles Recipe By Celebrity Chef Amy Beh with Nitrigan Cast Iron Wok
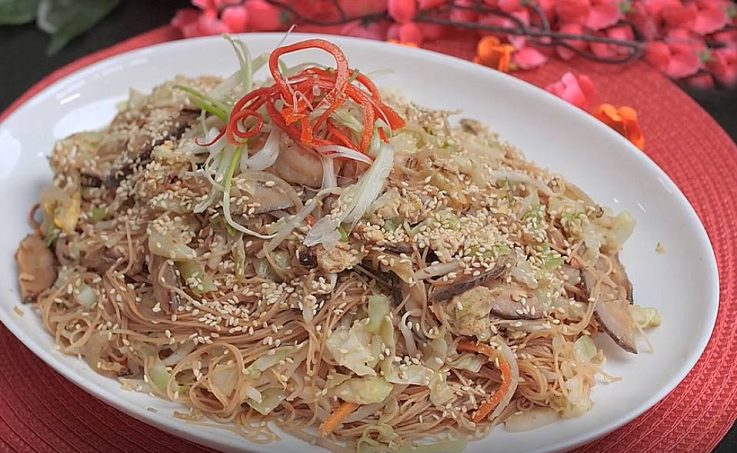
Longevity is one of the most loved ideas in Chinese culture, alongside bliss, fortune, and success. Life span was accepted to be a definitive gift. In old times, rulers and rulers even had pills of eternality arranged for them.
During Chinese New Year, long noodles are eaten on all sides of China. “Life span noodles,” likewise introduced at birthday festivities, another child, a wedding, or a lunar new year feast, are never cut or broken by the cook, and assuming that they can be eaten without gnawing through the strands, it’s viewed as significantly more fortunate. Life span noodles are a significant part of this multitude of blissful occasions.
These noodles are generally served at Chinese New Year’s dining experiences. An antiquated Chinese conviction says that long noodles are the way into a long life so don’t cut the noodles as you eat them.
Since the longer the noodles, the more auspicious it will be, we will be using mee sua for this recipe. For obvious reasons, don’t go for the spaghetti!
Here’s how to make this longevity noodles:
Ingredients:
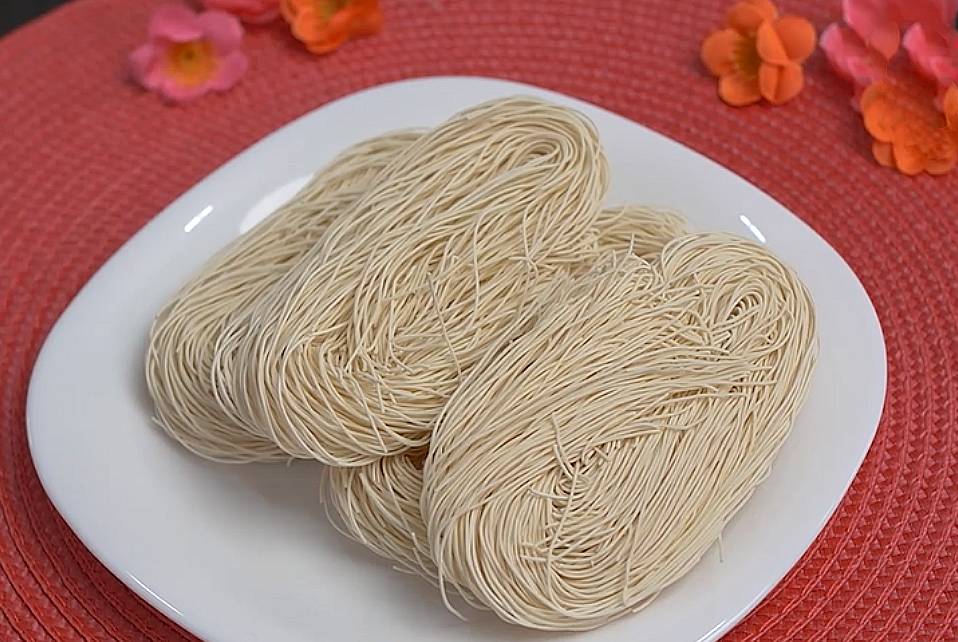
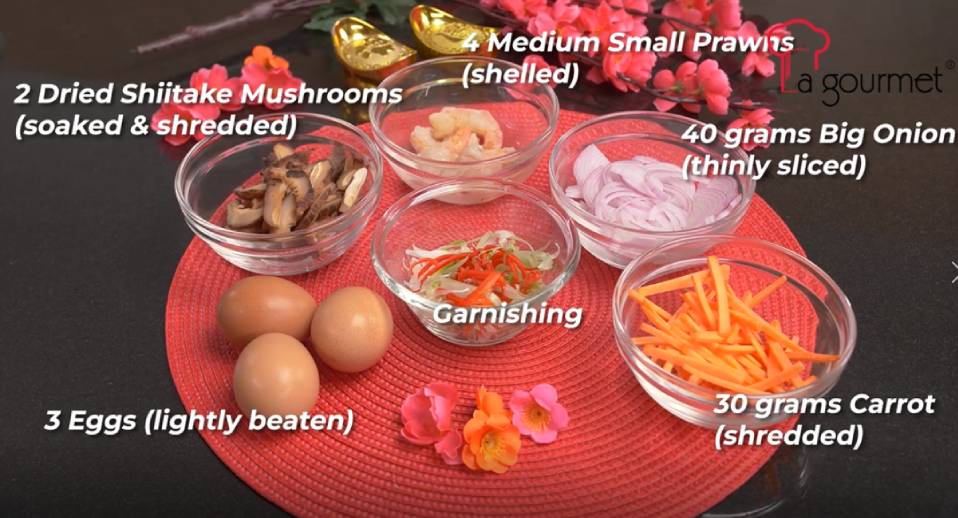
- 3 bundles of flour vermicelli (mee sua)
- 2 cups cooking oil (for deep-frying)
- 1 tbsp sesame oil
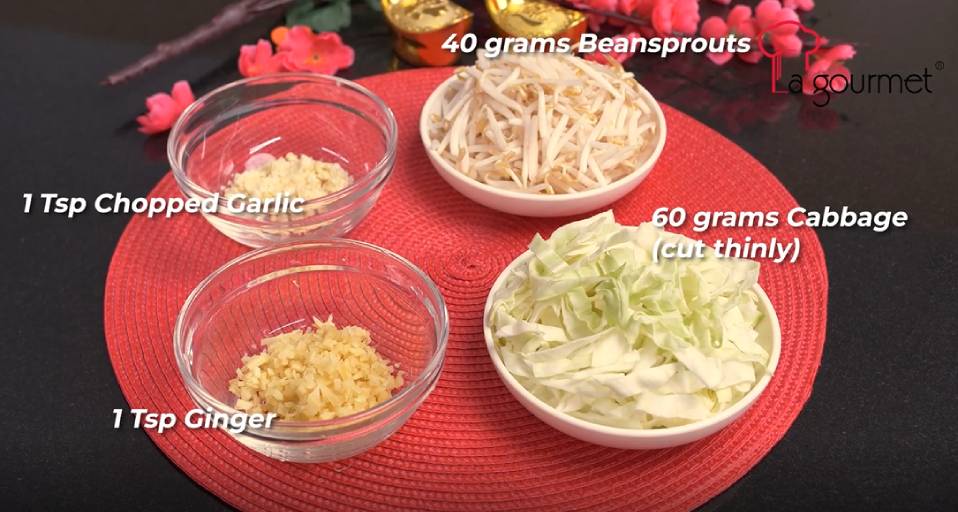
- 1 tsp chopped garlic
- 1 tsp ginger
- 3 eggs (lightly beaten)
Ingredients A:
- 4 medium small prawns (shelled)
- 2 dried shiitake mushrooms (soaked & shredded)
- 30 grams carrot (shredded)
- 40 grams big onion (thinly sliced)
- 60 grams cabbage (thinly cut)
- 40 grams beansprouts
Seasoning:
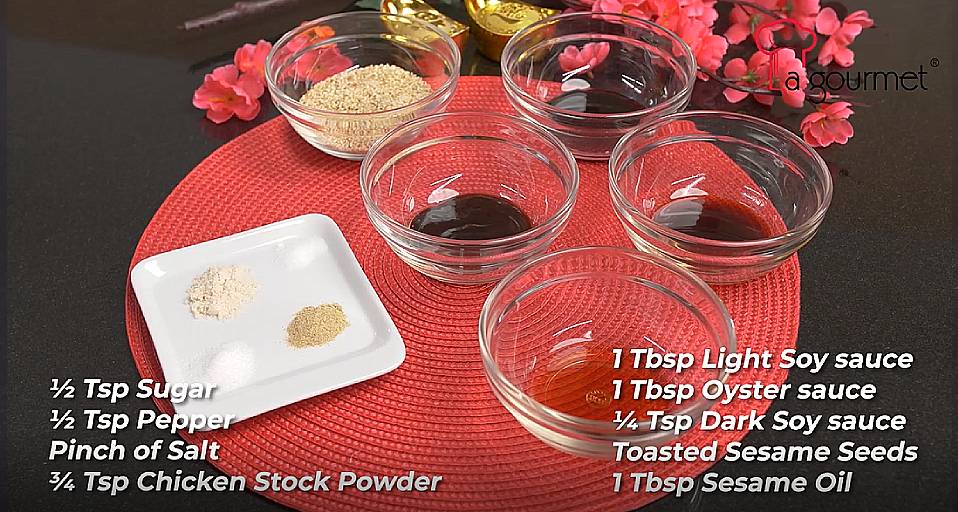
- 1 tbsp light soy sauce
- 1 tbsp oyster sauce
- 1/4 tsp dark soy sauce
- 1/2 tsp sugar
- 3/4 tsp chicken stock powder
- 1/2 tsp pepper
- 1/2 cup water
- A splash of Shaoxing wine (optional)
- pinch of salt
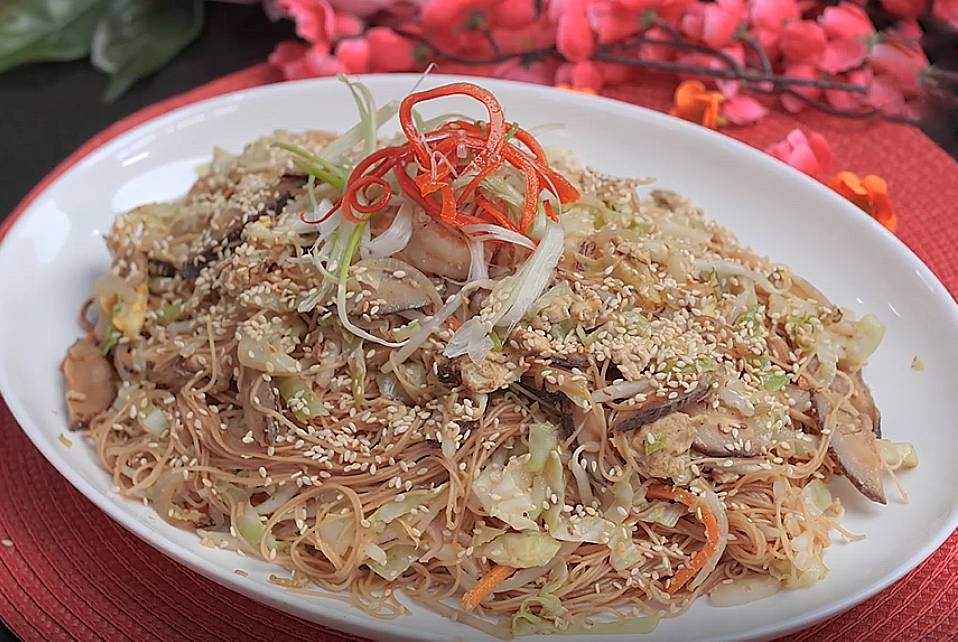
Garnishing
- Spring onion & coriander leaves (chopped)
- Red chilli curls
- Adequately toasted sesame seeds
Directions for this Longevity Noodles recipe:
1. Prepare hot boiling water in a bowl. Fill it just enough to soak all the noodles.
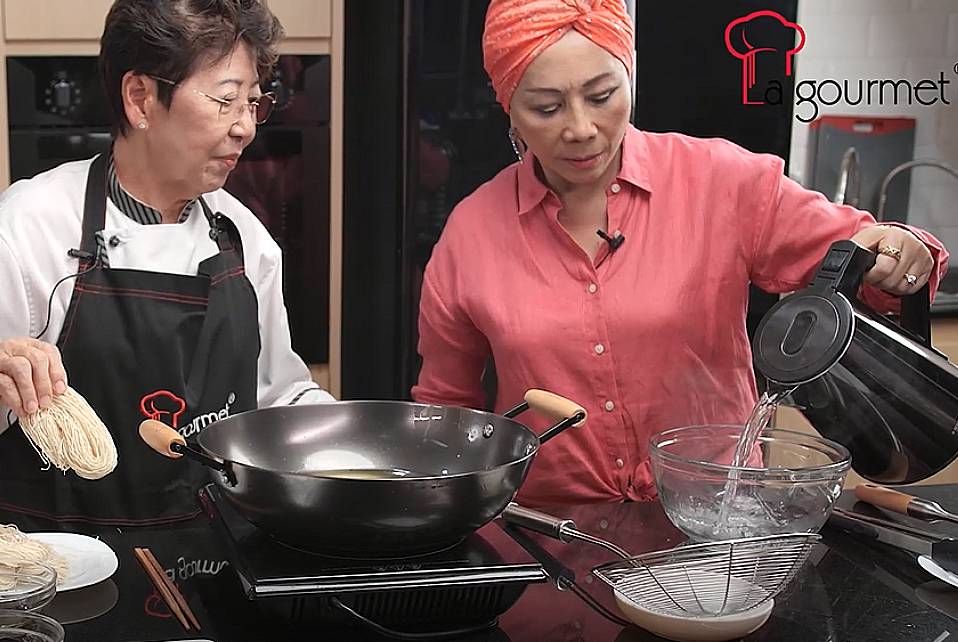
2. Fry the vermicelli noodles for a while until it turns golden brown.
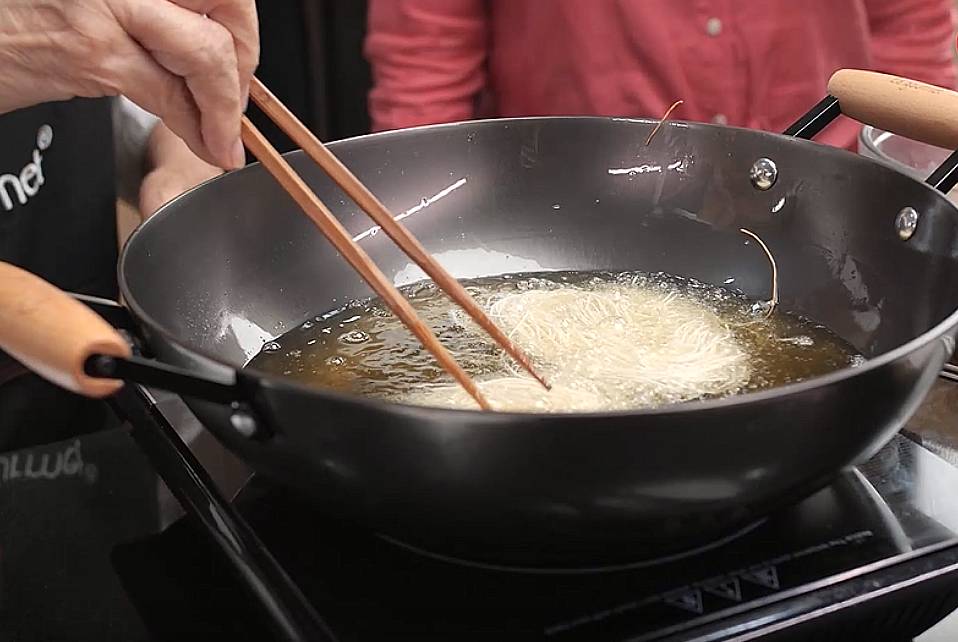
3. Transfer the fried vermicelli into the hot water. Let it soak. This will remove the oil from the vermicelli noodle. Let it sit a while until it softens.
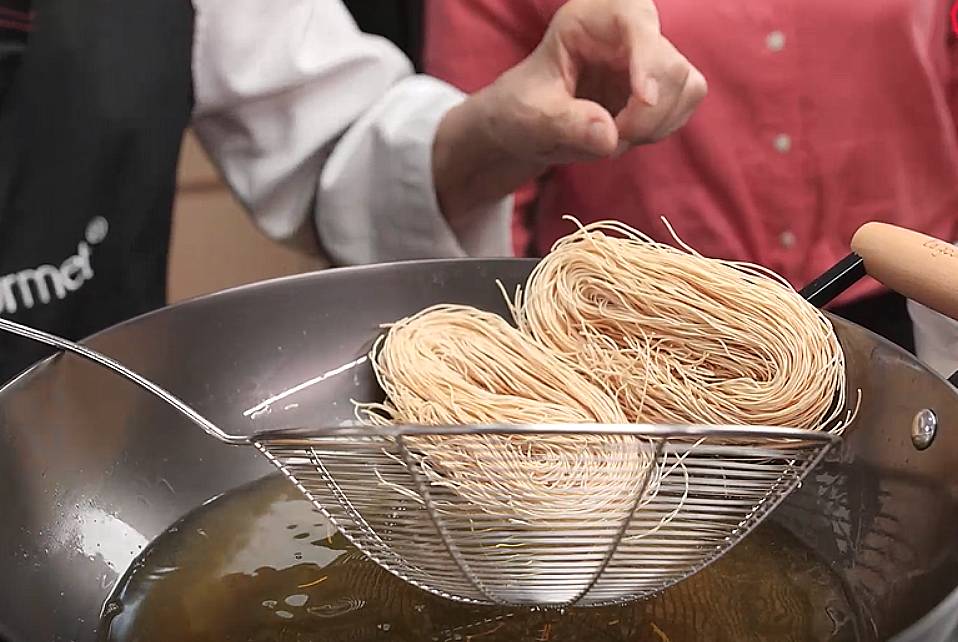
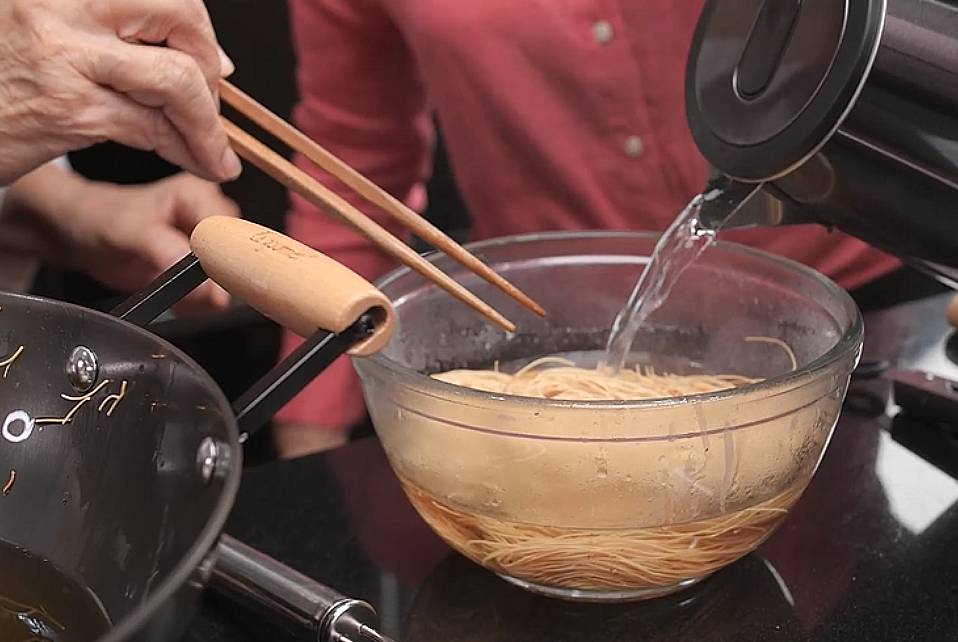
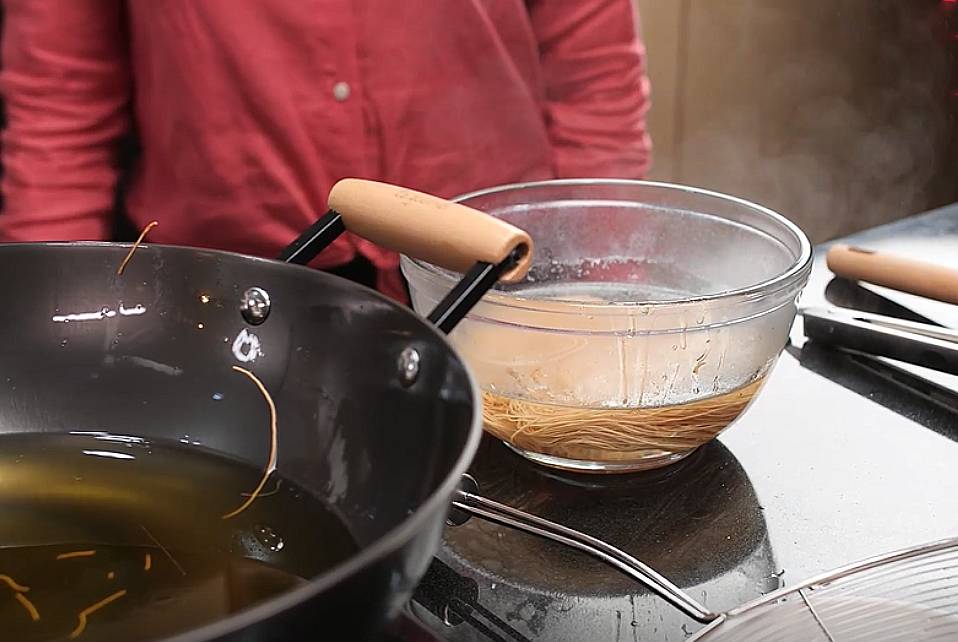
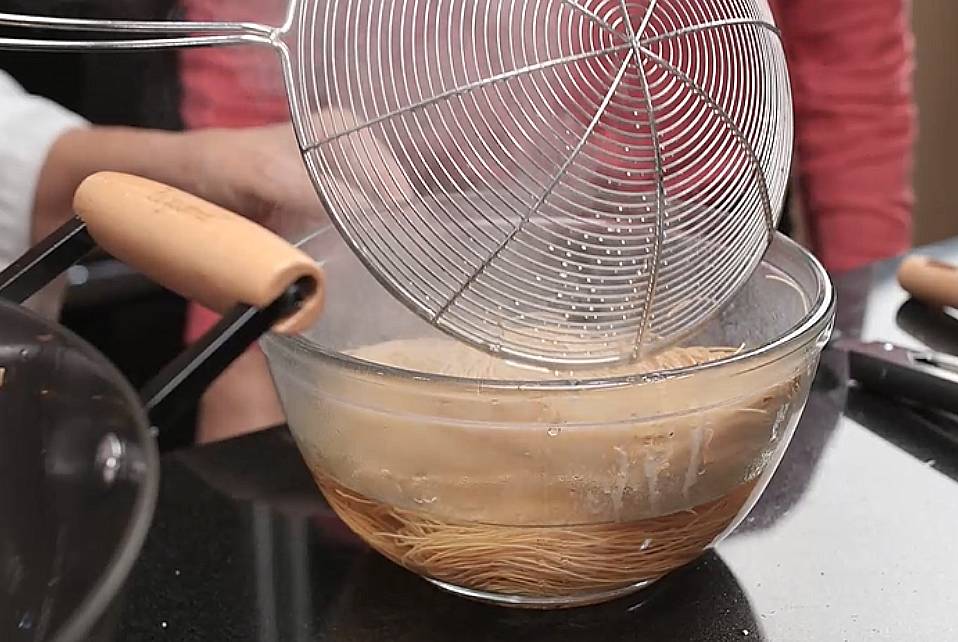
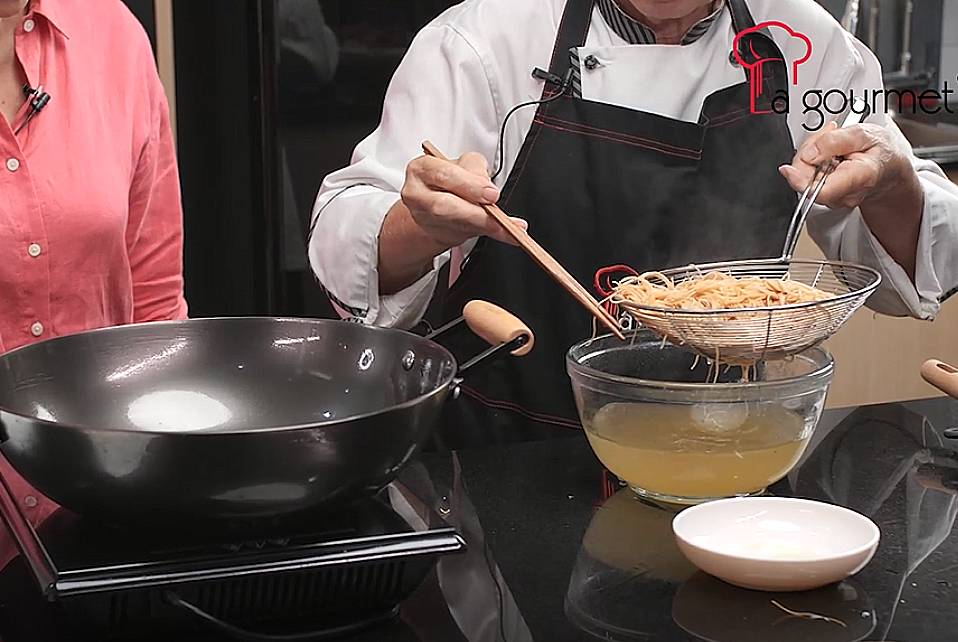
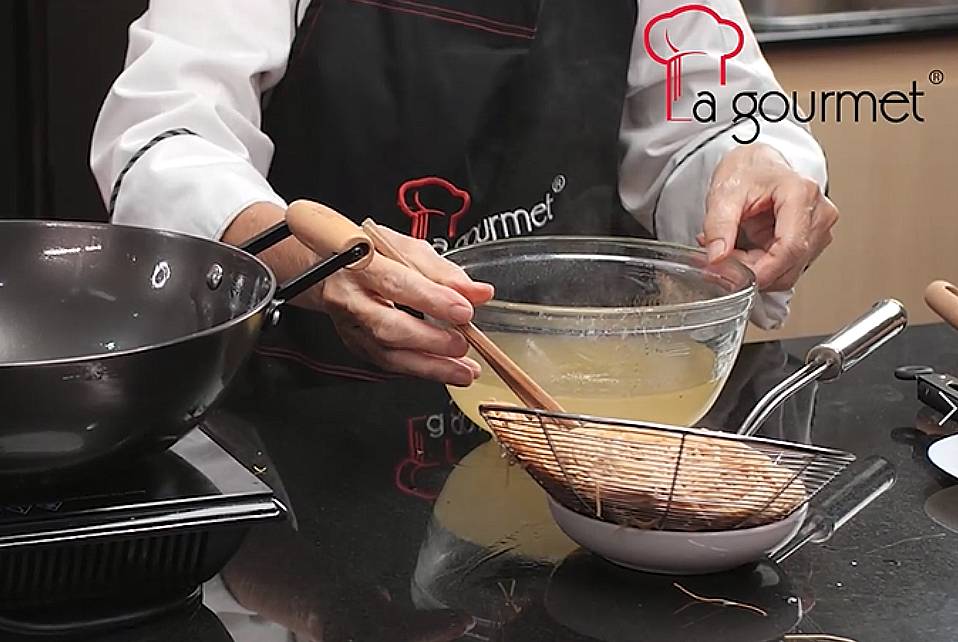
4. Once the vermicelli noodle softens, let it drip dry.
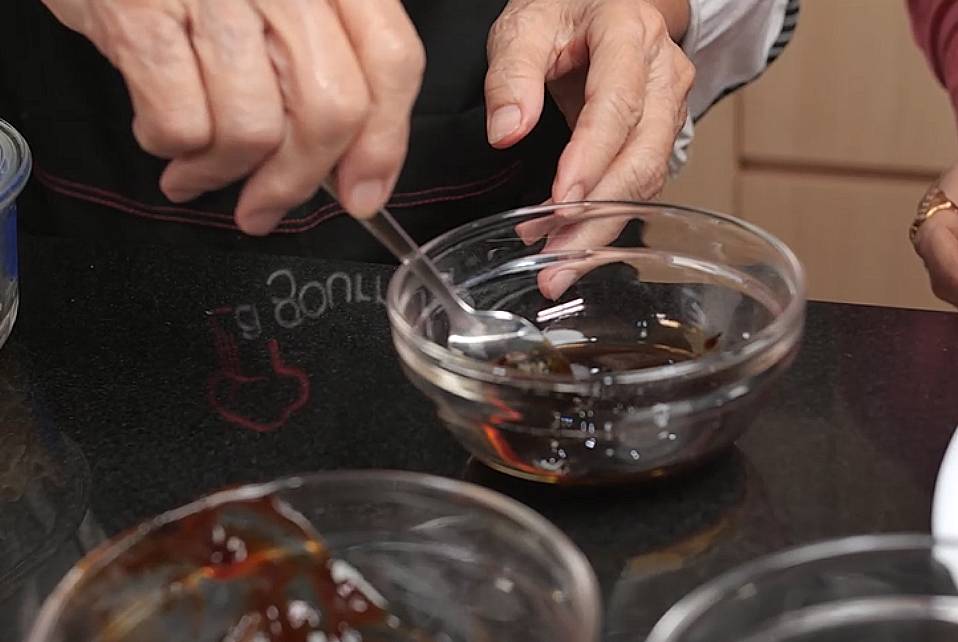
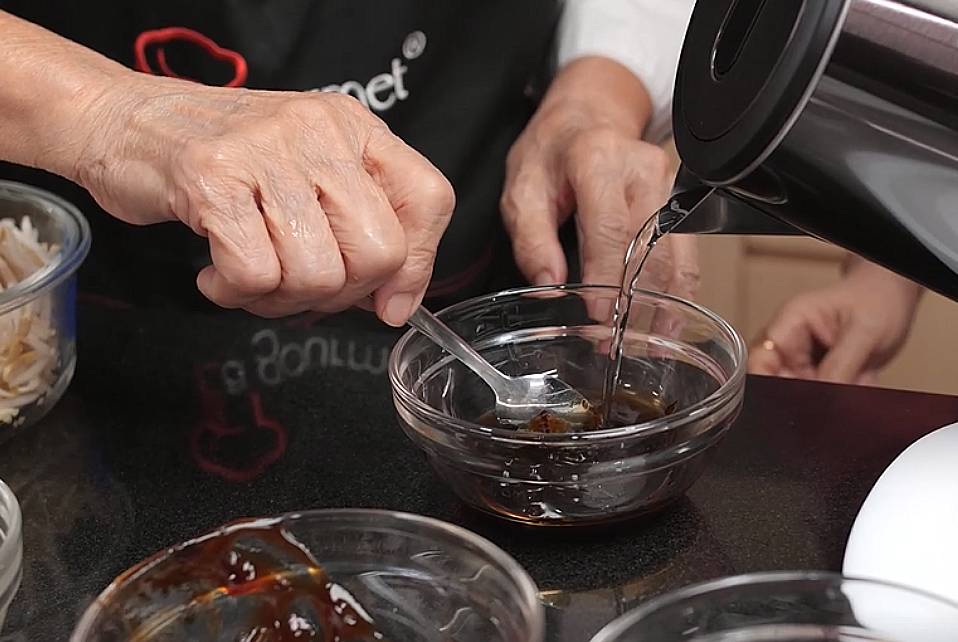
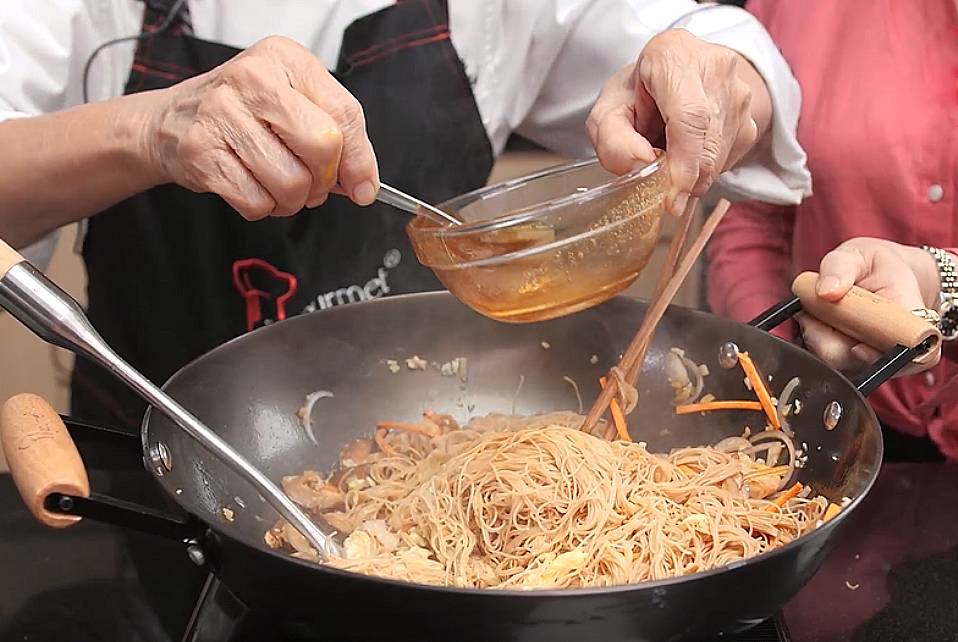
5. Now, let’s prepare the sauce. Mix dark soy sauce, oyster sauce, Shaoxing wine and light soy sauce. Then, add a little bit of hot water and stir. Add in a bit of salt, chicken stock powder, sugar and a dash of pepper and stir.
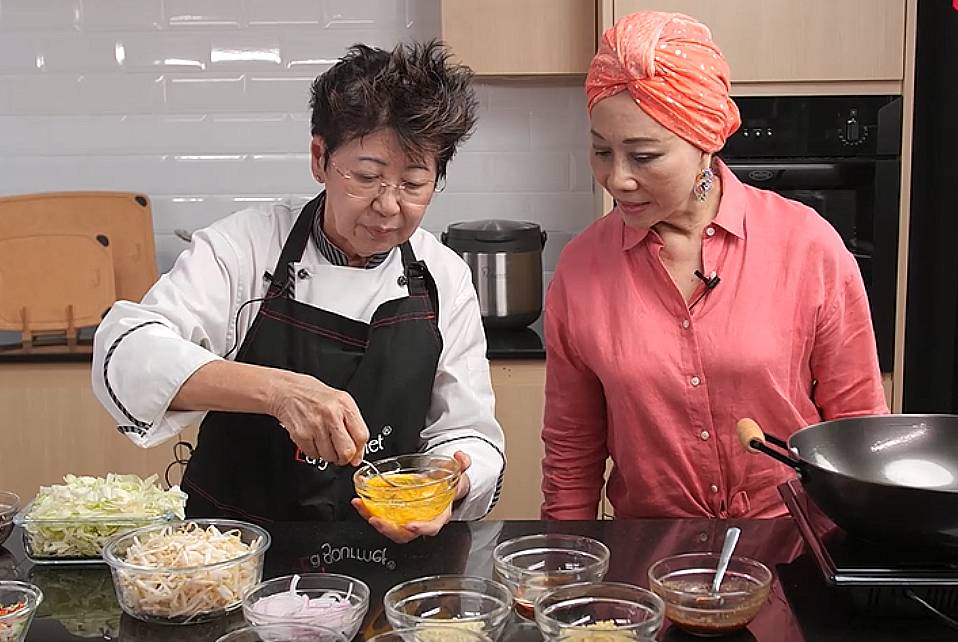
6. Next, break 3 eggs into a bowl. Lightly beat up the egg.
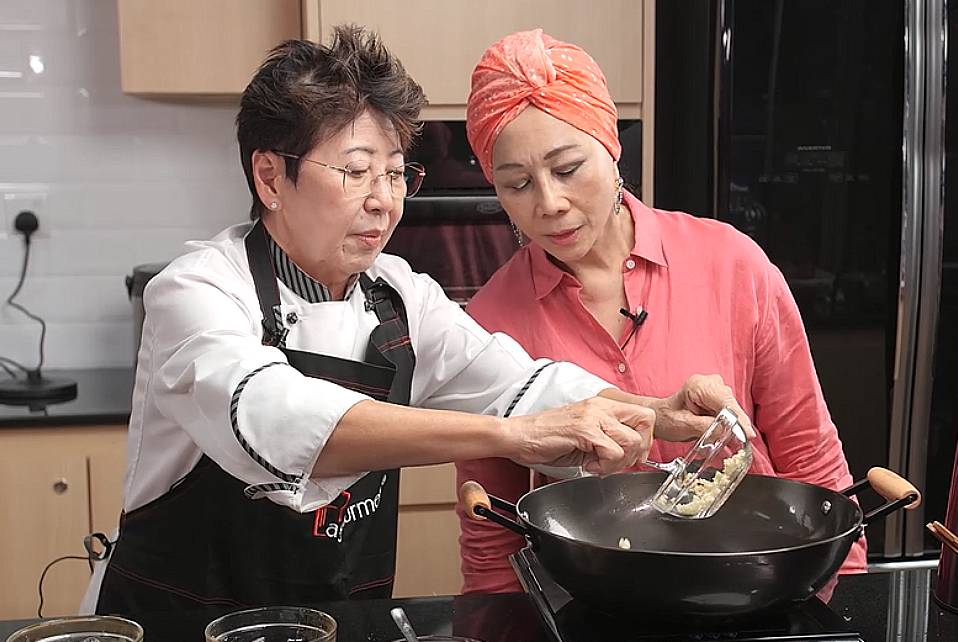
7. Put some sesame oil into the wok. Add some garlic, chopped ginger, mushrooms, prawns, carrots and onions. Then, stir fry.
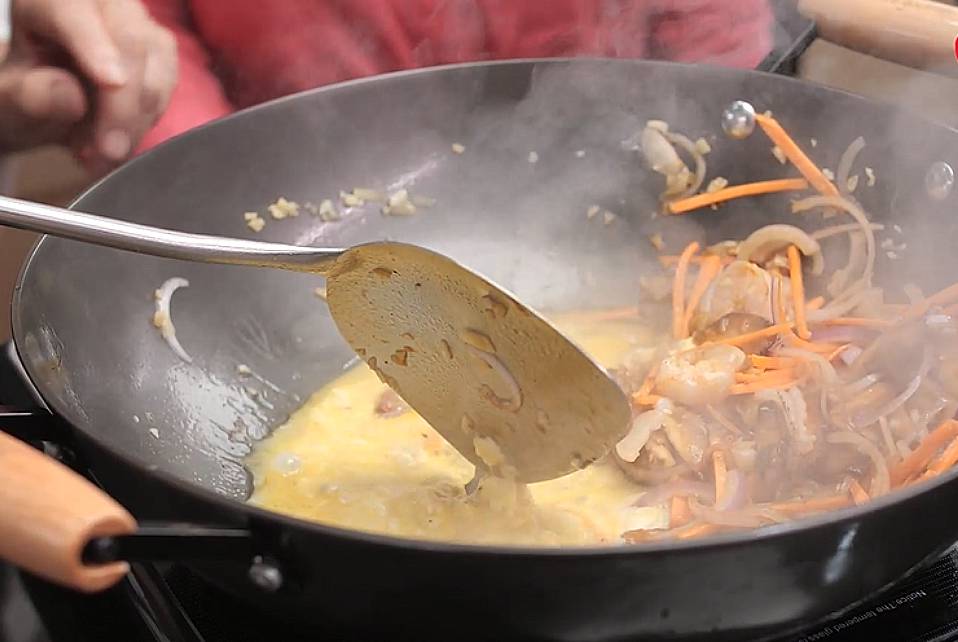
8. Push those ingredients to the side, then add in the eggs. Scramble the egg.
9. Add in the mee sua into the wok and toss it.
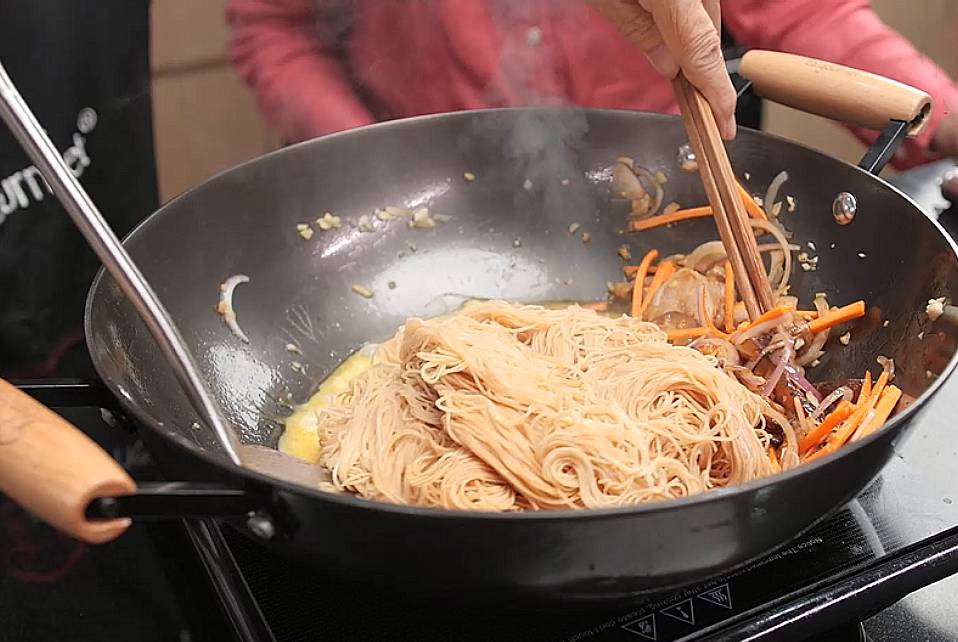
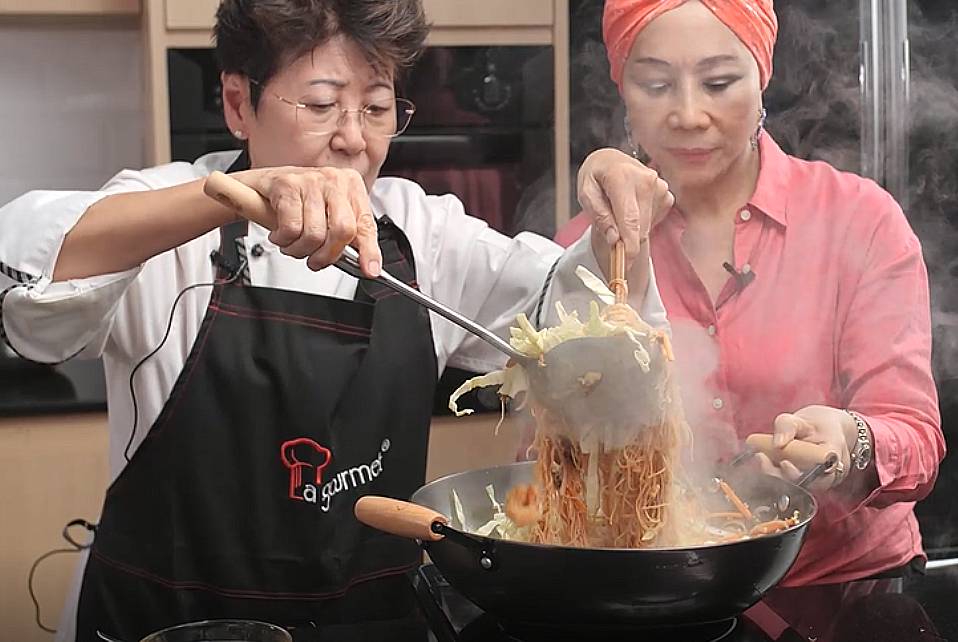
10. Add in the remaining sauce.
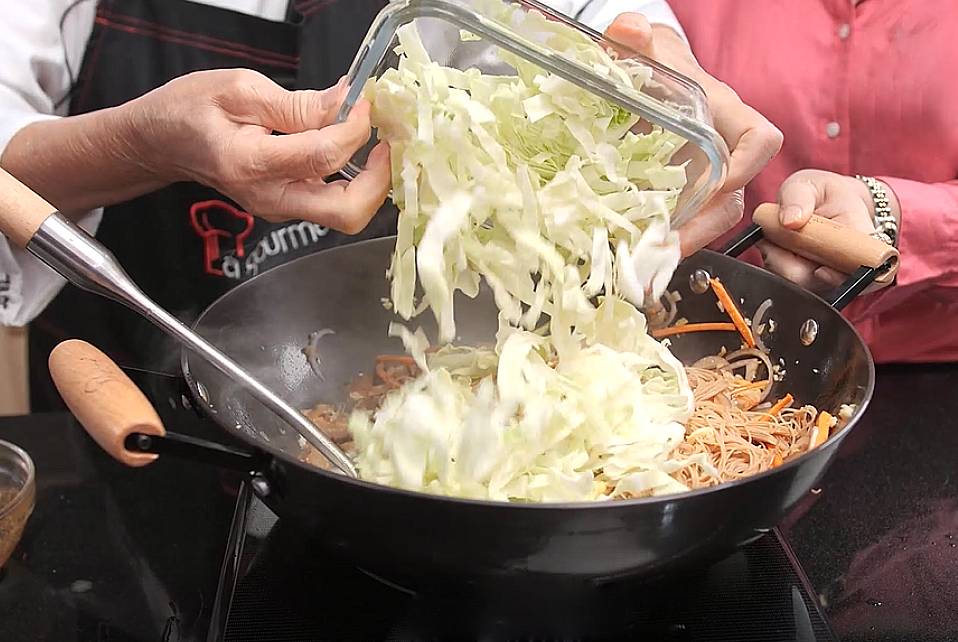
11. Put the cabbage in and stir fry again.
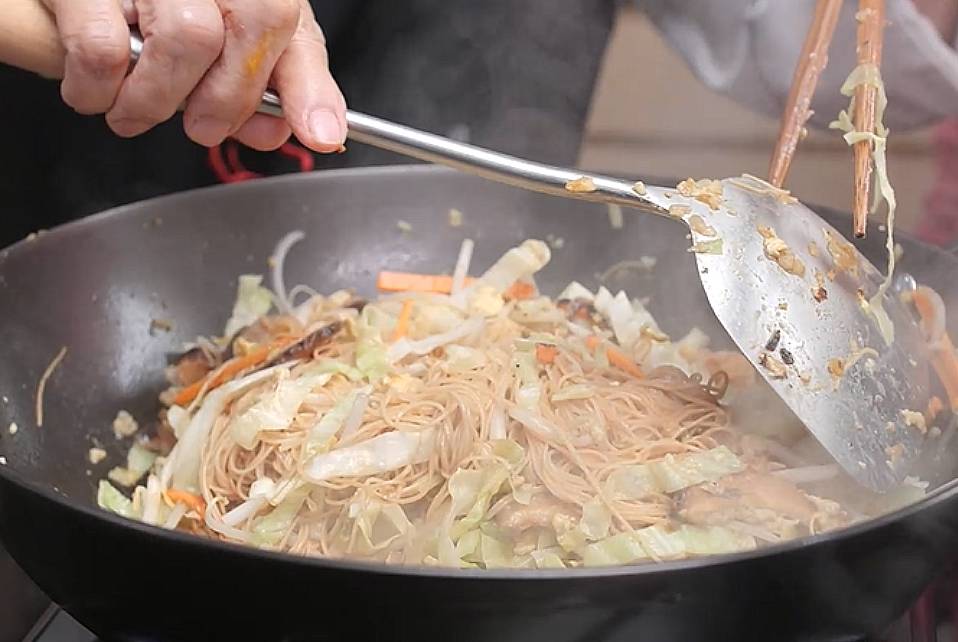
12. Pour a little bit of water before adding the beansprouts.
13. The Longevity Noodles is done and ready to serve!
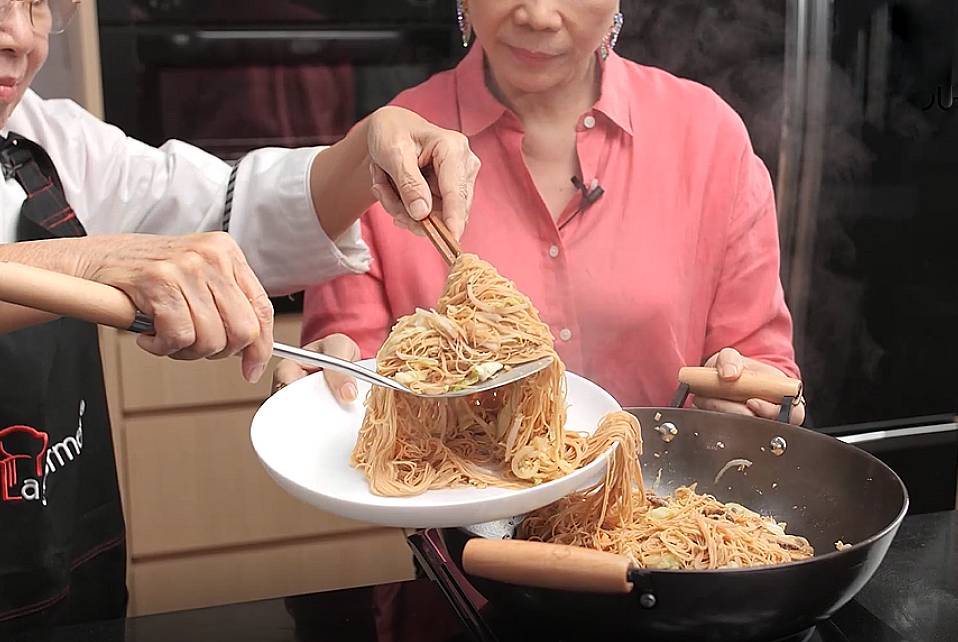
Why are they called longevity noodles?
In China, the Han people follow the custom of eating longevity noodles on their birthday.
In Chinese, the person “面” in a real sense implies noodle as well as face.
The Chinese Emperor Wu accepted that individuals with long appearances for the most part lived longer. The more extended the face, the longer the life someone will have. Since Emperor Wu, long noodles have been utilized as an analogy for life span and as a gift for birthday festivities.
The custom has been followed from that point onward. A life span noodle is a solitary noodle that fills the entire bowl, and it is better not to break it while eating.
Traditions of longevity noodles
There are a few traditions related to eating longevity noodles. One of them asks that visitors pick their noodles from their own bowl and spot them into the bowl of the individual commending his birthday as they wish them a fortune, joy, and life span.
Another custom is to hold the noodles up with your chopsticks and consider how long they are with your guests.
Likewise, never fill noodles to the edge of a bowl, as it would imply that you are demonstrating a full life expectancy.
However, the one thing that is an outright no-no is to cut a strand of noodle as you would be in danger of stopping your life expectancy!
There are a large number of longevity noodles recipes. Most frequently, they are ready with pork, chicken, or simply Chinese chive and shiitake mushrooms.
What type of noodles to use for longevity noodles recipe?
The long noodles address a long life, cutting the noodles emblematically reduce your life. So, it’s about using long noodles. Not just any long noodles, it has to be tough and not that easily break yet maintains that edible texture.
In this recipe, we’re using mee sua. Another more popular choice is the use of yi mein.
Yi Mein, is a Cantonese egg noodle comprised of wheat flour. While making the mixture, soft drink water is utilized rather than plain old water so the noodle surface is somewhat chewy, fairly supple, and absolutely cracking magnificent.
They’re permeable noodles, so they retain a portion of the sauce you use to make things considerably more enchanted. Try to get great quality noodles; it has *all* the texture.
They’ll keep up with their versatility in the wake of being boiled and sautéed, and that permits them to extend and remain scrum-diddly-umptious! That’s what makes yi mien a popular choice for this recipe.
Hope this post has been informative and makes you hungry! For the best cookware to get that wok hei, use a cast iron wok such as Nitrigan Cast Iron Wok from La gourmet.
Nitrigan Cast Iron Wok is manufactured with nitriding process to make it tougher and highly-resistant against rust. As you season and use it, it gets better as it goes!
When well taken care of, you can also pass it on to your younger generation. It’s that durable!
Drop by our website for ongoing cookware sales and offers!
Best Thai Style Steam Fish Recipe by Celebrity Chef Amy Beh
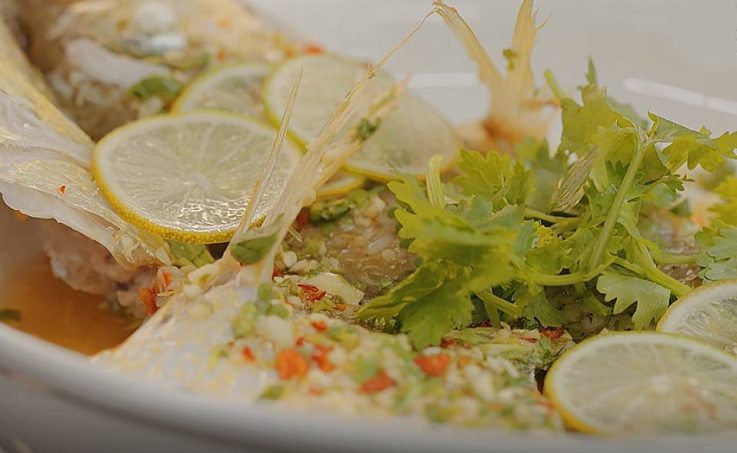
Thai Style Steam Fish Using Elite Wok & Healthy Glass Food Chopper
This is the most well known steamed fish dish in Thailand, presented with zesty Thai stew pepper, garlic and lime juice sauce. In Asia fish is constantly steamed entirely, however on the off chance that you like to utilize filets essentially lessen the cooking time. Red stew peppers are chiefly for added colors. The best part is that steamed fish is one of the fastest and best fundamental dishes to get ready.
Nasi Goreng Pattaya Recipe – Best of Malaysia
Nasi goreng pattaya or pattaya fried rice is one of the well known Malaysian cooking and is easily accessible in Malay hawker stalls and eateries that sell them individually. Pattaya fried rice is one of the varieties or variety of fried rice menus that can be found in Malaysia.
There are a few sources saying that this menu started or was roused from Pattaya, Thailand.
This menu plainly alludes to the utilization of fried rice. Normally, the fried rice just has the typical fixings, in particular the fundamental flavouring like onion, glue and a few vegetables, the utilization of chicken, squid, shrimp or meat.
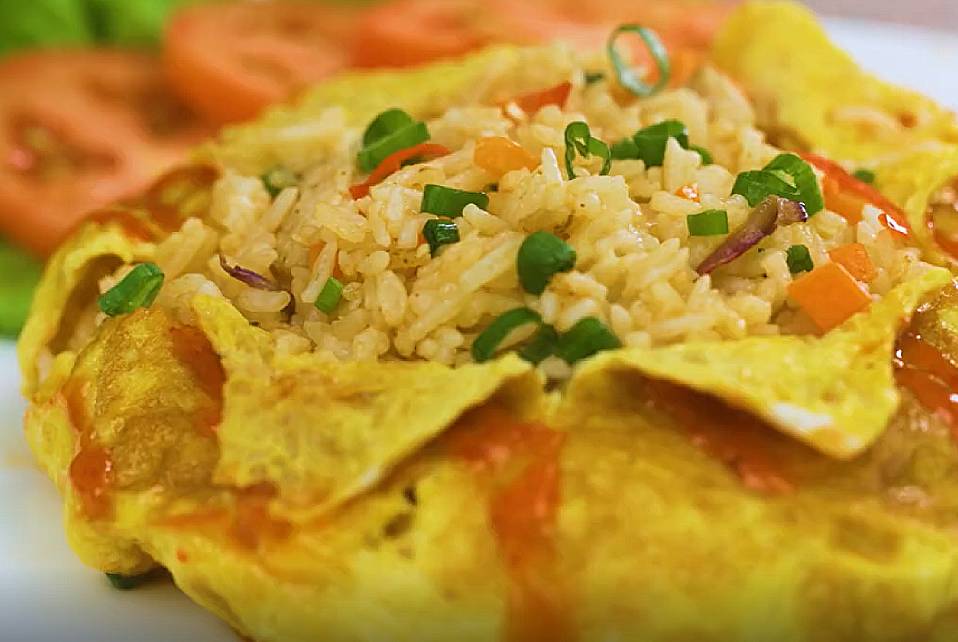
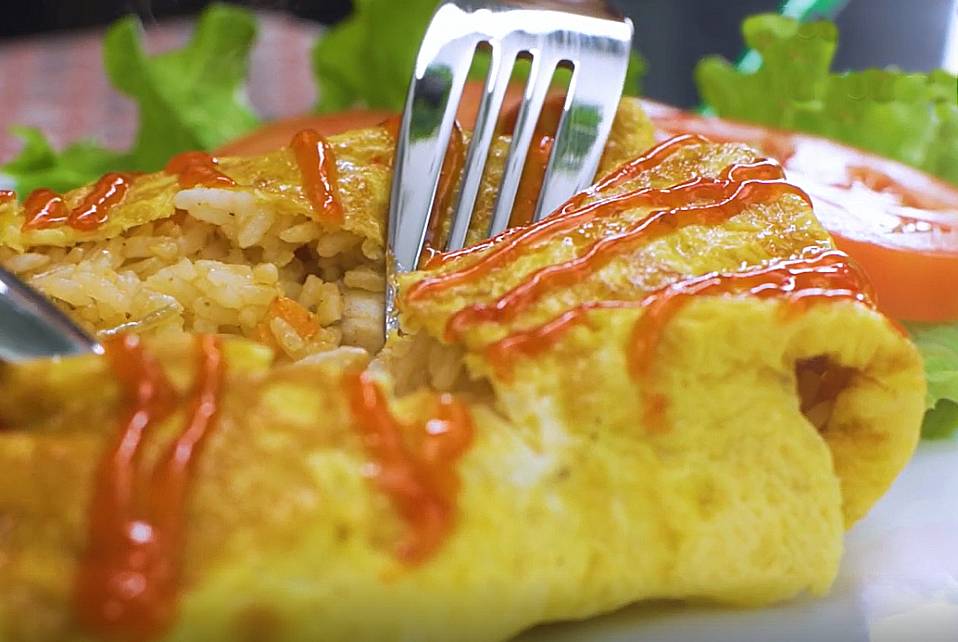
In any case, the uniqueness of this seared rice is that the singed rice is enclosed by an omelette covering and afterwards traps the hotness, smell and presence of the singed rice until the individual who eats it cuts or parts the omelette.
Pattaya fried rice is generally served very much like that with bean stew sauce that frequently shapes a composition on the omelette. However, it has become standard for this Pattaya fried rice to be presented with cucumber cuts. Some are additionally presented with some lettuce and tomato cuts. Some even put soup aside.
Here’s how to make this nasi goreng pattaya recipe with La gourmet Galactic Honeycomb Cookware:
Nasi Goreng Pattaya Recipe (Pattaya Fried Rice)
Ingredients:
For fried rice
2 cups cooked rice
100g boneless chicken breast (bite-sized)
1 carrot (diced)
2 tbsp ketchup
2 cloves garlic 9minced)
2 bulb shallots (thinly sliced)
2 tbsp cooking oil
1 tbsp fish sauce
1 1/4 tbsp salt
1 tbsp ground pepper
1 tbsp soy sauce
1 tbsp oyster sauce
For each omelette
2 eggs well beaten
1/4 tbsp salt
1/4 tbsp ground pepper
For garnish
chilli (sliced)
coriander
Instructions:
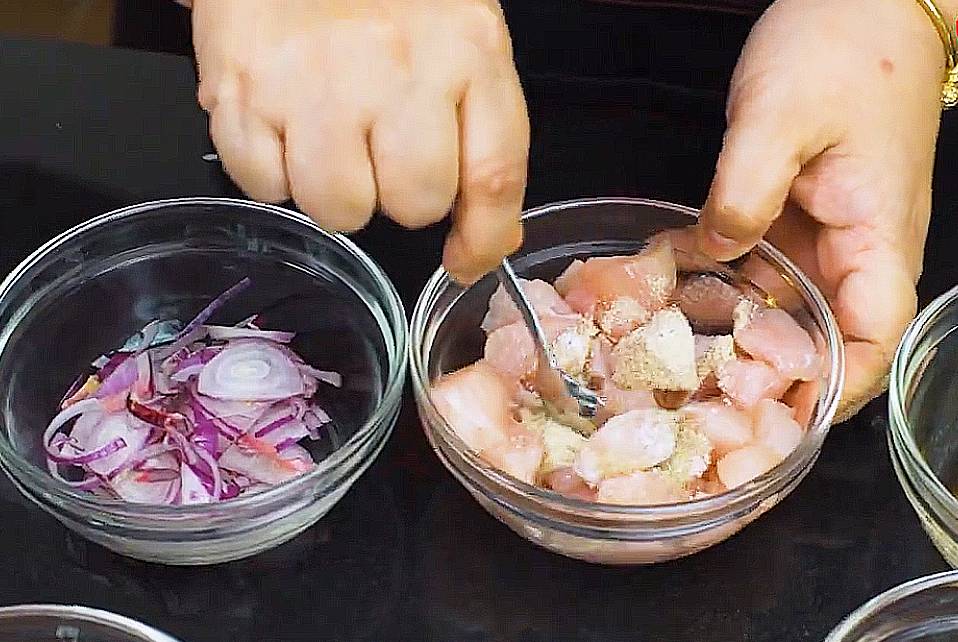
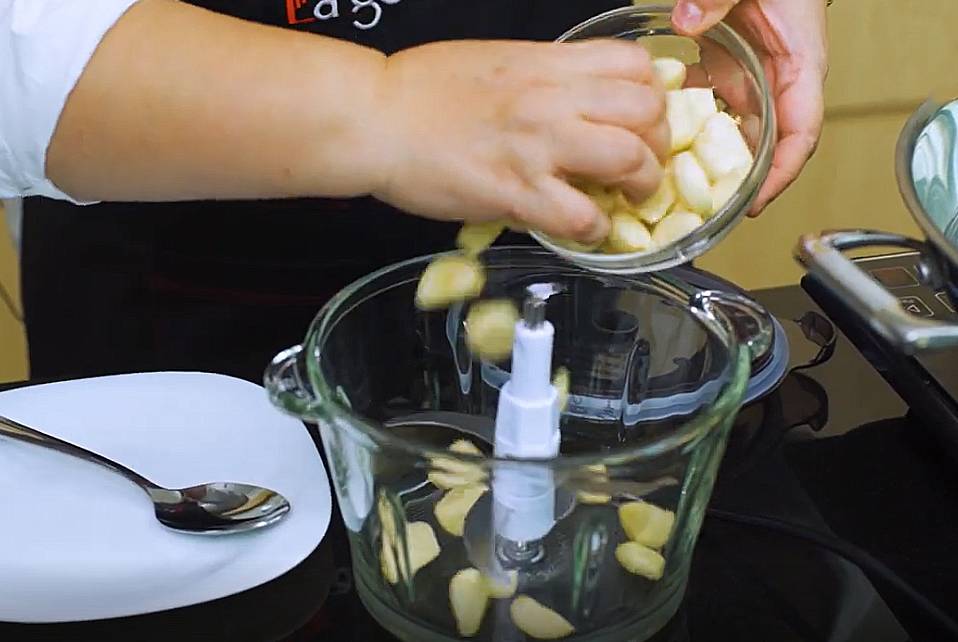
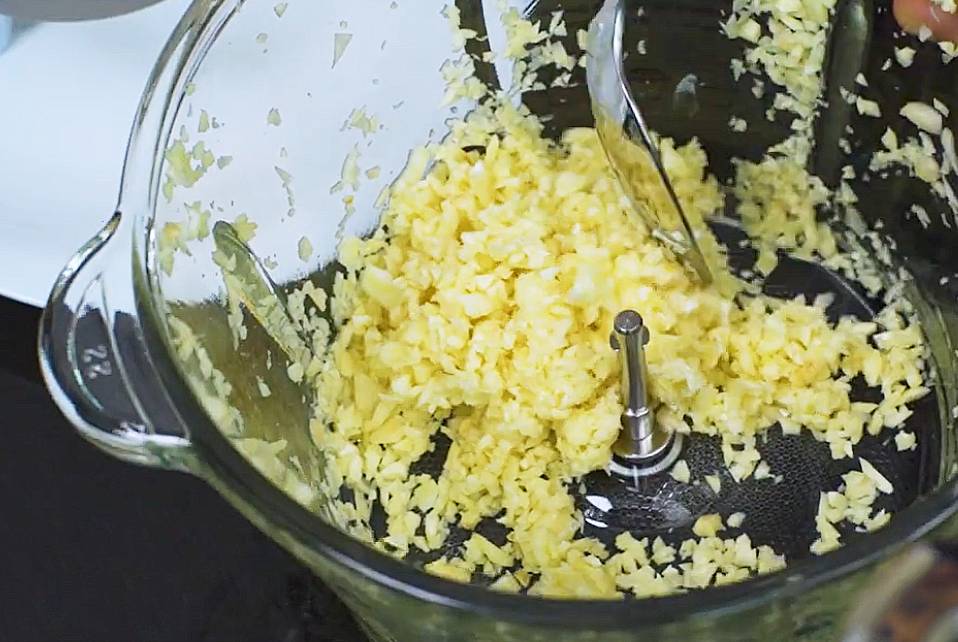
1. Season the chicken pieces with 1/4 tbsp of salt. Mix well and set aside.
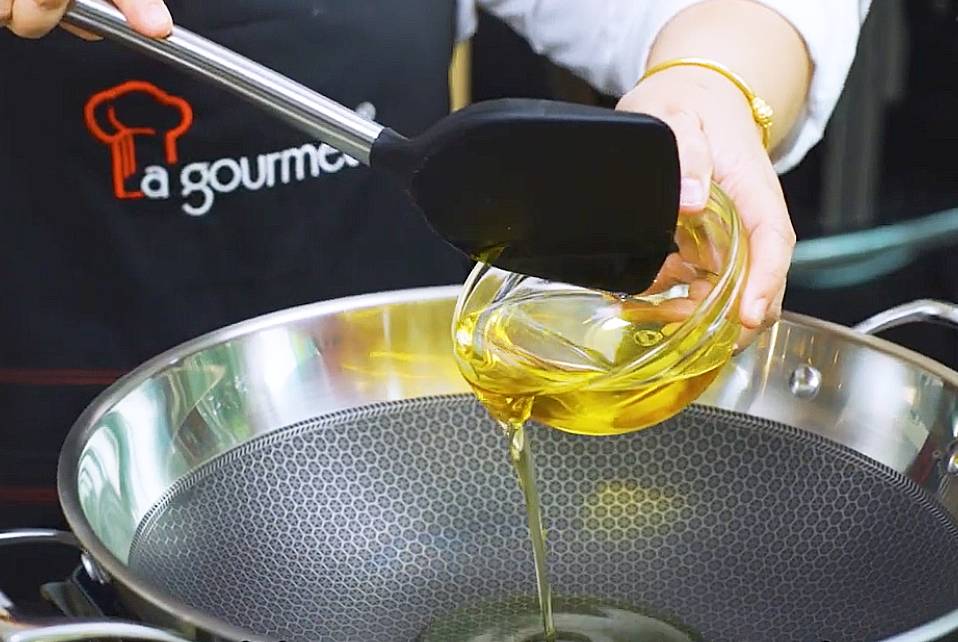
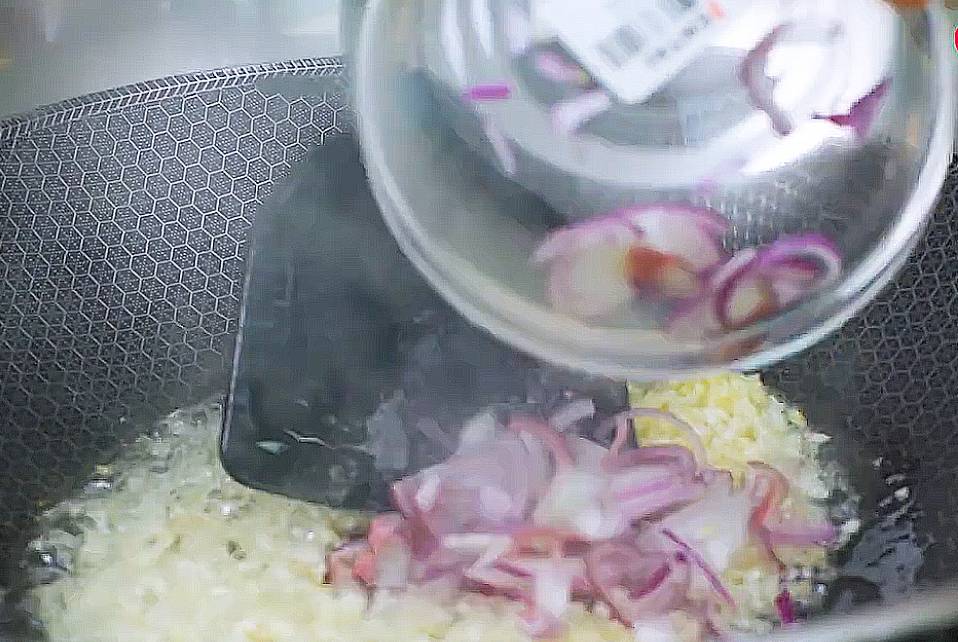
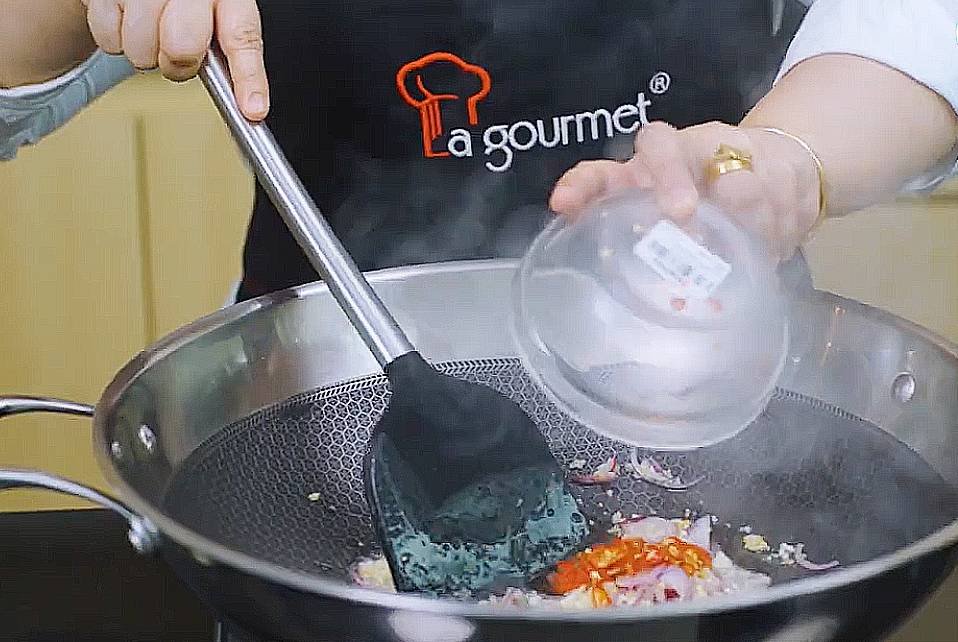
2. Heat cooking oil in a wok on high until smoking hot. Add in the garlic and shallots, saute until fragrant and lightly browned.
Ensure your wok or pan is quite hot before you add your rice and different variety of ingredients to it. You need everything to cook together rapidly, so the rice gets exceptionally hot and done quicker, yet doesn’t overcook the rice.
Oyster sauce is a significant flavour booster in fried rice and (relax) doesn’t have an aftertaste like shellfish. You can easily find it in the seasoning or sauce section of supermarkets.
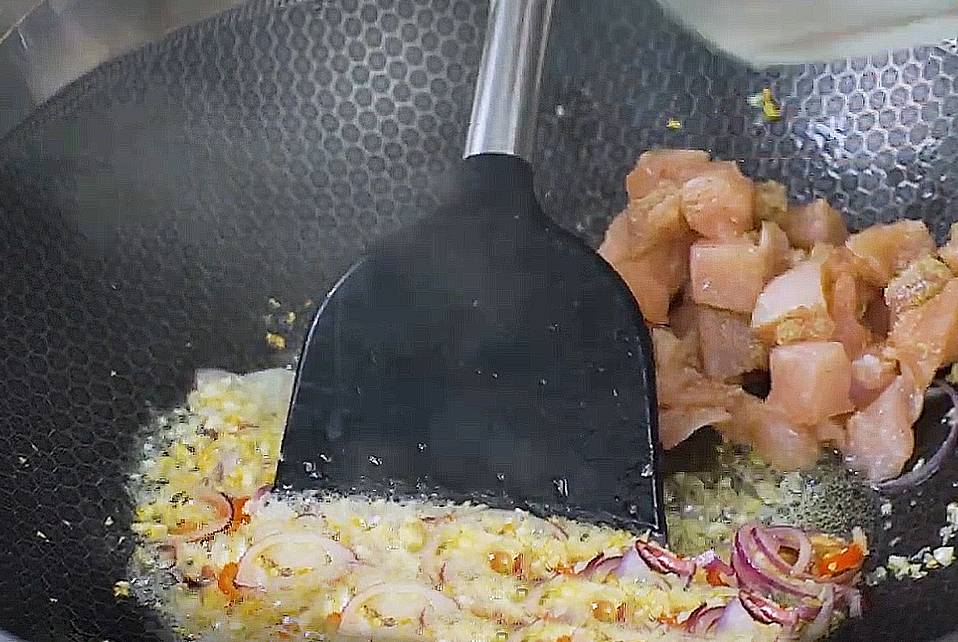
3. Add in the chicken pieces and carrots, stir for about 2 mins until the meat is cooked and carrots are soft.
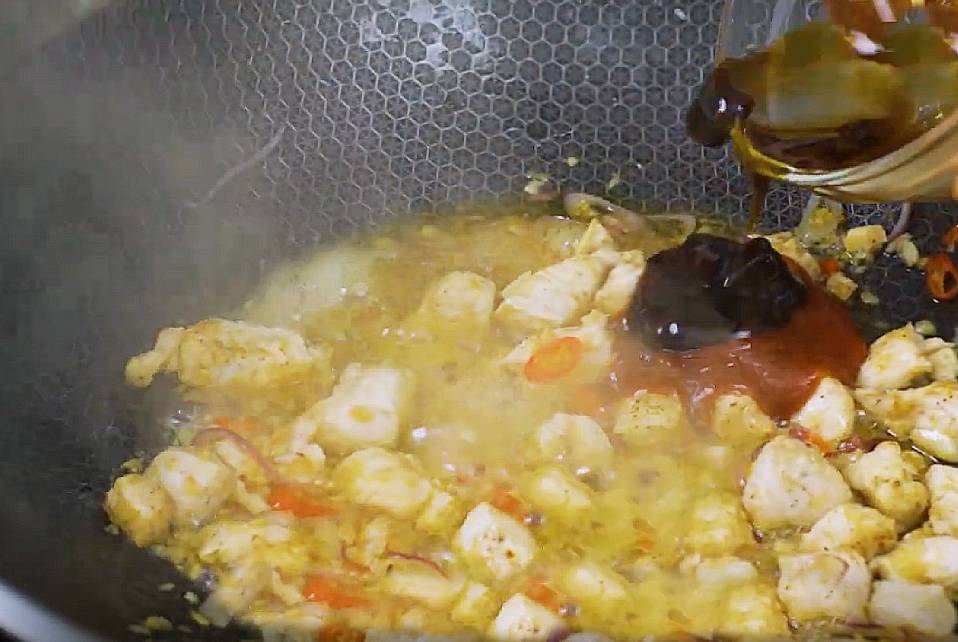
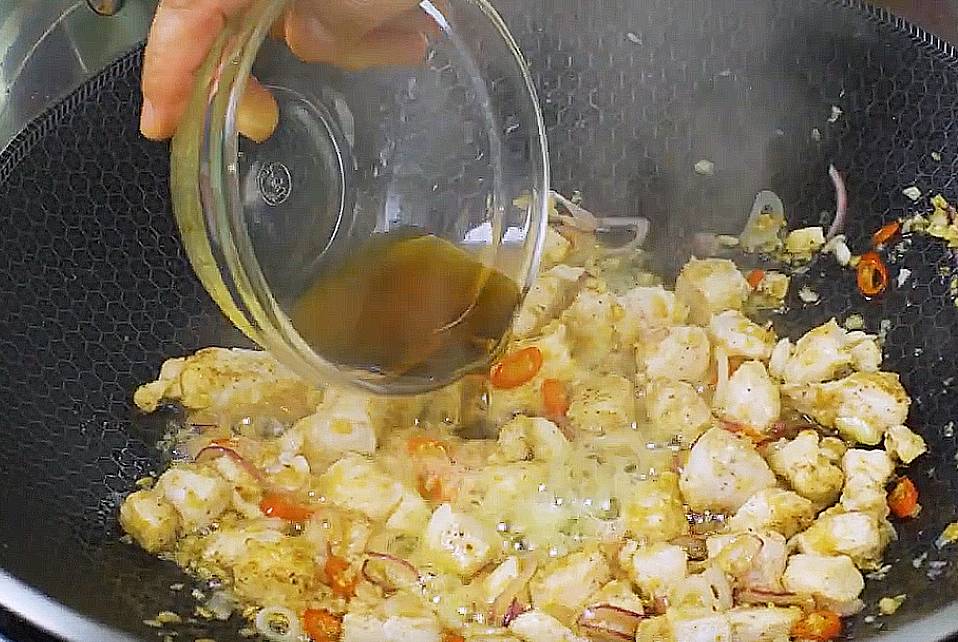
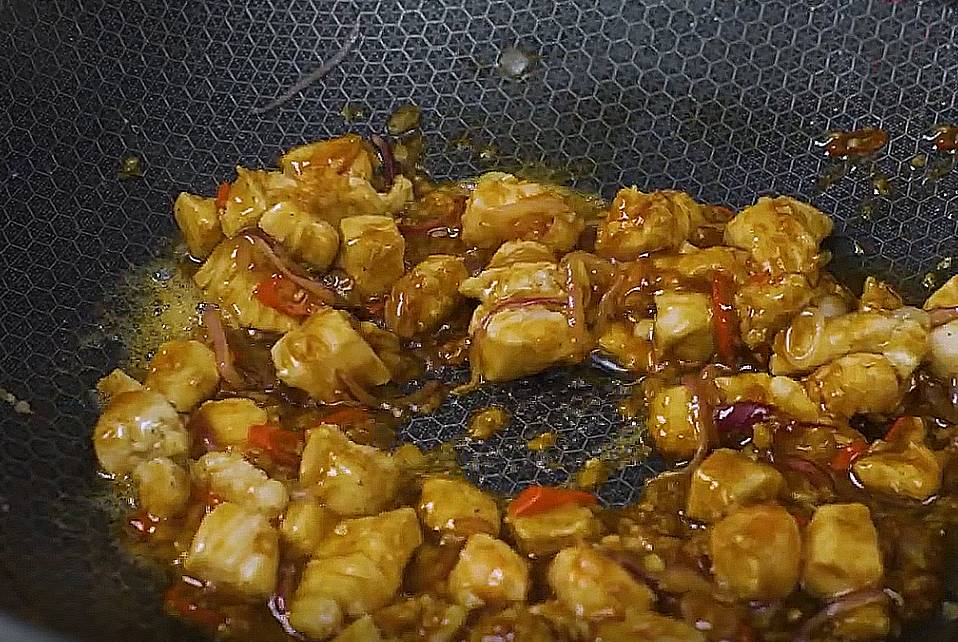
4. Add in the ketchup, fish sauce, salt and pepper. Mix well. Some use soy sauce to season their fried rice. But, that teaspoon of soy sauce will include some saltiness with everything else, except it’s not to the point of seasoning the whole thing that you’re cooking in the wok. I like to prepare my rice with plain salt rather than putting in more soy sauce, as salt won’t add overabundance wetness, nor will it divert from other, more unpretentious flavours in the rice.
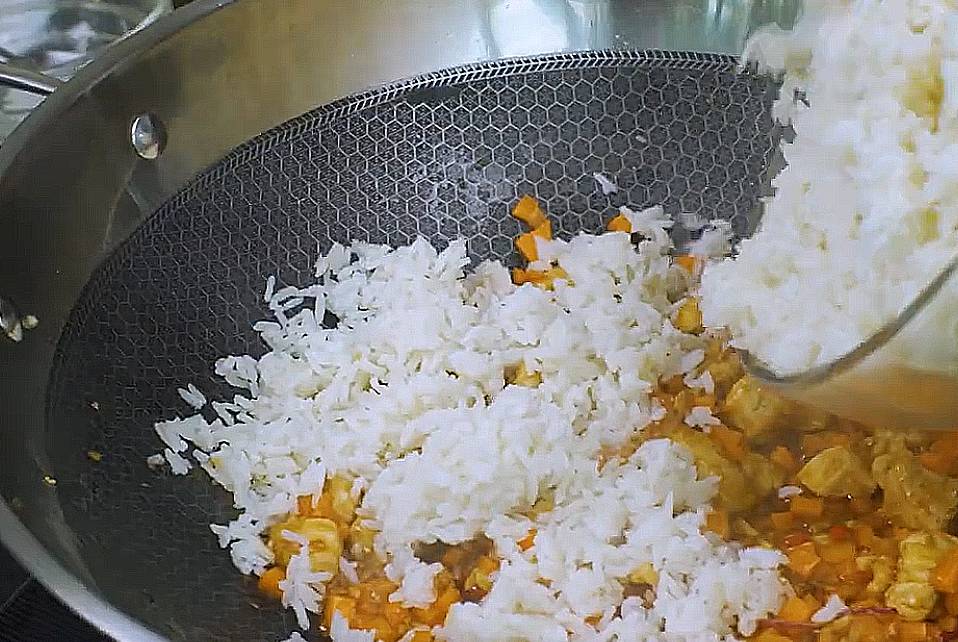
5. Add in the rice and stir until all ingredients are well combined. Remove from heat and pack the rice into bowls.
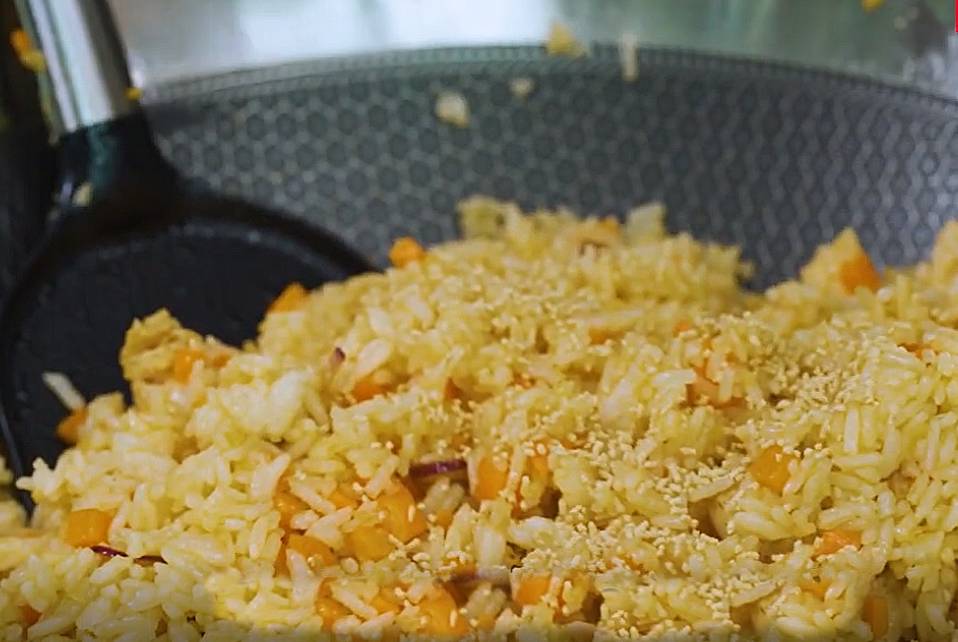
While the first step in making fried rice absolutely includes cooking rice, its timing is what determines if it turns out good or not. For this situation, new isn’t in reality better. Assuming you start with tacky, warm, just-cooked rice, your fried rice will turn out mushy, without those particular chewy grains that decent fried rice has.
All things being equal, cook the rice something like a day early and refrigerate. This assists with drying the grains out to the point of giving your fried rice a decent texture. Utilize cool, extra cooked rice.
Left in the refrigerator short-term, the rice grains will solidify, making it simpler to separate and diminishing the odds of your fried rice turning out soft. Rather than viewing this as a disturbance, I like to consider it an extraordinary leading step. That is to say, when the rice is cooked, making the pattaya fried rice just requires a couple of moments!
6. Add the omelette seasoning and cornflour mixture into the beaten eggs, mix well.
7. Heat oil over medium heat in the Galactic honeycomb pan.
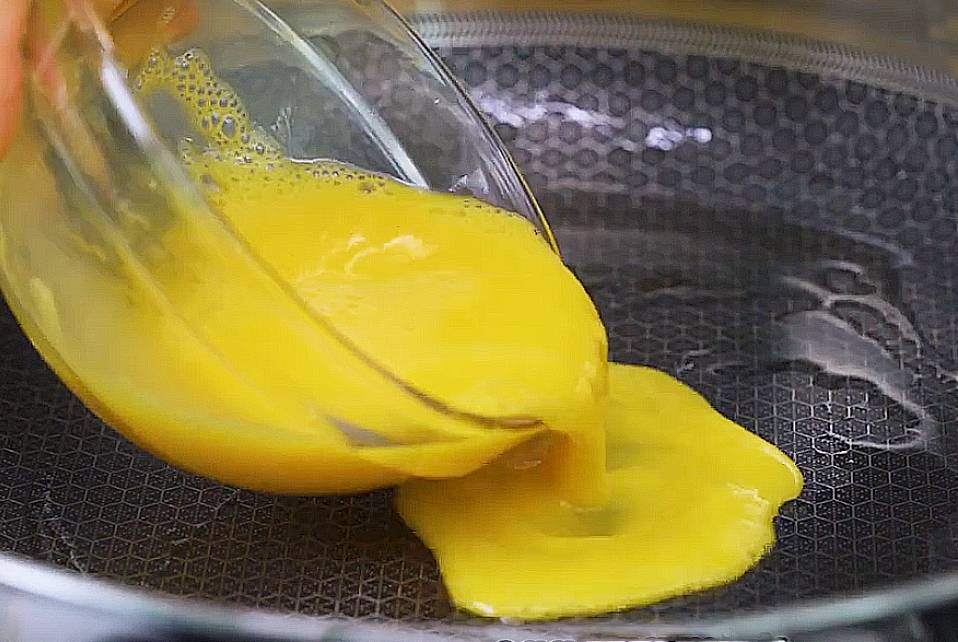
8. Hold the pan away from heat and pour in the beaten eggs.
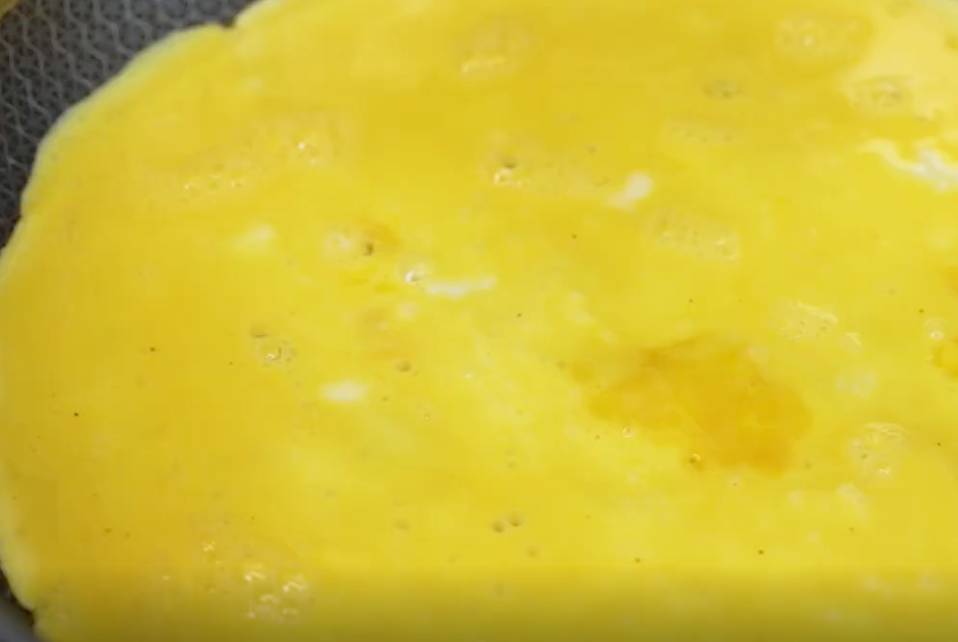
9. Swirl the pan to make the omelette thin and large.
10. Place the pan back on the heat and cook on low for 20 secs.
11. Turn off the heat and cover the pan and cook for 1 min.
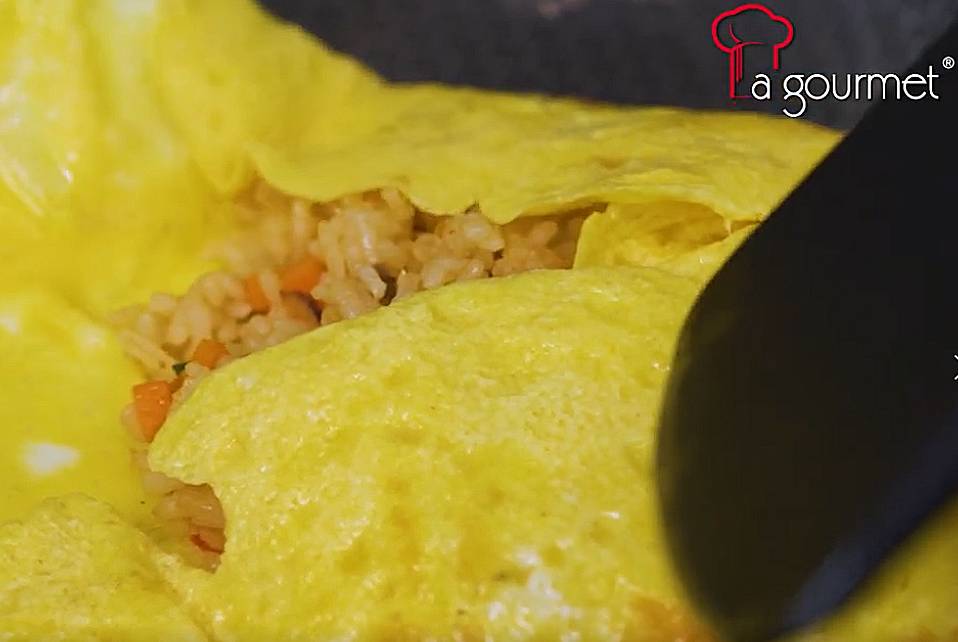
12. Place a bowl of rice at the centre of the omelette, fold the 4 edges to wrap the rice.
13. Hold a plate over the omelette fried rice and flip it over.
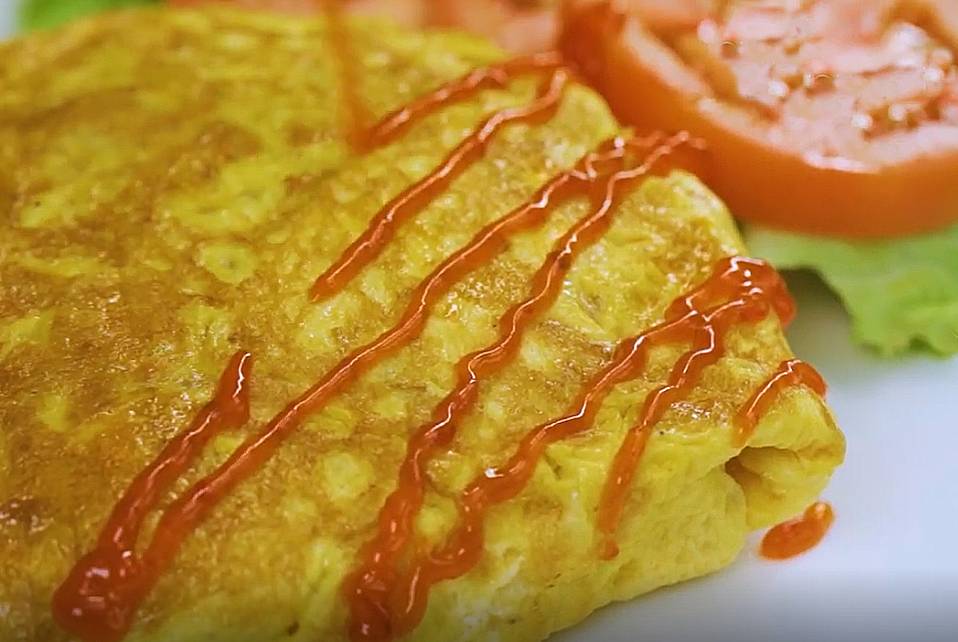
14. Serve wrapped or cut open, garnish with coriander and chillies.
Ways to make Rice Ahead of Time
The following are a couple of tips on making rice early to make it much easier:
- Assuming that you’re preparing rice for another meal the day after, make twofold the sum for a future fried rice dish.
- Tapao the steamed rice you didn’t eat at the restaurant and carry that home to use for this wonderful nasi goreng pattaya recipe.
- Not certain when you’ll find time to make fried rice yet have extra rice? Hold up it! Whenever frozen appropriately, you can toss the frozen rice solidly into the container and it’ll defrost right away.
- If you were to simply dump extra rice directly from the fridge into the wok or skillet, you’d observe that it’s assumed the state of the holder it was put away in, and the grains will stay together into bunches. It’s ideal to separate these clusters prior to placing the rice into the wok. Press the rice between the centres of your hands that have been moistened with cool water, so the grains don’t stick to each other.
Looking for quality cookwares? Head over to La gourmet website now and check out our promotions!
Homemade Healthy Poached Pears Without Wine Recipe
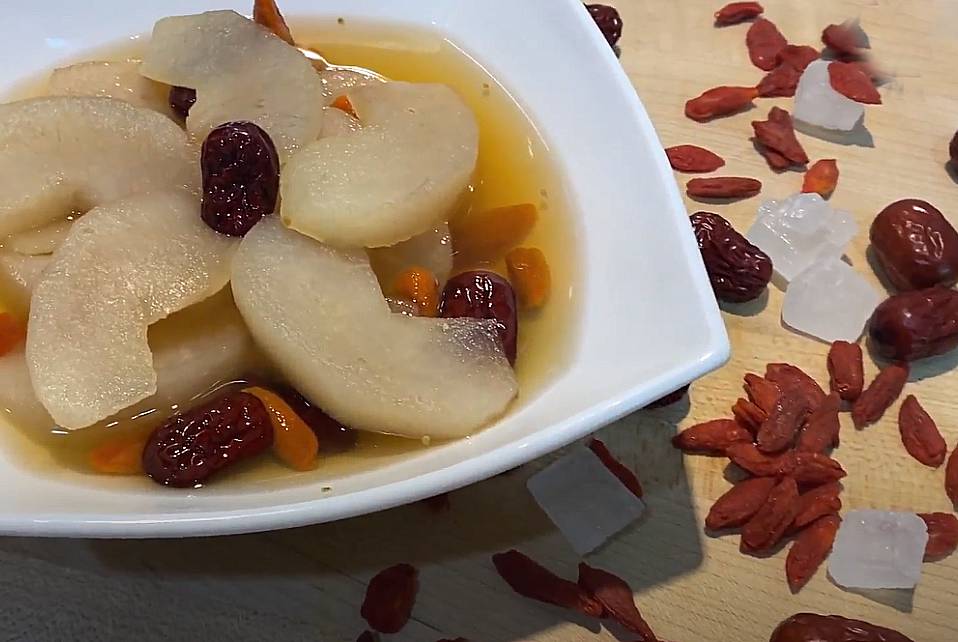
Poached pears without wine make the ideal winter warmer as they’re soothing, look marvellous and take no time by any stretch of the imagination to get ready. In this technique for delicate, burner cooking, the pears are gradually stewed with a wide range of syrups and flavours to draw out their sensitive and particular flavours. What makes them shockingly better is that you can serve them any way you need.
Easy Homemade Gula Melaka Kaya Recipe
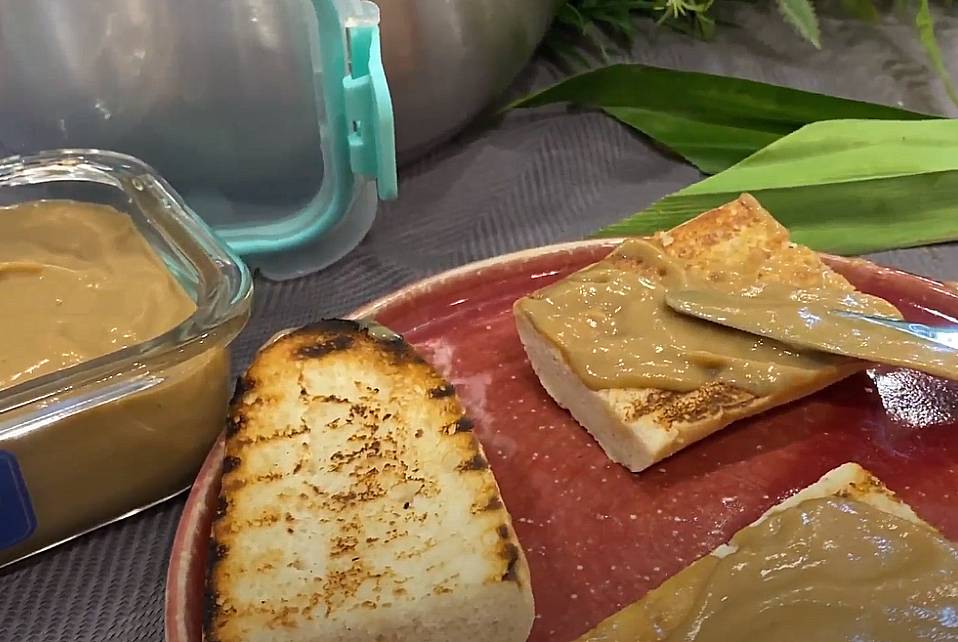
Kaya is basically a coconut jam utilized fundamentally as a bread spread, waffle spread, fillings for buns and paos (steamed bun) and cakes. Today, we’re gonna show you how to make a homemade gula Melaka kaya so you don’t have to buy from outside.


