Is Cast Iron Cookware Good for Health? Here’s What’s Up!
Is cast iron cookware good for health?
Cast iron cookware has been around for more than 100 years ago. People use cast iron pots and pans on a day to day basis. It is an effective cooking tool that gets the job done. Being durable and long-lasting, the only thing that it needs is proper care through seasoning and cleaning. As it is made entirely of iron, there’s a question floating in the community. Is cast iron cookware good for health?
Yes, cast iron cookware is good for your health. Research shows that cooking food in iron cookware increases the iron content in the food. Given that iron is an essential mineral that is used for blood formation, it helps to reduce the risk of iron deficiency anaemia. Hence, the use of iron cookware becomes a promising solution to reduce such deficiency, especially in developing countries.
Iron is an essential mineral needed by the body
Besides being utilized for assembling steel and cast iron cookware, iron is likewise a fundamental dietary mineral. This implies it should be acquired through your eating regimen as your body cannot synthesise it by itself. Iron plays many parts including transporting oxygen around the body through haemoglobin, enzymatic responses. Iron is additionally a fundamental part of your immune system as well.
Cooking acidic food sources will add more iron to your food than non-acidic food varieties.
Iron cookware can altogether build the iron content of specific food sources like eggs and pureed tomatoes. However, not all food will have the same amount of boosted iron build-up when cooked in cast iron cookware.
A review distributed in the July 1986 issue of the Journal of the American Dietetic Association tried the iron substance of 20 distinct food sources when cooking in an iron skillet.
Researchers inferred that cooking in an iron skillet significantly hikes up the iron content of food because of various influencing elements; acidic food varieties that have a high dampness content (for example fruit purée and pureed tomatoes), food varieties that are cooked for longer timeframes versus food varieties that are cooked rapidly (for example rice versus cheeseburgers), food varieties that were mixed all the more every now and again and food varieties that were ready in a new cast iron cookware versus more seasoned cookware.
Season your cast iron cookware to better control the amount of iron that goes into your cooked food.
Cast iron cookware has so many benefits that it’s hard to ignore in the hands of any house chef. To restrain the amount of iron that goes into the food, make sure to season the cookware well. The seasoning acts as a barrier between your food and cast iron.
What is seasoned cast iron cookware?
Seasoning cast iron cookware is the first thing that you do when you just bought your new cookware. The seasoning is actually the layer of polymerized oil that is absorbed into your cast iron cookware through heat.
Seasoning is important for your cast iron cookware.
Cast iron cookware rusts easily when exposed to moisture. Therefore, it’s absolutely forbidden to leave it wet. To reduce the risk of rusting, you have to season it with any form of cooking oil.
Seasoning not only creates a barrier on the cast iron cookware that prevents rust, but it also creates a non-stick layer that makes your cooking life easier.
During the seasoning process, you will coat the inner and outer surface of the cast iron cookware with cooking oil such as canola oil or vegetable oil. This is repeated a few times during the first round after you obtained your cookware.
You also have to repeat the seasoning process every now and then. When the cast iron cookware is exposed to high heat, the oil bonds to the cookware. The oil polymerizes into the patina coating.
When done periodically for years to come, the layer becomes more solid and achieve the perfect non-stick state. With proper care, cast iron cookware retains its non-stick properties that last a lifetime. This is one reason why it is better than non-stick cookware that uses a certain unsafe chemical coating.
Some marketplace offers used cast iron cookware for sale. These are typically seasoned with a lot of cooking prior. While this may seem like it would save the hassle of seasoning again and again to get the perfect state, there are several factors to look at before choosing your cast iron cookware.
Be sure to read our guide on the blog!
Kindly note that the information shared here is for entertainment purposes only. Should you have any health concerns, do kindly consult with your doctor prior to getting a cast iron cookware.
How To Choose Cast Iron Cookware – Expert Guide
How To Choose Cast Iron Cookware?
With regards to kitchen gear, cookware seldom gets better with age. Nonetheless, the cast iron cookware is apparently a strange special case for this norm. As they say, if you treat the cast iron cookware right and cook with them routinely, not only will they last long for a lifetime, they will also improve with every use! Having that said, is all in the market working the same? Today we will explain how to choose cast iron cookware that is the best for you.
Here’s how to choose cast iron cookware:
1. Look at the weight of the cast iron cookware
The weight is a central point in the acquisition of a good piece of cast cookware, and keeping in mind that not generally obvious, the heavier things will quite often hold more hotness and give a more bona fide iron cooking style.
Revolutionary technology has allowed the cast iron cookware to be lighter. In fact, La gourmet’s Nitrigan cast iron cookware range uses such technology to create 30% lighter cookware compared to other brands.
2. Convenient handles and knobs
The quality of the cookware is without a doubt important. Being able to move your cookware around is essential when you want to transfer the food onto a plate or to the dining table.
Hence, the handle or knobs of the cast iron cookware is important so that you don’t get burned when accidentally touching the hot surface.
Check out the features of the cast iron cookware that you’re looking to buy before making a purchase. See-through if the handle has a heat-resistant cover or holder over it.
While looking for cast iron cookware, watch for the handle designs. Make sure the knobs are comfortable to hold. Remember that cast iron cookware is usually heavy. So, the handle design is quite important.
It must be extensive enough to allow you to hold with cloth wrapped if needed.
The position of the handle is important too. It should be ergonomic enough so that it won’t be too heavy on the wrist. This is essential to reduce the risk of injury when lifting the cast iron cookware to be served.
3. Choose whether you need classic or enamelled cast iron cookware
One major thing to do when it comes to buying traditional cast iron cookware is that you have to season it yourself. Pre-seasoned cast iron cookware is available in the market, however, they are for the most part more expensive than unseasoned cast iron cookware.
When the traditional cast iron cookware is seasoned, it ought not to be cleaned with soap or put into the dishwasher. Instead, scratch the food out of the cookware, wash it with water and dry it on the stove with fire. Apply a thin layer of oil, then let it be. Don’t leave it in the sink as this will cause it to rust. This cookware can keep going for a really long time if appropriately taken care of.
On the other hand, we have the enamelled cast iron cookware. This type of cookware is easier to care for than the traditional ones. They don’t need to be seasoned. Plus, they also can be washed with soap and water.
Cooking acidic foods too is totally fine without additional effort to season it as how you would with the traditional cast iron cookware.
The only downfall to the enamelled cast iron cookware is that the coating is prone to damage. It may chip. Plus, the colour too may go out of style.
One of the main features of traditional cast iron cookware is its versatility. You can use it on the stovetop or outdoors under a campfire. If going outdoor is your thing, enamelled cast iron cookware will not be a good choice. That’s because you have to protect the enamelled layer.
Price-wise, enamelled cast iron cookware is also much pricer than traditional ones. If you’re going for the branded ones, they tend to be more expansive but their enamel is expected to be tougher.
4. Decide to go for new or used cast iron cookware
If seasoning the cookware is your thing, go for a new cast iron cookware. It’s easily accessible and most malls sell them.
Traditional cast iron cookware is well-known for its durability. When well taken care of, it could last so long that you can even transcend it to your next younger generation. So, in the right hands, there’s actually nothing wrong to get used to cast iron cookware.
In fact, there’s a market for antique cast iron cookware. Besides, they tend to get better as it is used longer. Putting aside the fact that it is seasoned by other people’s cooking, you can actually save time to have the ideal cast iron cookware that has been smoothed well enough that it will always have that perfect non-stick coating on it.
When you’ve decided to buy a used cast iron cookware whether, from your garage sales or some online market, it’s important to examine it before committing your payment.
What to look at when choosing used cast iron cookware
Check for rust or pitting. Physical impact or thermal shock could cause pitting in cast iron cookware. This means that the cast iron has been eroded away. This kind of condition is hard to be salvaged so best to avoid it.
If there’s little rust, then it’s generally okay. It can be cleaned off during the re-seasoning process.
Check for warping of the cast iron cookware. Warping is a defect on the cast iron cookware where you can’t place it evenly on the surface of the table. It may wobble and will have movement. This is usually caused by putting water onto the pan when it’s still hot.
Check the seasoning layer. If the seasoning layer appears thick, sticky or flaky, then it needs to be removed and reseasoned again.
On the other hand, if the surface is shiny without any defect, then it’s good to bring home. It will also save you the hassle of seasoning it yourself.
The seasoning can be foreign to some but it’s the upper hand that makes it better than non-stick cookware. Its durability is a benefit of cast iron cookware that’s worshipped by many.
For the best cast iron cookware for your money, check out our Nitrigan range today!
8 Best Cast Iron Cookware Benefits That Makes You Want To Get One
Cast Iron Cookware Benefits
The pots and pans we cook with are similarly just about as significant as the food that goes in them. One of the most popular cookware materials that people choose for their cooking ventures is cast iron. Why is that? Here are cast iron cookware benefits that you should know about.
Cast iron cookware benefits
1. Cast iron cookware is non-toxic
Non-stick pans can be advantageous, yet they’re exceptionally simple to scratch up, which is an issue since scratching that non-stick covering can deliver poisonous buildups that can move to your food. As a matter of fact, in any event, preheating a dry non-stick pan can deliver poisonous exhaust up into the air that we breathe in! Utilizing cast iron is a simple method for keeping away from the two issues. Seasoning cast iron cookware is a natural way to create the non-stick layer without harmful effects.
Non-stick pans made with Teflon are easily found everywhere, however, they aren’t really great for our wellbeing. When warmed to high temperatures, and particularly when the pan is dry (like while you’re reheating a dish prior to searing meat or pan-searing), they discharge synthetic substances out of sight called perfluorinated compounds (PFCs). Scratched non-stick delivers considerably more PFCs into your food. Studies have connected specific PFCs, specifically PFOA and PFOS, to various medical conditions connecting with chemicals, liver brokenness, and mind wellbeing. PFCs are especially significant for moms to stay away from, as it goes through breastmilk.
These synthetic compounds advance into your food, however they end up down the channel and in landfills, dirtying streams and winding up back into the food that we eat (like fish that live in polluted water). Far more detestable, they require numerous years to biodegrade which is bad for the environment.
In a great sense, cast iron cookware is better than most non-stick cookware.
2. Cast iron cookware is easy to be cleaned
Cast iron cookware is incredibly simple to clean, especially when it is well-seasoned. You don’t have to wash it with dishwashing liquid. Most of the time, you can simply clean a cast iron cookware off with a kitchen towel. If you need to give it a good scrub, kosher salt with a little bit of cooking oil will do.
Some people might see that it is hard to clean cast-iron cookware. This is usually not the case. It’s all about adapting to new practices.
Once your food is done cooking, transfer the food to the plate. With the cast iron cookware still hot take it to the sink and under hot running water, scratch off any food bits with your metal spatula.
After that, put it onto the stovetop and turn on the fire to dry it. Then, wipe with a paper towel dunked in a little oil, and leave it. You can now enjoy your meal. This action will help maintain that oil layer on your cast iron cookware.
The above strategy in a real sense requires just about 30 seconds and saves me from being required to scour the cookware and harm the seasoning.
3. Cast iron cookware can stand the heat
Dissimilar to different types of cookware, cast iron can endure even the most smoking cooking conditions. Put it over a wood fire, on a gas range, in your stove, or elsewhere cast iron can deal with everything!
Cast iron cookware are perceptibly powerful and their weight is important for their features, permitting them to hold heat longer than most different woks and pans. This functions admirably, whether you’re burning a steak at a high temp, or stewing a stew on low. On the off chance that you don’t have the most dependable oven, a cast iron skillet can assist with keeping you from burnt food. Well cooked food is always something to smile at.
4. Cast iron cookware is durable
In contrast to some other cookware, cast iron ages gracefully. With each utilization, the cooking surface turns out to be more smooth, permitting oil to seep into the surface and build up that patina layer with the seasoning.
On the other hand, Teflon covered non-stick cookware will get destroyed if you’re using the wrong type of spatula. The metal or wooden type has the risk of ruining the nonstick layer of these pans.
If your non-stick is unscratched, any cookware that requires you to utilize a plastic spatula is both harmful and disgusting. Cooking with a plastic spatula liquefies particles of plastic into your food. That is gross!
There is really absolutely no reason at all to use unsafe non-stick pans or plastic spatulas when you have cast iron cookware!
5. Cast iron cookware adds iron to the food that you cook
While it’s all around acknowledged that cast iron increases the iron content of food. In a study, it is estimated that the iron substance of 7 food sources is prepared in cast iron or glass. Acidic food sources and those cooked for longer time frames amassed the most iron. Pureed tomatoes, for instance, had 87.5 mg of iron when cooked in a cast iron dish, however a simple 3.0 mg when cooked in a glass skillet (per 100g serving, which is not exactly ½ cup). Indeed, even non-acidic and fast cooking food sources, similar to eggs and fries, have increased 5 times of iron content when cooked in iron cast cookware.
Cast iron cookware is possibly good for health. It adds a touch of iron to all that you cook. Iron assumes an imperative part in the human body, assisting with keeping up with energy levels and reinforcing your immune system. In a research done, results show that cast iron cookware could reduce risk of iron deficiency anemia among children.
6. You can cook almost anything on a cast iron cookware
We don’t really need that much kitchen cookware stacked up in our cabinets, gathering dust – you can pretty much use cast-iron cookware for cooking pretty much anything! This is one of the main reasons why people choose to use cast iron cookware.
One of the upsides of cast iron cookware for cooking is perfectly burning steaks. It gives that beautiful seared brown that hikes up the aesthetic of your food appearance. Having said that, it doesn’t mean it’s only good for that. Cast iron cookware aces in cooking other ingredients as well.
Other than cooking huge cuts of meat like chicken chop and beef chunks, these cast iron cookware are more than capable for preparing delightful fried eggs, pie, or even barbecued cheddar. Besides, in light of the fact that all cast iron cookware is stove safe, you can utilize them to make pizza, bread, or a fruity dessert too!
Tip: Avoid cooking food varieties with acidic properties (like tomatoes or bolognese sauce) in your cast-iron skillet, as these can possibly reduce the seasoning layer that you’ve worked hard for.
7. Cast iron cookware keeps the food warm on the dining table
Right when you just take it off the stove, cast iron cookware remains hot for a longer period of time. This is perfect to actually cook with a cast iron pan first and the food will still remain warm while you prepare other food.
8. Cast iron cookware is versatile
This is the place where cast iron truly shines. It’s reasonable for so many cooking strategies. Cast iron cookware can be utilized for:
Frying – brilliant for sautéing fish filets yet additionally broiled chicken comes out a wonderful brilliant shading.
Baking – cornbread strikes a chord first. Nonetheless, baked goods, sweets, and bread come out superbly.
Searing – your steaks stay delicious in the middle and have a beautiful caramelized outside to improve favours. You might even need to consider a barbecue search for gold grill barbecue marks you’d find at a top café.
Roasting – you won’t require a devoted broiling dish to make cook chicken. A skillet or dutch stove will really do comparably well.
Slow cooking – a French/Dutch stove is brilliant for slow cooking. Project iron warms up leisurely and can be left on at a low temperature, either on the burner or broiler.
Sauteed vegetables – with a piece of margarine then, at that point, served straightforwardly on the table for loved ones to help themselves.
Open-air or setting up outdoor camping – camping is fun and even greater when you’re cooking something with the campfire.
Interested in cast iron cookware? Not all are made the same. Check out how to choose cast iron cookware in our blog. It will enlighten you!
Ultimate Guide In Seasoning Cast Iron Cookware
Seasoning Cast Iron Cookware
Cast iron remains one popular choice of cookware that people use because of its durability and is also well-known for its ability to cook dishes with wok hei among the Chinese community. Cast iron cookware is also one of the best cookware materials out there that can last for generations if properly taken care of. One of the ways to care for it is by seasoning cast iron cookware the right way.
What is seasoning cast iron cookware?
Seasoning cast-iron cookware means that you are applying a slight layer of cooking oil to its surface to fill the minuscule pores that are normally a piece of any cast iron wok, pan, pot, or skillet.
While some may see it as a hassle, having a replenishable nonstick layer is actually one huge advantage that no other cookware has. This benefit of cast iron cookware will prove to be advantageous for you in the long term.
Cast iron is a unique combination of unquestionably sturdy and strangely sensitive particularly for a cooking utensil. The metal is genuinely solid, yet additionally exceptionally responsive, and that implies even a bead of water sitting in your cast iron dish can leave a rust spot. To safeguard that pleasant dark surface, you should cover it with a flimsy layer of solidified oil, an interaction called seasoning.
Hence, you might have heard notice of seasoning cast-iron. Dissimilar to non-stick covered and steel containers, cast-iron cookware needs to be seasoned before you use it. Any other way, you’ll find it difficult to take any food off of its surface as they will stick!
Seasoning cast iron cookware is pretty basic: oil within the cooking surface and afterwards heat it until the fat polymerizes, repeat the cycle to develop a defensive layer. Polymerized oil is more similar to plastic than fat, which makes it hard and impervious to stay. By warming the entire skillet to a sufficiently high temperature, you forever bond the oil to the crude iron. Here, it has a protective layer on the metal from air and food.
Some cast-iron cookware comes pre-prepared, which is a helpful feature. You can in any case season them again to advance the covering’s life span and toughness. This is optional as well because when you’re cooking oily food, you’re actually maintaining the patina layer as well.
For those cast iron cookware that comes unseasoned, you’ll need to do it first before you even consider using your cast-iron cookware for cooking. When, you’re picking a used cast iron cookware, this is something to check first.
Seasoning cast iron cookware steps
Here’s how you can season your cast iron cookware:
1. Scrub pan with soap water.
You might have heard that you ought to never under any circumstance use dishwashing liquid or soap on a cast iron cookware. That is not totally evident. A well-seasoned skillet has a sufficient layer of oil that a little soap won’t reduce completely. As a rule of thumb, plain water is the best approach except if you’re going to reseason cast iron.
You need to clean the cast iron cookware of any little food particles and pieces of rust on a superficial level before you season, so you can make the smoothest conceivable covering. That implies you should utilize dishwashing liquid or soap. If your cast iron cookware is rusty, take metal wool to scrub it and clean that rusty tone off. Truly go ahead and scrub the cast iron cookware as it won’t harm it.
2. Dry the pan.
Dry the cast iron cookware with a paper towel, and wipe it well. Better yet, put it on the stove over low hotness to dissipate any remaining water particles. You’ll need to make a smooth layer of oil, and any waiting water beads will interfere with the seasoning process. So, be sure it is well dried out.
3. Apply oil to the cast iron cookware.
Any oil or fat ought to get the job done. Some oils are superior to others since they can get pretty hot before they begin smoking. You will warm your skillet to over 400°F, so any oil with a low smoke point will fill your stove (and house) with oily vapour. Solid fats like shortening likewise have high smoke focuses, however they’re harder to spread over the skillet in a flimsy, even layer, so you should adhere to using the liquid type of oil.
Spread the oil on the metal with a paper towel, remembering that you just need a patina of fat. You can use a tong to hold the paper towel and wipe it on the cast iron cookware. Try to cover the entire surface completely. In the event that you leave an excess of oil on the cast iron cookware surface, it’ll shape pools, and you’ll wind up with solidified drops of polymerized oil in your container.
Oil to use when seasoning cast iron cookware
a) Canola oil
Canola oil is very reasonable to purchase and is helpful in a lot of recipes, so you probably as of now have a container reserved in your storeroom. While canola can be easily used to get the job done right, its outcomes aren’t as great for seasoning cast-iron. Flaxseed oil and grapeseed oil both get you better outcomes, yet you’ll pay a premium for them, as well.
Canola oil has a high smoke point with a neutral flavour so it won’t influence your food taste. Nonetheless, it has kind of non-stick properties so the seasoning might break faster than other oils. The main seasoning with it additionally will in general be more vulnerable and subsequently, require seasoning more frequently.
b) Vegetable oil
Just like canola oil, this is one of the cheaper option when it comes to choosing the ideal oil for seasoning your cast iron cookware. It also doesn’t give you the best results. Vegetable oil have a high smoke point with very light taste. So, you don’t need to worry if it affects the taste of the food that you’re cooking.
However, the seasoning will be weak and require more frequent sessions of seasoning to maintain it.
c) Sunflower oil
Sunflower oil is another popular choice among Malaysians to use as cooking oil. It is inexpensive and just like other vegetable oil, it has the same quality seasoning as them.
The light taste to it makes it right to use as seasoning oil. There’s no need to worry if the oil imbalances the taste of the food. However, the seasoning will break down quickly as well.
d) Avocado oil
Avocado oil is probably one of the best options to season your cast iron cookware. It is full of healthy fats that make the fruit popular in the first palace.
Using it for seasoning is just perfect as it gives a strong hard coat of seasoning that lasts long. Avocado oil also has a long shelf life so you can keep it as your go-to option for seasoning. The only downfall to this oil is that it’s quite expensive.
e) Olive oil
Commonly used for salad, olive oil is one of the most popular oils that can be found on most kitchen counters. It is not really that expensive and the tons of health benefits it has pretty much makes it one of the top oils to buy.
The soft flavour won’t affect the taste of cooked food as well. So, that’s a pretty cool plus point.
However, it has a low smoke point which tends to degrade as you cook your food. Considering the fact that we season the cast iron cookware to provide this oil protection layer, using a low smoking point oil kinda defeats the purpose.
It is up to your discretion to use which oil to season your cast iron cookware. Common vegetable oil works fine!
Apply the oil 4 to 5 times before turning off the fire. This repeated seasoning will improve the layer of the seasoning over time.
4. Leave the cookware overnight.
Put your cookware safe in a corner of your kitchen for 24 hours before use.
This is how seasoning cast iron cookware is done. Like how we would wash our hands after eating, the habit of seasoning cast iron cookware can blend in seamlessly into our routine without taking much time.
In fact, the need to re-season the cast iron cookware may as well be one of the major factors that makes it better than non-stick cookware.
While other non-stick pans and pots may use harmful chemicals, cast iron cookware is known to add iron to your food which is good for health.
Easy Guide – How Do You Clean A Thermal Cooker?
How do you clean a thermal cooker?
The thermal cooker is one of the most awesome cookware that you can have to save your cooking time and money as well. It possesses a lot of advantages that none other cookware has. Plus, it can cook the food quite well. Like all cookware, each has its own use and care. This goes the same for the thermal cookers. So, how do you clean a thermal cooker?
In this post, we will describe in detail how do you clean a thermal cooker.
The thermal cooker has two major components. The inner cooking pot and the other insulated container. Cleaning on these two components may require a different approach.
How to clean the outer container of a thermal cooker?
The outer container of the thermal cooker can be cleaned using a damp cloth. Wet the cloth sufficiently and wipe inside and outside the pot.
Rinse the cloth as needed and continue to wipe the container repetitively until it is clean of any food residue or stain.
If necessary, use little dish soap to clean the grease from the food off. Wipe it around with damp cloth. Rinse the cloth as needed and squeeze to remove excess water. Wipe the container again until it is clean. Do not splash with water.
Never ever submerge the outer container into the water and wash with soap. Most of the container casing of the thermal cooker is not made to be waterproof.
As you submerge it, water will seep into the interior of the insulated container over time. This can prove to be harmful for your thermal cooker.
Some thermal cookers are made out of special foam to insulate heat. When it is exposed to water, it will expand and damage it.
Therefore, damp cloth wipe is the best method to clean it. Having said that, it is also not advised to put it into the dishwasher.
How to clean the inner pot of a thermal cooker?
Before you start, check the user manual or guidelines for a particular washing tips. Albeit many kinds of cookware are advertised as dishwasher-safe, hand-washing is normally the most effective way to clean stainless steel pot. To try not to allow it to warp, consistently let your cookware cool down prior to cleaning. Never utilize grating apparatuses like steel fleece or cruel cleaners, for example, dye or stove cleaner on your tempered steel skillet, as these can forever harm the surface.
This is how you clean the inner pot of a thermal cooker:
For regular cleanup, scour your hardened steel dish with hot lathery water and a nonabrasive sponge. Whenever stuck-on food bits remain, fill the dish with sufficient lathery water to cover the buildup, heat to the point of boiling, and scratch with a spatula or wooden spoon. The food should leave without any problem. Permit the skillet to cool, then, at that point, wash it as usual.
For tougher stains, including consumed food or oil, could require a more rough cleaning strategy. For a basic, economical method for cleaning burnt inner pot, get some baking soda from your storage room. Add a couple of spoonfuls of baking soda to your seared inner pot alongside enough water to cover the consumed regions. Heat to the point of boiling and stew until the greater part of the water has vanished. Switch off the hotness and delay until the dish is adequately cool to deal with. Scour away development with a nonabrasive wipe and wash in hot, foamy water.
Tips to clean a thermal cooker
Just utilize non-grating cleaners and wipes.
Coarse scrubbers and cruel cleaning arrangements like fade or family cleaners can scratch your hardened steel and harm its completion. Furthermore, albeit baking pop and more grating scrubbers (like fine steel fleece) can be helpful in cleaning a polished dish, be careful that utilizing these items could void your guarantee.
Try not to rush the preheating process by utilizing high heat flame.
Since excellent hardened steel is viable at holding heat, preheating on high could prompt overheating your dish (and consuming your food).
Remove the chill from cold food sources.
Cold food is bound to adhere to a hot dish, as the steel will contract when it interacts with a cooler temperature. In this way, on the off chance that you’re cooking food varieties like meat, chicken, or fish directly from the fridge, permit them to sit at room temperature for 10 to 15 minutes. Prior to cooking, try to touch with a material or paper towel to eliminate excess dampness.
Just salt water once it has effectively reached boiling point.
At the point when water is salted pre-bubble, “pitting erosion” can happen, which leaves little yet unsalvageable blemishes, as though from a nail, in the lower part of the pot. So salt your pasta water, indeed, yet just once it’s bubbling.
Permit the inner pot to cool totally prior to washing it.
Lowering or drenching a hot-tempered steel dish in chilly water could be the reason for the hopeless warping of the inner pot.
To decide if your inner pot is hot enough for the oil, do this basic water test:
Drop a minuscule sum (around 1/8 teaspoon) of water in the dish. At the point when the water, quickly after hitting the dish, meets up into a “ball” that coasts and moves across the surface, your skillet is preheated flawlessly now, you can add the oil! Note that this is beyond the place where the water sizzles when it hits the skillet’s surface: When the container is appropriately hot, the water shouldn’t “sit” on a superficial level by any means.
Make sure to heat your inner pot adequately prior to adding on the oil.
And afterwards, add the food once the oil is hot. Adding oil to the skillet when it’s hot makes the steel become “static,” which makes a briefly nonstick surface. Continuously watch the oil to sort out assuming it’s adequately hot to begin cooking: If it’s shining, you’re prepared to throw in your other ingredients.
Prevent water spots from forming
The secret to forestall those somewhat irritating water spots is to really get to drying as quickly as time permits, otherwise known as, right away. In the event that you don’t get to it soon enough, and the spots show up, essentially hose the outer layer of the pot or dish, rub it with a clammy wipe that has been sprinkled with baking pop, and wash to no one’s surprise.
Find out the difference between slow cooker and thermal cooker in blog!
For longer-lasting use of your thermal cooker, be sure to read our post on how to cook in a thermal cooker.
How Do You Cook In A Thermal Cooker In 4 Easy Steps
How Do You Cook In A Thermal Cooker?
A thermal cooker comes with a lot of advantages. It offers ease of convenience in both terms of time and money. While many tend to stray from it as it is still new in the market, we can only see that the trend is going up as more people get to know about it. So, how do you cook in a thermal cooker?
If you think of it as a thermal flask, you put food inside the thermal cooker instead of only water. It is not complicated and you don’t need special recipes for it to work. You just need to know the fundamentals of how it functions and you’re pretty much good with other recipes. Here’s step by step on how do you cook in a thermal cooker:
1. Slice and dice your ingredients
Chop your ingredients into shape just as how you would normally when cooking. The inner pot has limited space, so if you want to put larger ingredients in, be sure it is at the right size.
If you’re working with frozen ingredients, let it thaw first. Be it frozen peas or chicken cubes, it needs to be defrosted well.
This has to be done properly. Else, the heat will drop quickly after the transition, causing the whole food in the pot to be poorly cooked.
2. Bring your dish to a full boil
The thermal cooker needs to have steam for the cooking process to happen. Hence, most of the recipes that work with thermal cookers require some form of liquid.
So, it’s either soup or stew.
Once your ingredients hit boiling point, lower the flame and let it boil further for about another 5 minutes.
When you’re boiling, be sure to put the lid on. This will trap the hot air in. Contrarily, putting on the lid later will push a gust of cool air into the pot which brings down the temperature.
We want to keep the heat in as much as possible for the best cooking effect.
3. Transfer the inner pot into the outer container of the thermal cooker.
After the food is boiling for a while, it’s now the time for the transition or transfer of the inner pot to the outer container of the thermal cooker.
Place the container near to you without anything obstructing the path. You will have to hold the handle with a piece of cloth as insulation and lift it into the container.
Do it carefully as it can be heavy. Close the lid instantly after transfer.
4. Leave it to cook
Close the lid and lock it in place. The thermal cooking process will begin. Do allow at least 2 hours for the thermal cooker to cook.
Do not open the lid until the time is up. Curiosity is not your friend in this case. Trust the process and let your thermal cooker do its job.
Tips to cook in a thermal cooker
Here are some tips that will help you master the skill to cook with a thermal cooker:
a) Fill the pot fuller
The amount of ingredients that you put into the inner pot of the thermal cooker affects how long the heat is retained in it. The fuller the pot, the better.
Having more mass of ingredients in the pot means that there will be lesser air. Hence, this helps to retain temperature better.
Even so, it is not advisable to fill the pot all the way to the lid. In most cases, the thermal cooker should not be filled exceeding 80% of the inner pot.
b) Defrost all the frozen food
If you’re using any form of frozen food, do make sure that they thaw properly before putting it into the inner pot to boil.
The food must be completely hot before the transfer happens. Having incompletely defrosted ingredients will bring down the temperature quicker. This will hamper the thermal cooking process.
c) Make sure the ingredients are in full boil before the transition
When you’re boiling the ingredients with the lid on, make sure it reaches boiling point. Let it boil for a little bit longer before the transition.
This will help the ingredients to get hot further. If you believe there are ingredients that are not fully defrosted, boil longer.
d) Speed of transition
Once the pot has reached a boiling point for some time, get ready for the transfer. Hold the handle with a cloth and lift it into the outer container of the thermal cooker.
Do it swiftly and carefully to minimize heat loss. Immediately close the lid after that.
e) Don’t open the lid
We all know how much we love looking at how our ingredients are doing. Some of us might have the itch to check it out as well.
Well, don’t.
Opening the lid unnecessary will cause the heat to escape fast. This will reduce the heat in the container and risk undercooking your food.
Patience is a virtue. Give it a little bit of time to do the cooking process and you will reap the deliciously cooked food as a reward in the end.
What not to do with your thermal cooker
Do not put your outer container of the thermal cooker to cook.
Only the inner pot is designed for cooking purposes. You can put it on the stovetop or induction cooker. Do read the instruction manual to know what kind of cooking device is compatible with the inner pot of your thermal cooker.
The outer container can be made out of plastic and stainless steel which will get damaged or melt on your stove. It is designed to retain heat, not withstand fire.
Not all outer containers of your thermal cooker can be washed.
Some thermal cooker has a foam layer technology that is used to insulate heat. This foam tends to expand when exposed to moisture.
In this case, washing the container is not a good idea. Because when it does expand, the thermal cooker will be damaged and won’t be usable. Worse is that this will not be covered by most manufacturers’ warranty.
The only part that is safe for water washing is the inner pot. You can clean it like any other regular stainless steel pot.
To clean the outer container of the thermal cooker, wipe it with a damp cloth. This is sufficient.
There’s often a confusion going around that a thermal cooker works the same as a slow cooker. The truth is that they are different. Read more on our blog!
What Is The Difference Between Slow Cooker and Thermal Cooker?
What is the difference between a slow cooker and a thermal cooker?
Both thermal cooker and slow cooker cooks your food over time However, they work differently and there are pros and cons. While this can be confusing for some, we’re here to clarify the contrast between the two.
Here are the differences between slow cooker and thermal cooker:
1. Thermal cooker is unpowered while the slow cooker runs by electricity
Both thermal cookers and slow cookers cook food throughout an extensive stretch of time, yet the way that they do it is unique.
A slow cooker is associated with power and uses a warming component inside the gadget to prepare the food at a consistent temperature.
A slow cooker should be continually associated with the power to prepare food and to keep it warm. Assuming it loses power the food will quit cooking and may ruin it before you get to eat it.
A thermal cooker then again utilizes no power except for it somewhat keeps the food hot by utilizing vacuum protection like how a thermal flask bottle functions.
You first heat up the food on the stove, reaching the boiling point, then, place the food inside the thermal cooker which utilizes its vacuum protection to keep the food hot.
The heat of the food then, at that point, cooks it gradually after some time.
2. Slow cooker is easier to use than a thermal cooker
Since slow cookers have a functioning warming component preparing and preparing dinners can be more straightforward than a warm cooker.
For a ton of recipes, you simply toss in the ingredients, spices and fluid/water and afterwards shut the top and turn the slow cooker on.
On the other hand, you need to know how to cook with a thermal cooker. You would really want to carry the food to a boil on the fire or induction stove first, prior to moving into the warm cooker.
In the event that you’re in a hurry, you probably won’t have the time or energy for this.
You also need to clean the thermal cooker‘s inner pot and the outer container separately. This maybe a hassle for some that looks for a quick and easy way.
Be that as it may, a slow cooker you can simply toss everything in and turn it on. It makes it speedier and simpler to prepare a meal.
3. Thermal cooker can be used to store cold foods while slow cooker can’t
While thermal cookers are basically used to keep food hot and cook food gradually vacuum protection or foam-based insulation technology can likewise be utilized to save things cold for a truly significant stretch of time.
You can make frozen yoghurt, store it in the cooler in the internal pot and put it in the protected external pot and take it with you. It’s really probably the most ideal way to keep frozen yoghurt frozen.
The frozen yoghurt will remain frozen the entire day will in any case be cold to eat an evening time after supper.
You can likewise utilize thermal cookers to keep ice frozen for an expanded timeframe.
Given a thermal cooker is significantly greater it could keep ice considerably longer and would beat most coolers.
4. Thermal cooker is portable while the slow cooker is not
One huge advantage of the way that thermal cookers don’t need to be plugged into an electricity port is that you can take them anyplace with you.
You could take it to work with you to have for lunch, or supper on the off chance that you’re having a late evening. You can take it on a picnic with you or I could even prepare it toward the beginning of the day at home and take it with you to explore the world while having a decently prepared feast all set at dinnertime.
Honestly, this thought of being portable to go on trips or visiting places is one of the fundamental reasons I’m thinking about a thermal cooker over a slow cooker.
5. Slow cooker can cook smaller meals whereas thermal cooker needs to cook an adequate amount of food
Slow cookers can really prepare smaller quantities of meals the entire day without issue.
Nonetheless, thermal cookers depend on the heat energy currently in the food to keep it hot. Assuming you have a smaller food quantity, then there is less energy and food can chill off excessively fast.
For the little amount of food cooked, you truly need a smaller thermal cooker to be effective, which is an additional cost. In any case, with a slow cooker, you can without much of a stretch cook little meals very much like you can prepare huge meals. The quantity of the food cooked isn’t an issue.
This is more helpful for single individuals or couples who just need to make a small amount of food only.
6. You can cook using gas with a thermal cooker
Slow cookers require consistent power to work. Be that as it may, thermal cookers simply expect you to warm up your food in the inward pot first.
This should be possible utilizing either a gas or induction stove. So on the off chance that you’re outside camping and don’t have access to electricity or you have a gas stove, then a thermal cooker will work for you.
You can prepare your food ahead of time and go on with your camping activities. When it’s lunchtime, simply open up your thermal cooker. You’ll have warm food well cooked and ready for consumption.
7. Thermal cooker can be used to transport hot food
Thermal cookers are really perhaps the most ideal way to keep food hot in a hurry.
Since they use vacuum protection they are incredible at keeping food hot for a significant stretch of time.
You don’t need to prepare food in them yet you can preload them with currently prepared food and it will keep it hot for several hours (or considerably longer).
So you can utilize a thermal cooker to move food to a companion’s house, take it to a patio barbeque party or go camping despite everything having hot food to eat when you’re prepared.
It can likewise be extraordinary for keeping food hot at a party. It’s a really flexible piece of cooking gear.
There are certainly pros and cons of the two cookwares. There’s no saying that one beats the other but more how each adapts to your lifestyle.
If you love eating home-cooked meals and being out there, a thermal cooker is probably the best. A thermal cooker also brings forth other benefits. Check out our blog for more!
On the other hand, if you love to enjoy certain recipes that tend to taste better over long periods of cooking, a slow cooker might be the best for you.
10+ Awesome Advantages Of Thermal Cooker That Makes You Want To Get One
Advantages Of Thermal Cooker
A thermal cooker is unbelievable one of the most convenient cookware that you can have. It works like a thermal flask but instead of water, you put food in it and it cooks over time. So, it’s just prepared then get on the ride to the beach or picnic. By the time you’re there, the food is done cooking. Here are more advantages of thermal cooker you should know about.
Here are the advantages of thermal cooker:
1. Portable
The thermal cooker is cordless and doesn’t run on electricity. Once you’re done heating the food up in the inner pot, transfer it into the container and it will continue cooking.
You can carry this portable thermal cooker to potluck gatherings, visit neighbours, boating, to the lake and all that you can think of. It is just that convenient.
When you open it, the food remains warm and you can enjoy it with your loved ones! Portability by far is one of the greatest advantages of a thermal cooker.
2. Save electricity
Conventional cooking involves putting your food on a stovetop and cooking it with your woks and pans. This goes on until the food is fully done and ready to serve.
With a thermal cooker, you just need to put the ingredients and heat it up with the lid on for about 10 minutes. As you see steam coming up, put it into the container.
The power consumed is just at the stage where you need to cook the food to a boil. After that, you can cut off the power and let the dish continue to cook inside the thermal cooker.
So, you don’t have to be there to cook the dish until it is well done. That’s a significant cut of cooking time.
3. Save the space on the countertop
These advantages of a thermal cooker come in handy when you have to cook a lot of dishes for gatherings and celebrations. It’s so nice to have things cooking while they’re not taking up the space in the kitchen.
In fact, one household can have multiple thermal cookers in place to cook multiple dishes at a faster pace.
You can have curry chicken cooking in one pot and ABC soup cooking in another while you’re stir-frying the veggies. Imagine having the traditional stovetop, you can only cook a dish one at a time. This accumulatively takes a longer time.
4. Don’t need to worry about overcooking
A thermal cooker is designed to retain heat as much as possible for as long as it can. There’s no electricity involved to power it. The temperature will drop over time at a very slow pace.
Therefore, it’s cooking through this heat retention feature. So, it’s not going to overcook at all.
The food will still taste great and it won’t’ fall apart.
5. Food retains integrity
When you cook soup on the stovetop, you will notice that the soup eventually becomes murky or cloudy. The boiling process knocks the ingredients together, causing the ingredients to be mushy as it goes and dissolve into the soup.
This is not the case with a thermal cooker. There are no boiling bubbles that push the ingredients to give it a stir. On the other hand, it is all cooked in a retained heat atmosphere.
Hence, the outcome is that you will get tasty soup that is both flavorful and looks clear. This is one of the advantages of a thermal cooker that other cookware doesn’t provide. It’s a total plus point in food presentation!
6. Have a meal when you’re convenient
You can make a meal for your loved ones at the time when you’re most convenient. Like when you’re making breakfast, you can already prepare for lunch and dinner by using a thermal cooker.
You don’t need to allocate special time to prepare the ingredients and cook the lunch and dinner separately. Just prepare beforehand when you’re making that breakfast and let the thermal cooker continue to cook throughout the day.
There’s no fuss about cooking time especially when you’re busy throughout the rest of the day. Just eat whenever you want to.
7. Highly nutritious food
As a result of the short measure of time spent on the burner, and since all the cooking and hotness is held inside with no dissipation, all the decency stays inside. It retains flavour, minerals, and supplements; produces less smell, oil, and smoke in the kitchen. Never overcooks and is easy to clean your thermal cooker without any problem.
8. Saves time
You are not held back to be in the kitchen to cook your food. With a thermal cooker, you can put your food in it and be on the go.
Get in the car and take the thermal cooker with you. Go on with the rest of your activities without worry. When it’s mealtime, open up to delicious hot food ready just for you. This is one of the best advantages of a thermal cooker that other cookware can’t offer.
9. Safe for children
The outer pot of the thermal cooker is usually always cool. Hence, you don’t have to worry if your children touch the surface by accident. There’s no risk of burn.
You can have them carry the thermal cooker into the car for you just fine. Just be sure to place it securely so it doesn’t tip over.
10. Save money eating home-cooked meals
Home-cooked meals are always cheaper as you don’t have to pay the delivery fees and other overhead costs to get the meals prepared for you.
You can go on a long road trip without the need to worry that there’s no eatery along the trip. In fact, save money by eating the warm food that you’ve brought in your thermal cooker.
Best of all, you can also bring delicacies back to your home from the trip. Just remember to heat it up before putting it into the thermal cooker.
11. Can be left unattended
The thermal cooker does not need electricity or pressure to cook the food inside. It cooks the food through heat retention. You don’t need supervision or monitoring for it.
You can cook anywhere indoor or outdoors. Whether you’re travelling or going to camp, the food can be cooked while you are on the move in a safe manner.
Thermal cookers do work wonders. It is well-suited for modern-day living for people with hectic schedules. It is almost certain that once you’re accustomed to how to use it, you will be appreciative of the tons of advantages of thermal cooker that is brought to your life.
However, this often confused with what a slow cooker can do. Slow cooker is different than a thermal cooker in terms of how they operate. Be sure to read our blog for more info!
For more details on how to cook with a thermal cooker, be sure to check out our blog and read all about it!
Yam Ring Basket With Celebrity Chef Amy Beh
Yam Ring Basket By Celebrity Chef Amy Beh with La gourmet Pressure Cooker
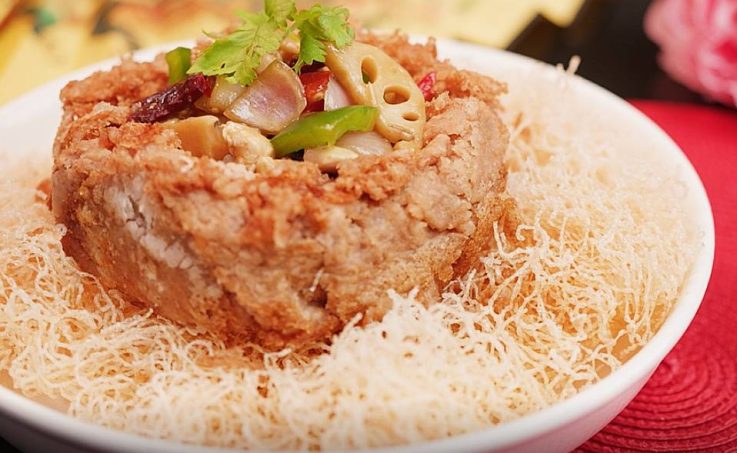
Mashed yam paste is formed into a ring and afterwards singed and loaded up with pan sear chicken and vegetables or any filling of your decision and served on a bed of fresh rice stick noodles. This is a well known Chinese New Year food you can without much of a stretch make at home.
The recipe may seem difficult to do but with our recipe guide here featuring celebrity Chef Amy Beh, you’ll catch on in no time!
Prosperity Yam Ring is a dish to start off any festival. It’s generally served in the Spring Festival 金芋满堂喜迎春, Jīn yù mǎntáng xǐ yíng chūn. Like some other food served during Chinese New Year, it has an auspicious significance. The yam ring basket or fatt putt is filled to the edge imply a spilling over of fortune (phoon woon put woon 盘满钵满 in Cantonese)
The yam ring basket gets its name from the Buddhist alms bowl (fatt putt). It is no big surprise the yam ring basket bears similarity to this said bowl.
This is a conventional dish that is normally served at weddings or Chinese New Year. The primary ingredient is yam which normally forms into a ring and is afterwards deep-fried.
The yam ring basket is then put on top of a bed of fried noodles, commonly used is rice vermicelli. With respect to the filling, it’s ordinarily a combination of sautéed meat, sea produce, and a variety of brilliant and delightfully cut vegetables.
Fresh outwardly and delicate substantial yam inside loaded up with appetizing meat as well as vegetable pan-fried food is actually a crowd-pleaser. Plus, the fancy deep fried rice vermicelli forms a beautiful nest where the yam ring will sit.
Here’s how to make this:
Ingredients for golden yam ring basket
- 300 grams yam (cut into thin slices)
- 60 grams wheat starch
- 1/2 tsp baking powder
- 1/2 tbsp 5 spice powder
- 1 tsp sugar
- 1 tsp salt
- 30 grams shortening
- 90 ml hot boiling water
- 1 piece deboned chicken whole leg (cubed)
- 20 grams red capsicum
- 20 grams green capsicum
- 100 grams local lotus roots (sliced)
- 20 grams big onion (cubed)
- 3 dried chilis (cut into sections)
- 1 tsp light sauce
- 1/4 tsp dark soy sauce
- 1 tbsp oyster sauce
- 2 – 3 tbsp water
- 1/2 tsp chicken stock powder
- dash of pepper
- 1/2 tsp sugar
- 30 gram rice vermicelli
- adequate cornflour slurry
- dash of shaoxing wine
Instructions for golden yam ring basket
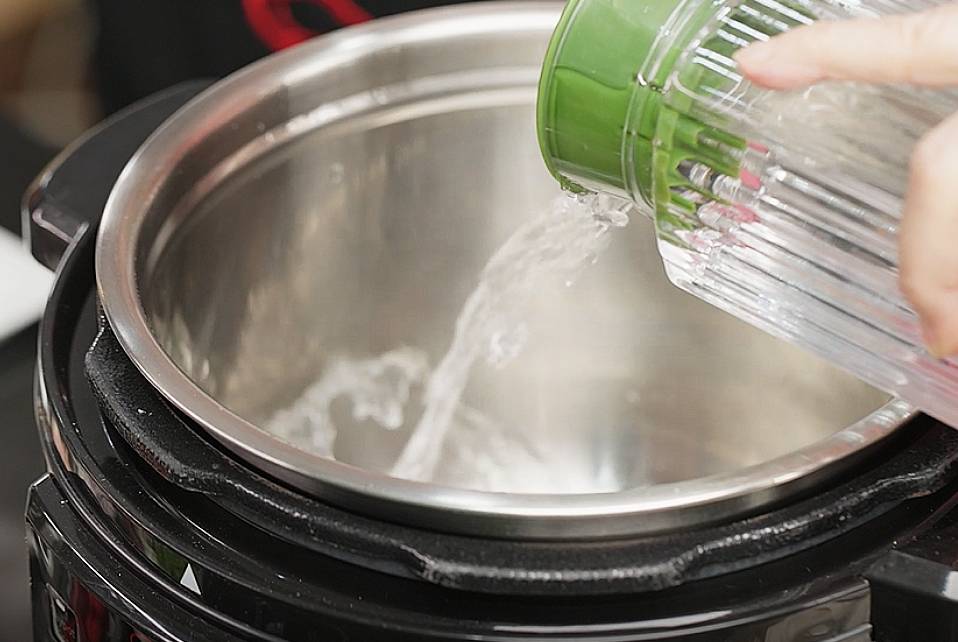
1. First, add water into the stainless steel pot of La gourmet pressure cooker. Then, put the yam in for steaming.

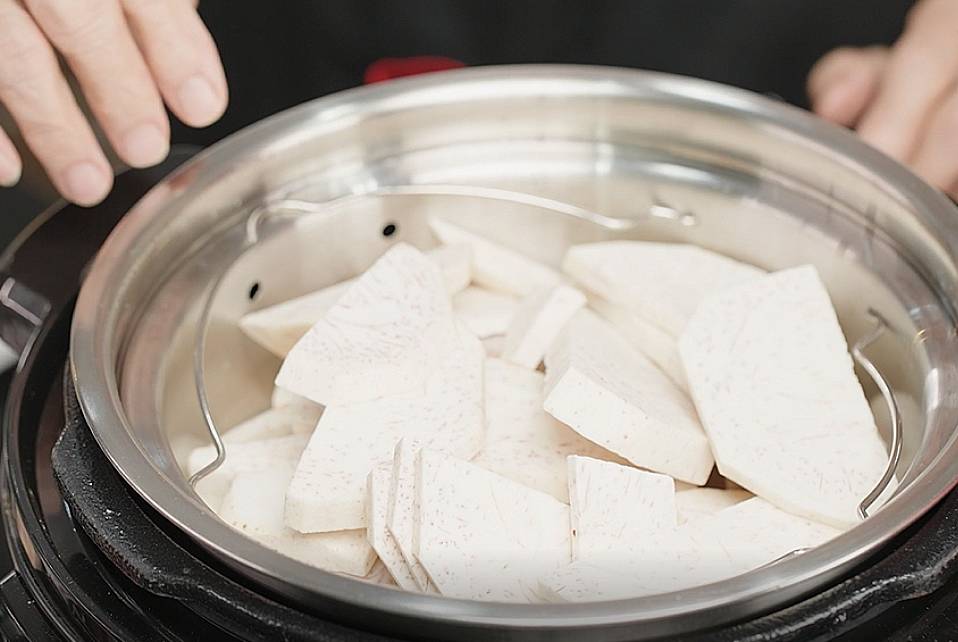

2. Lock the lid of the pressure cooker then. Press the “Steaming” button. The pressure cooker will start the cooking process on its own.
While waiting for the yam to be steamed, we will do the filling for the golden yam ring basket.
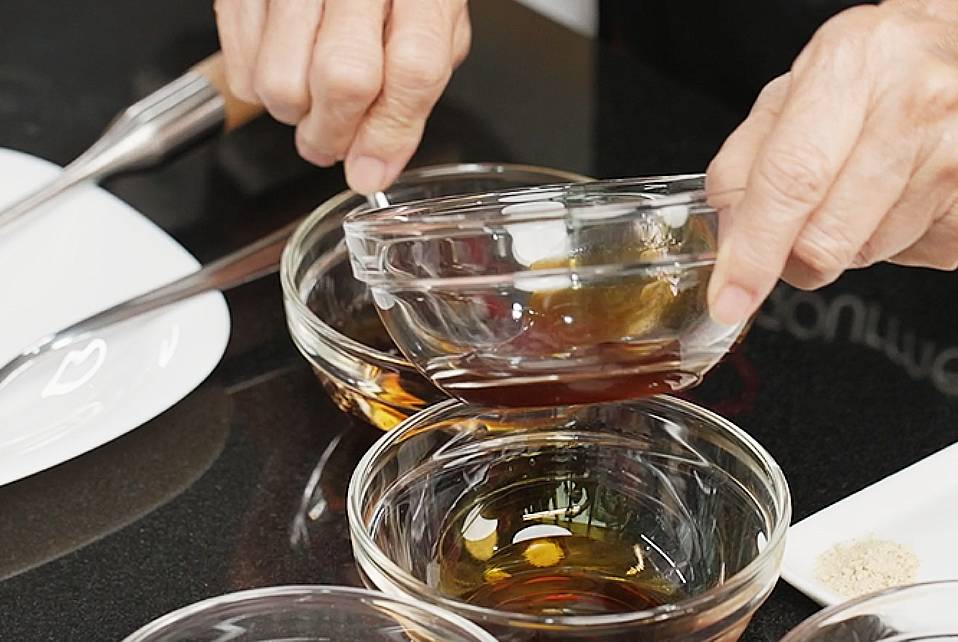
3. Add in light soy sauce, oyster sauce, dark soy sauce, pepper, chicken stock and sugar into a bowl and mix. Dark soy sauce has a light taste yet it is vastly used in cooking mainly for the color.

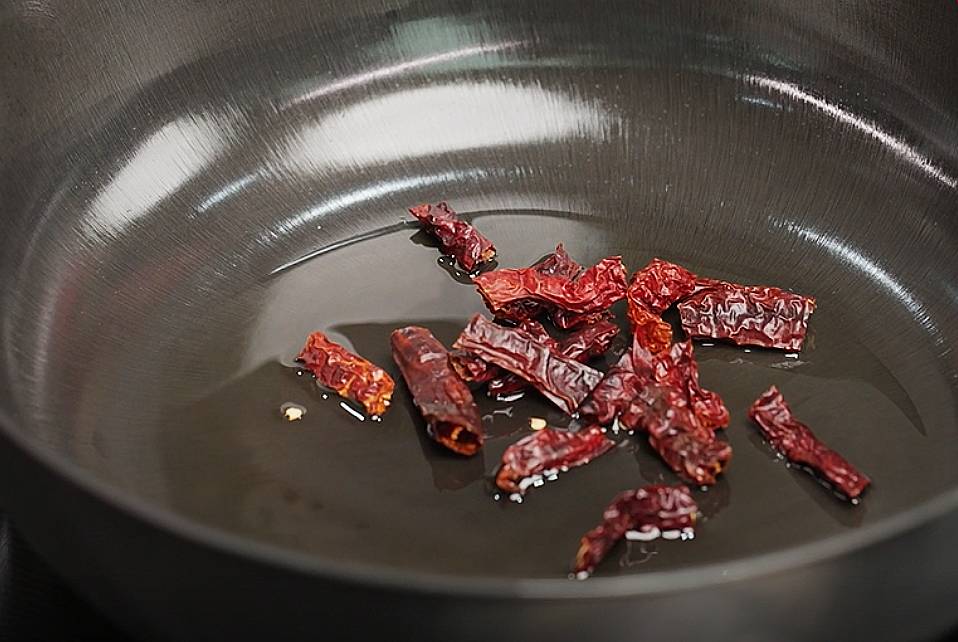
4. Heat the oil and add in the dried chilli. Lightly stir fry it to get the fragrance and spiciness out.

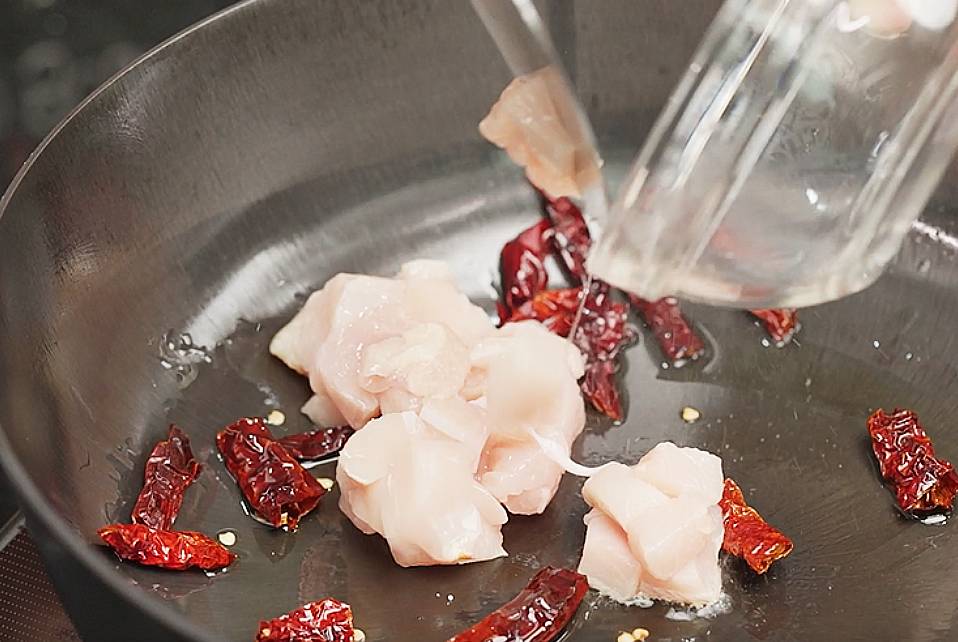

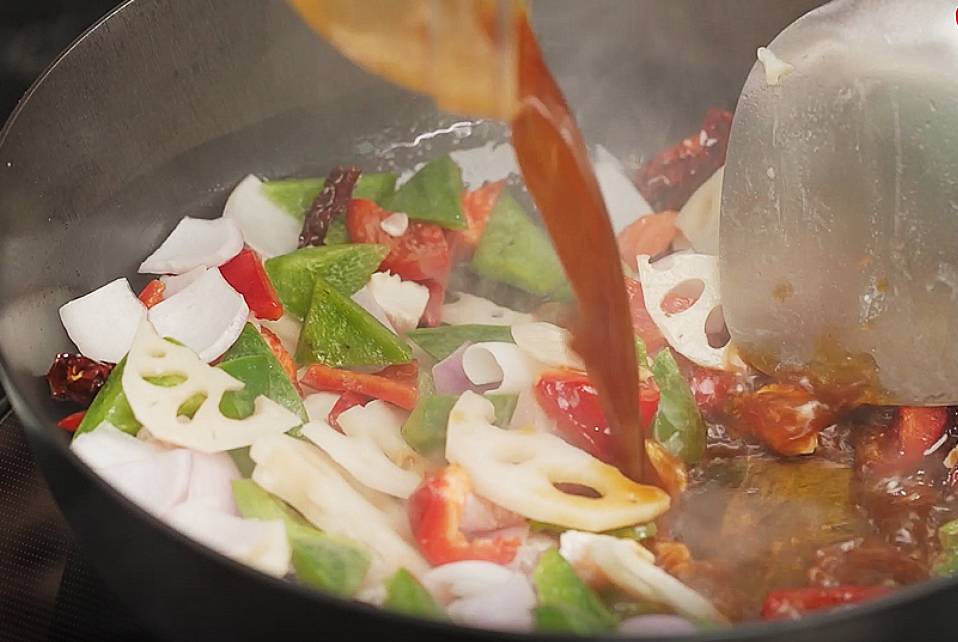

5. Then, add the chicken, lotus root, red capsicum, green capsicum, red onions and sauce. Stir fry together until they are well-combined.
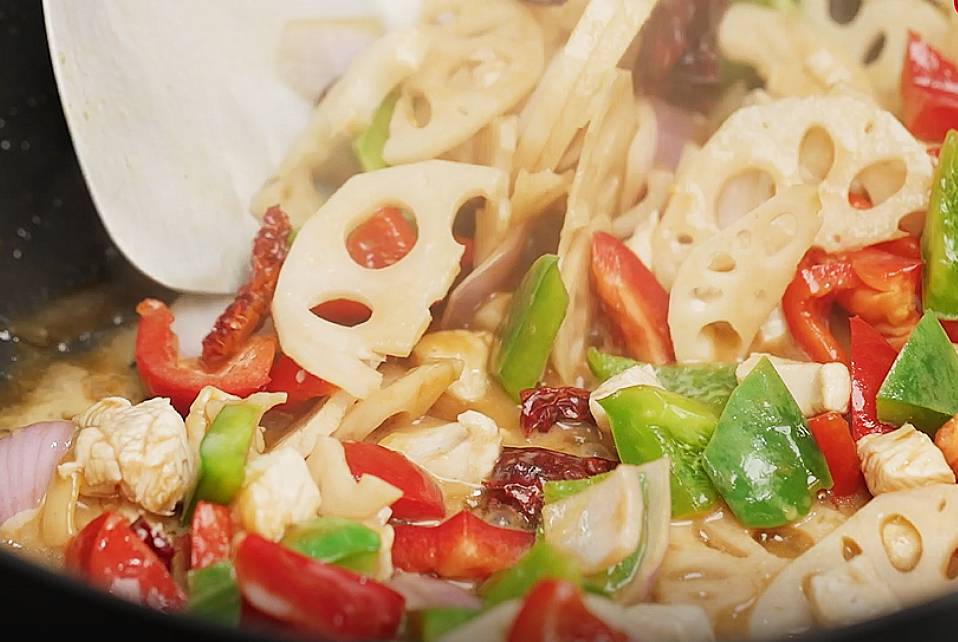

6. Add in the corn starch slurry gradually while stirring continuously.
Next prepare the wheat starch paste. Take the steamed yam out from the pressure cooker.
7. Add boiling water into the bowl of wheat starch to make the paste.
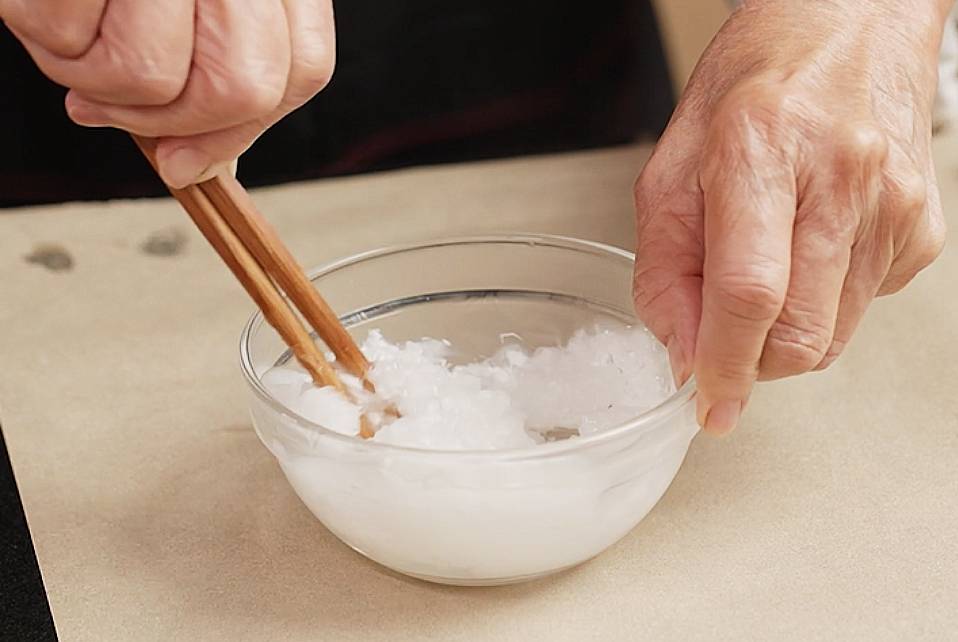

8. Mash the steamed yam. Then add the wheat starch paste and mix it together.
Add 5 spiced powder, baking powder, salt and sugar into the paste and mix them well. Add in shortening and continue mixing it.
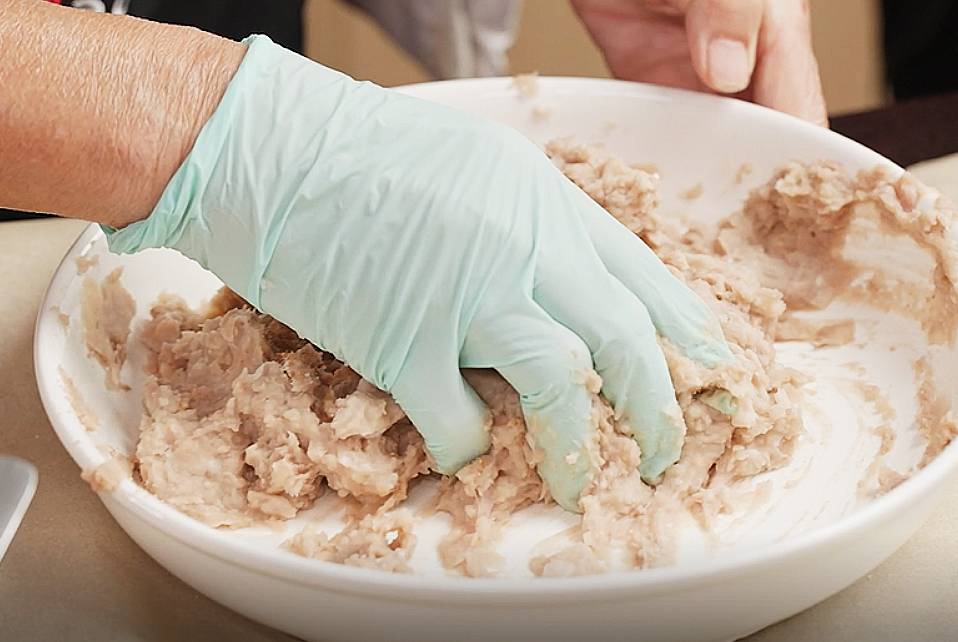

9. Transfer the paste onto the parchment paper to shape the yam ring so it will be easier to work with.
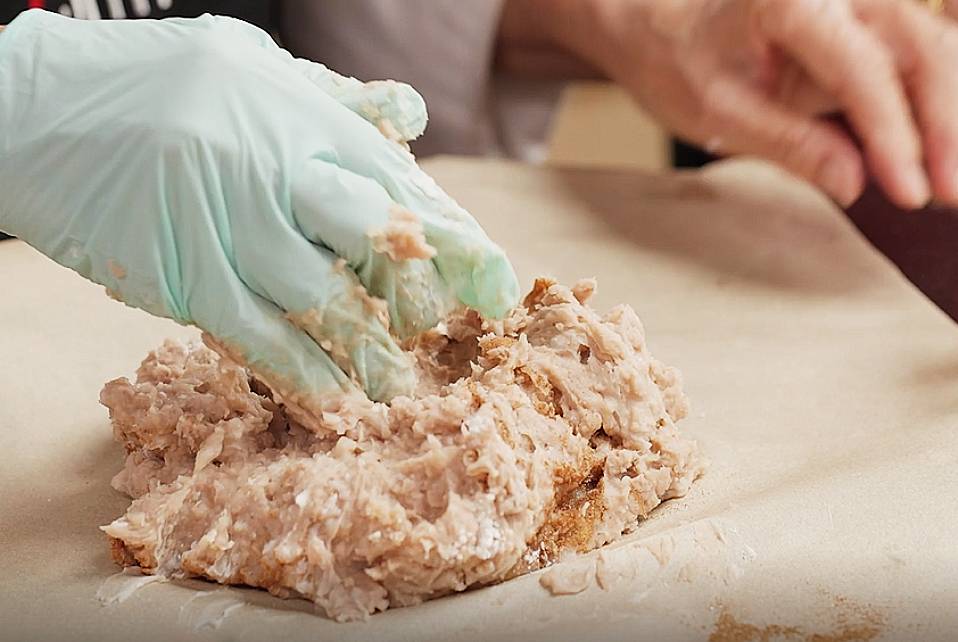

10. Put a cling wrap on top and roll it with a rolling pin. The cling wrap will prevent the paste from sticking to the rolling pin.
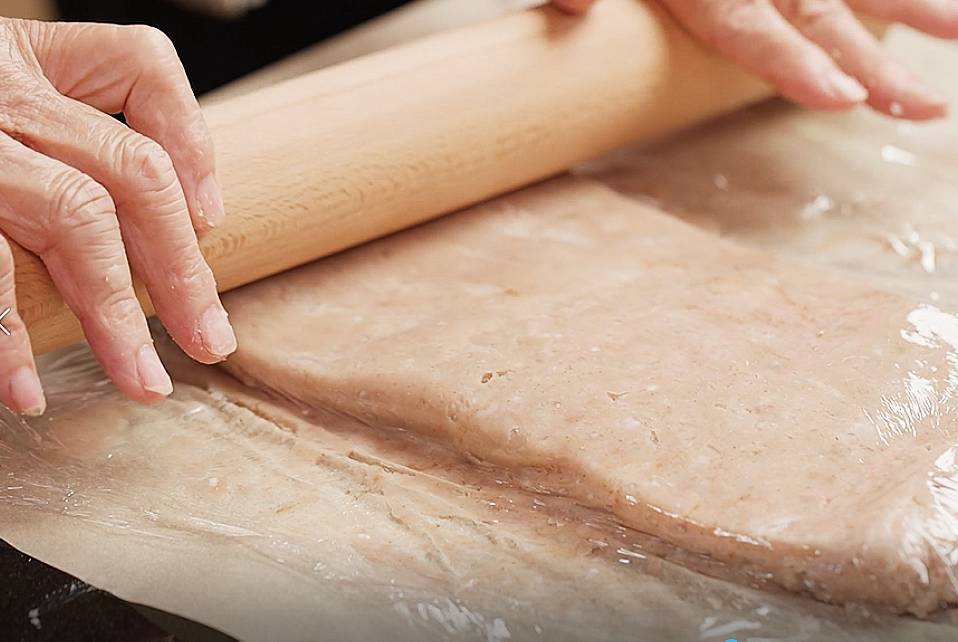

11. Form a rectangular block that is slightly thick. This will then be rolled to form the yam ring basket shape. After shaping it, cover it with parchment paper and leave it in the freezer for about an hour. Freezing it will help the yam ring to keep its shape.
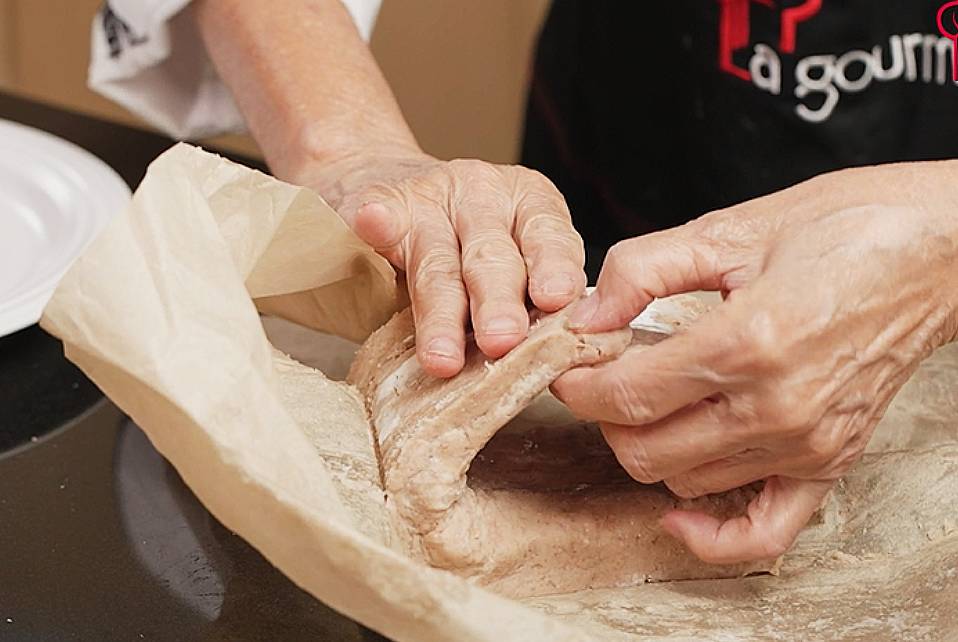

12. After that, take it out and form the yam ring basket shape. Stick the paste from end to end to form a cylindrical ring.
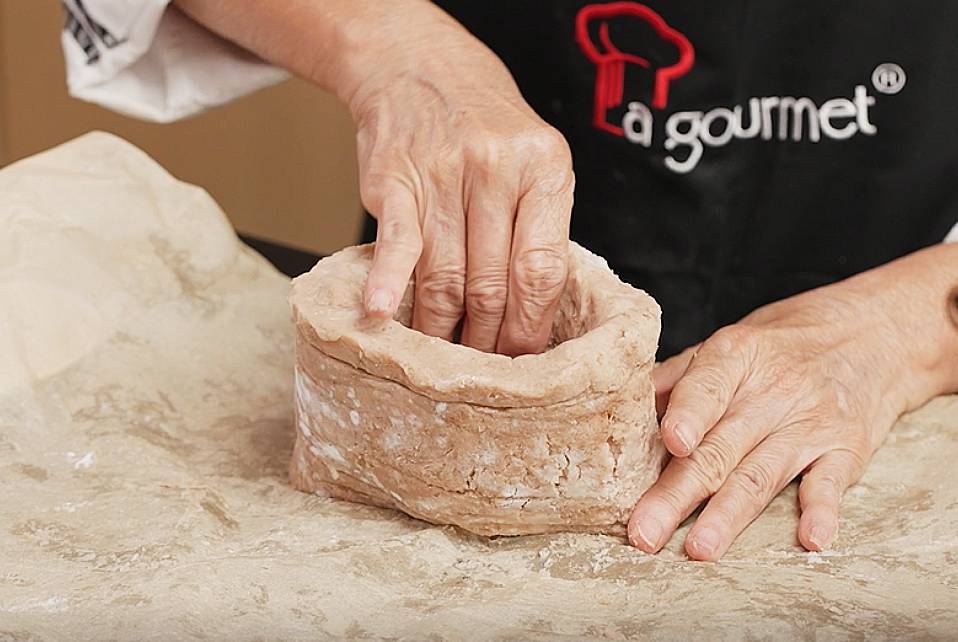

13. Heat the oil in the Nitrigan cast iron wok for deep-frying. To test if the oil is hot enough, stick a wooden chopstick into the oil, and on the off chance that you see huge air pockets conformed to the chopstick, it’s hot and ready. The bigger the air pockets, the higher the oil temperature is.
You can also drop a piece of rice vermicelli onto the oil. If it’s hot enough, the rice vermicelli will get fried and float to the top.
14. Dip the frying strainer into the hot oil before placing the yam ring basket on it so it won’t stick.
15. Then, move the yam ring basket onto the frying strainer carefully, then dip it into the hot oil.
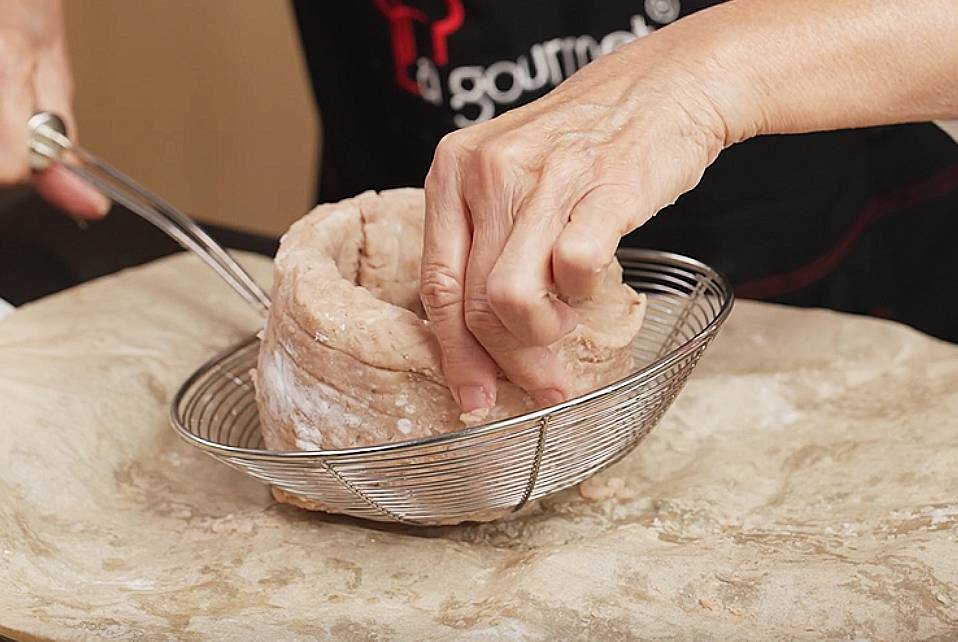

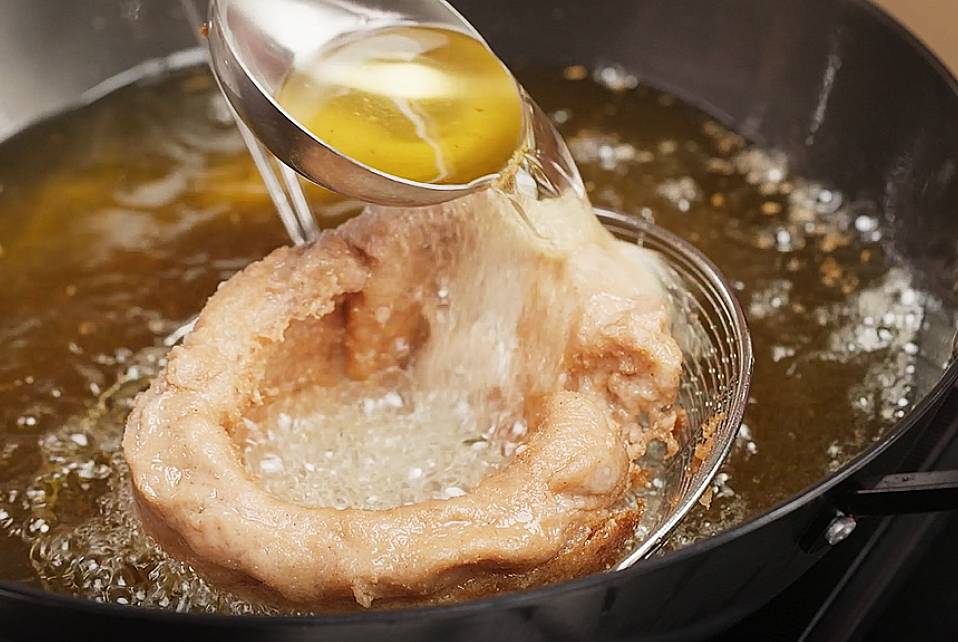
In the event that your oil doesn’t cover the entire yam ring basket, utilize a spatula to spoon the hot oil over the highest point of the ring. Fry until it turns golden brown.

16. After that, we will fry the rice vermicelli. Wait for it. It will blossom and float to the top. The rice vermicelli is, even more, a “style” purpose as it were. Albeit certain people might eat them, they are very tasteless. It’s probably better to have additional sauce or ingredients to go along with it. So it is truly discretionary to include this in the dish.
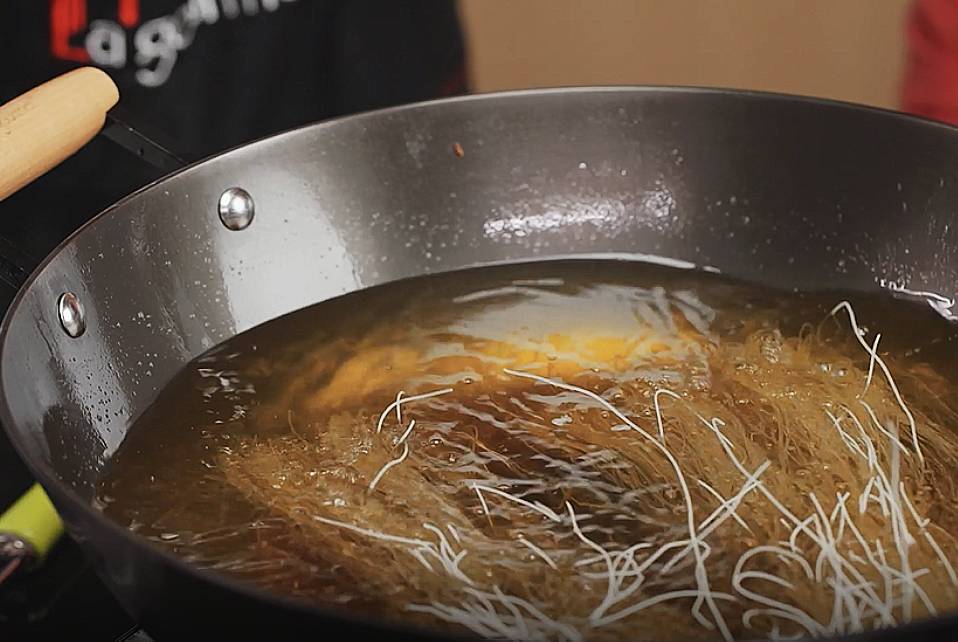

The rice vermicelli will quite often become brown as well. To prevent this, the oil would be exceptionally hot and when they are solidified, quickly take them out of both oil once they float.
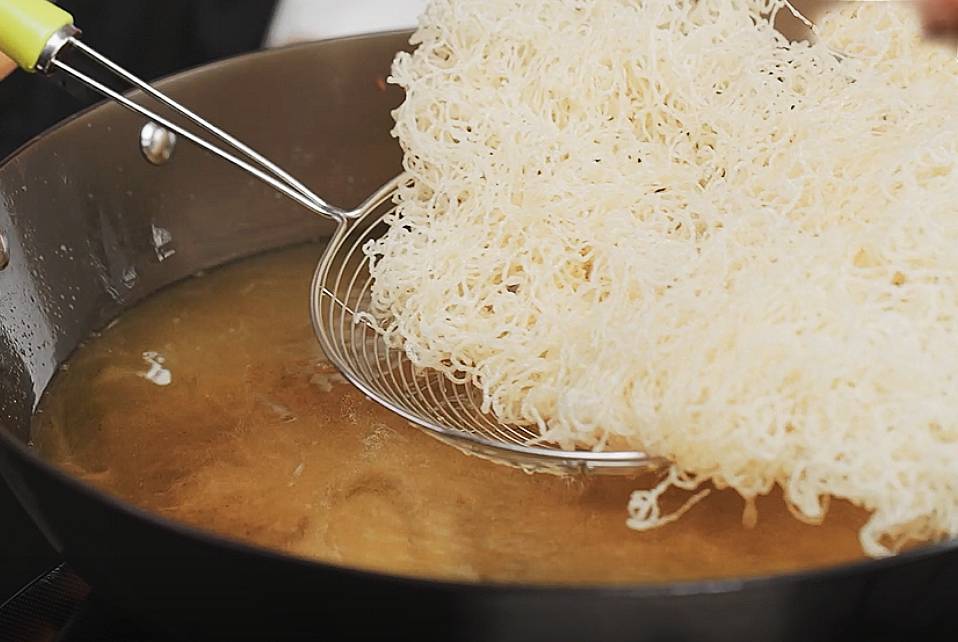

17. Scoop the fried rice vermicelli onto a plate. Then, place the fried yam ring on top of it.
18. Fill in the inside of the ring with the filling prepared earlier. Add garnishing with coriander leaves. Enjoy this Instagram-worthy dish!
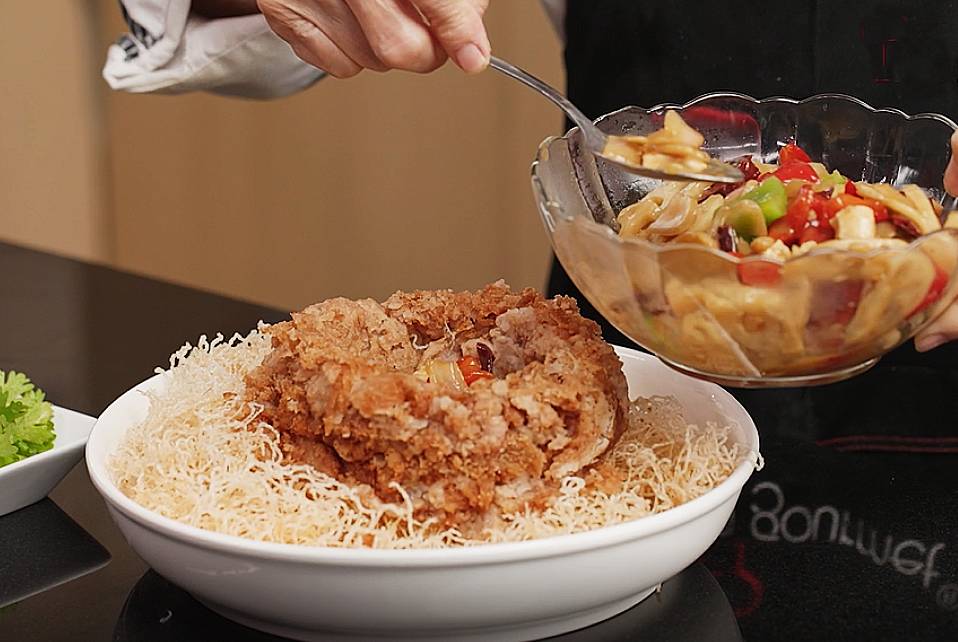

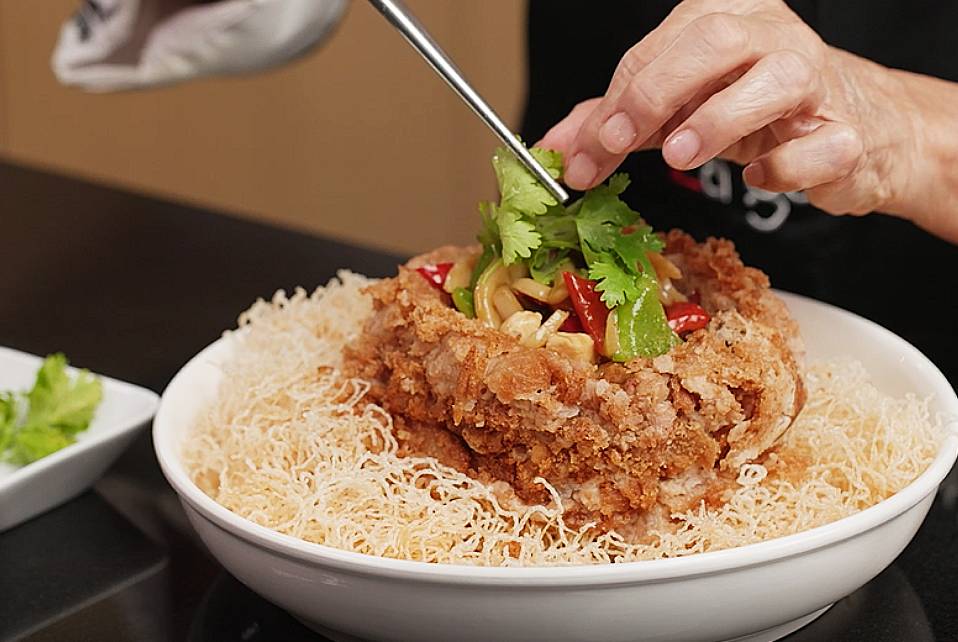

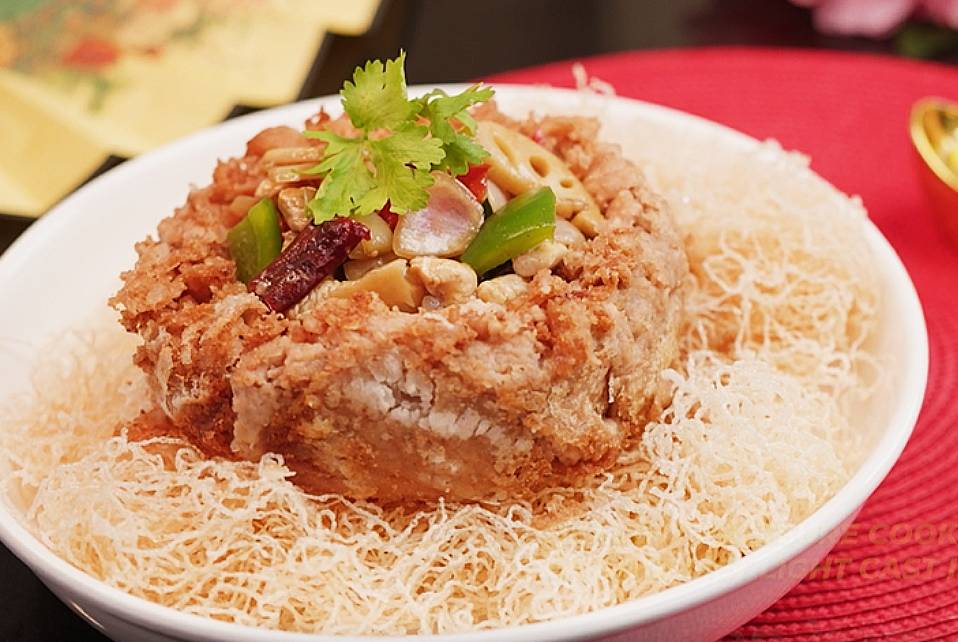

Serve while it’s hot!
Don’t forget to check out our ongoing cookware promotions on our website!
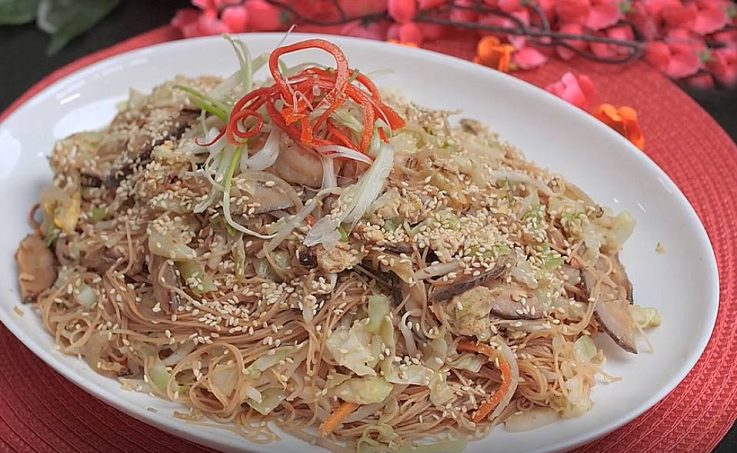
Longevity Noodles Recipe By Celebrity Chef Amy Beh
Longevity Noodles Recipe By Celebrity Chef Amy Beh with Nitrigan Cast Iron Wok
Longevity is one of the most loved ideas in Chinese culture, alongside bliss, fortune, and success. Life span was accepted to be a definitive gift. In old times, rulers and rulers even had pills of eternality arranged for them.
During Chinese New Year, long noodles are eaten on all sides of China. “Life span noodles,” likewise introduced at birthday festivities, another child, a wedding, or a lunar new year feast, are never cut or broken by the cook, and assuming that they can be eaten without gnawing through the strands, it’s viewed as significantly more fortunate. Life span noodles are a significant part of this multitude of blissful occasions.
These noodles are generally served at Chinese New Year’s dining experiences. An antiquated Chinese conviction says that long noodles are the way into a long life so don’t cut the noodles as you eat them.
Since the longer the noodles, the more auspicious it will be, we will be using mee sua for this recipe. For obvious reasons, don’t go for the spaghetti!
Here’s how to make this longevity noodles:
Ingredients:
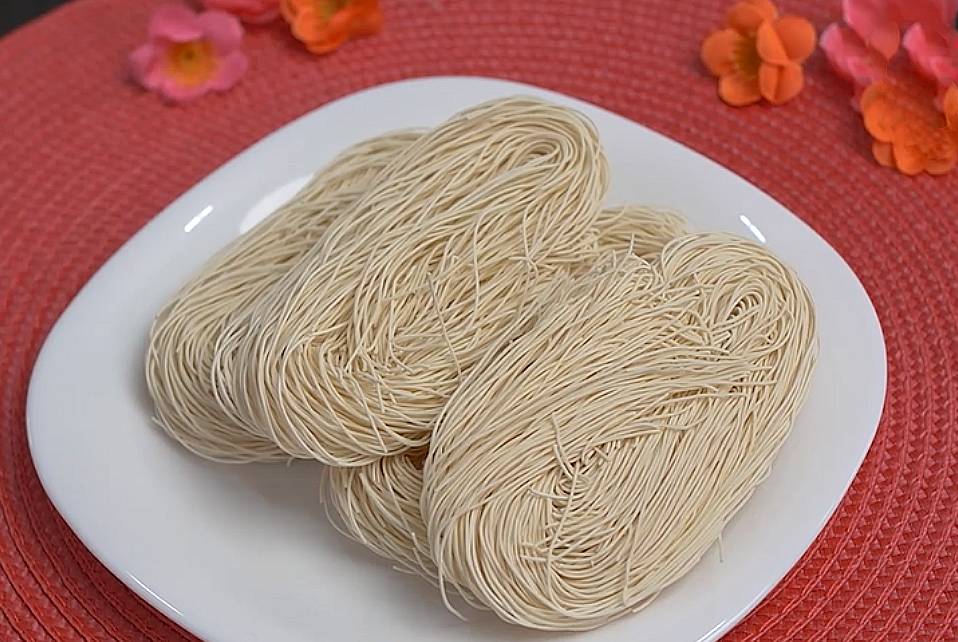

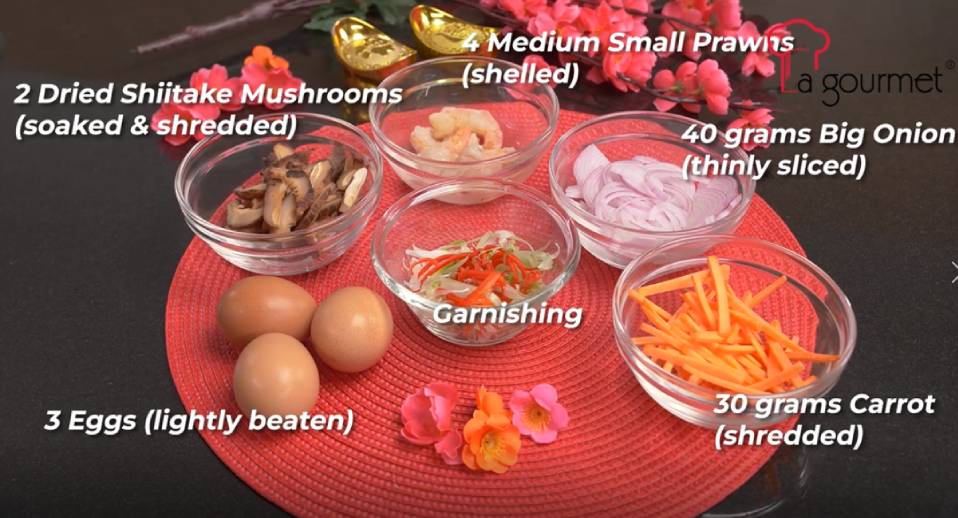

- 3 bundles of flour vermicelli (mee sua)
- 2 cups cooking oil (for deep-frying)
- 1 tbsp sesame oil
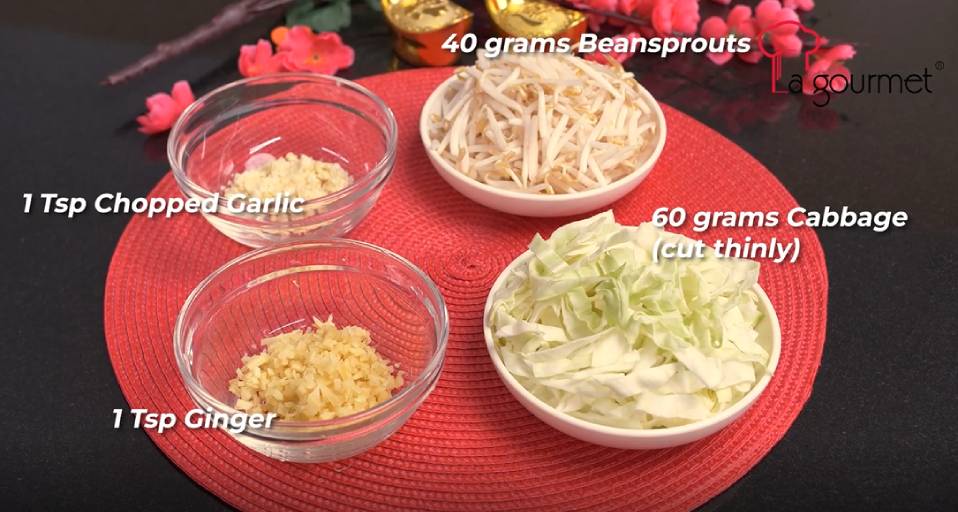
- 1 tsp chopped garlic
- 1 tsp ginger
- 3 eggs (lightly beaten)
Ingredients A:
- 4 medium small prawns (shelled)
- 2 dried shiitake mushrooms (soaked & shredded)
- 30 grams carrot (shredded)
- 40 grams big onion (thinly sliced)
- 60 grams cabbage (thinly cut)
- 40 grams beansprouts
Seasoning:
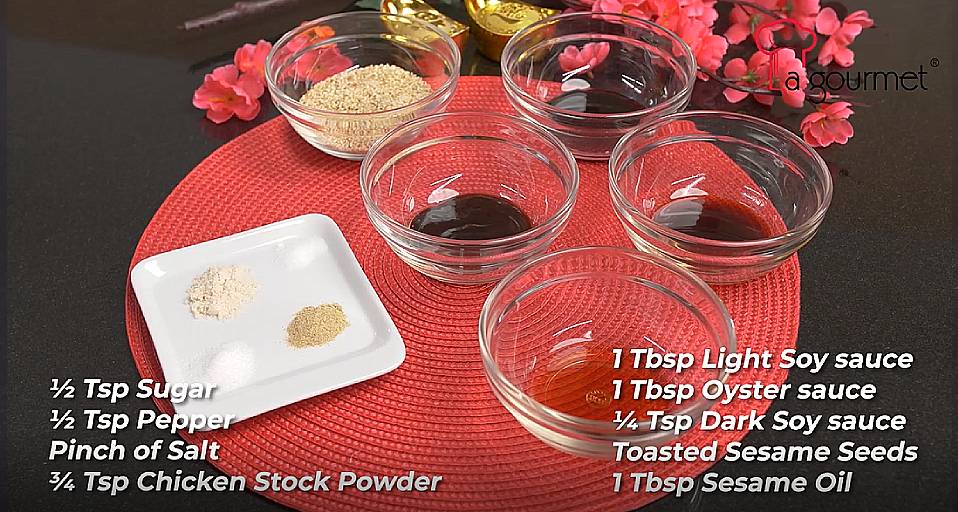

- 1 tbsp light soy sauce
- 1 tbsp oyster sauce
- 1/4 tsp dark soy sauce
- 1/2 tsp sugar
- 3/4 tsp chicken stock powder
- 1/2 tsp pepper
- 1/2 cup water
- A splash of Shaoxing wine (optional)
- pinch of salt
Garnishing

- Spring onion & coriander leaves (chopped)
- Red chilli curls
- Adequately toasted sesame seeds
Directions for this Longevity Noodles recipe:
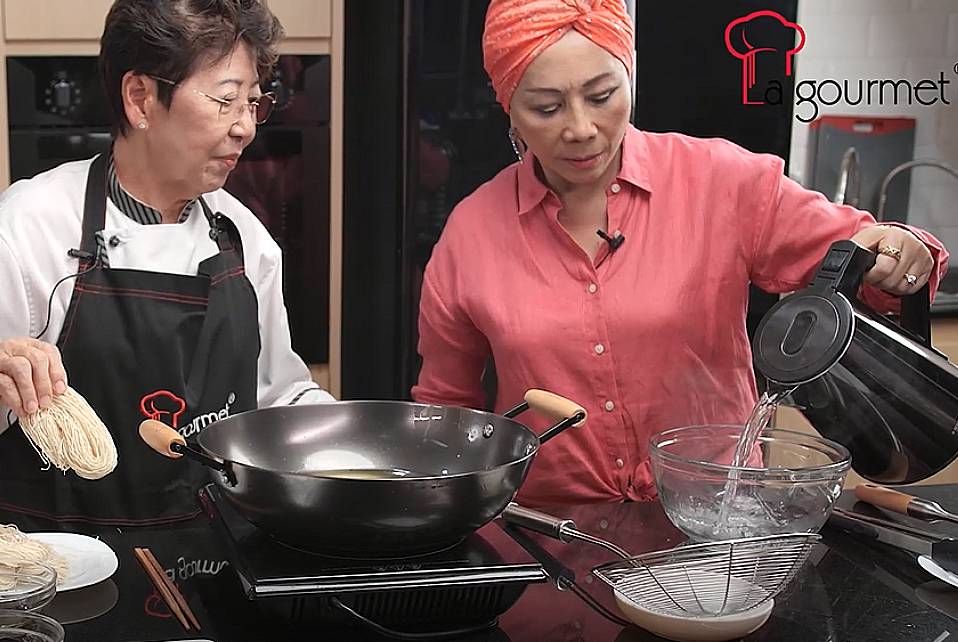
1. Prepare hot boiling water in a bowl. Fill it just enough to soak all the noodles.

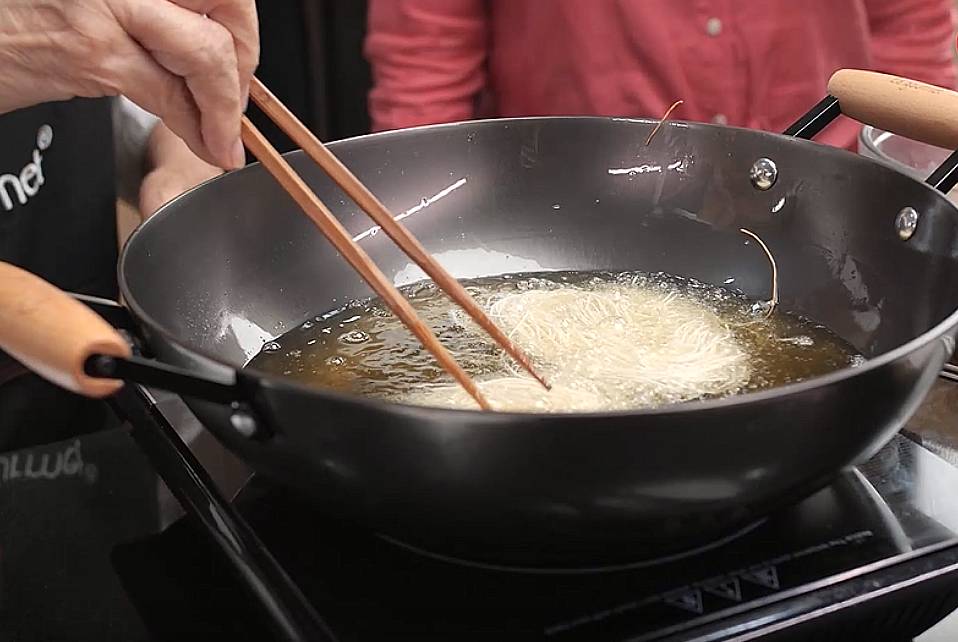
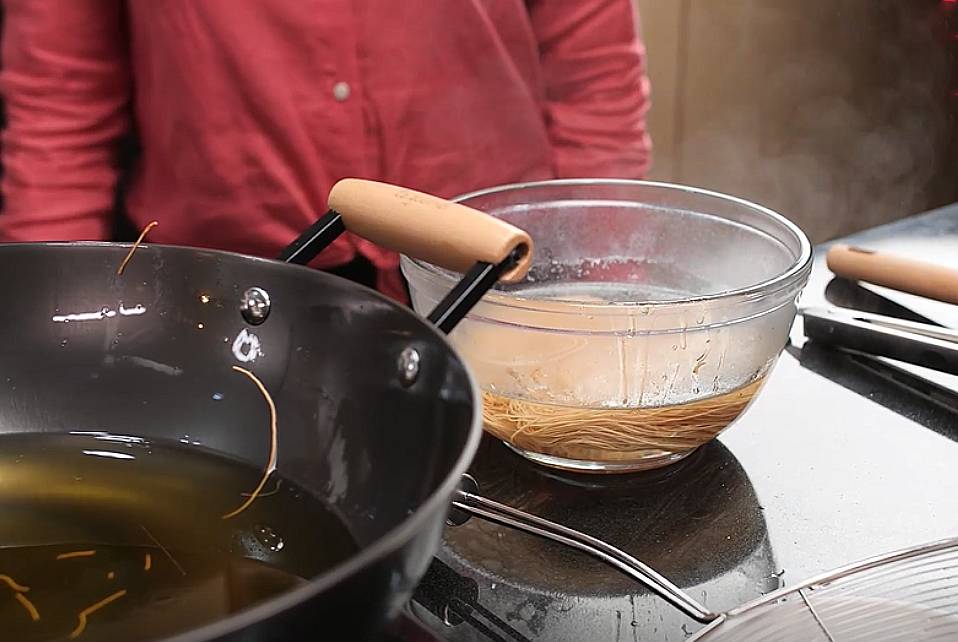
2. Fry the vermicelli noodles for a while until it turns golden brown.

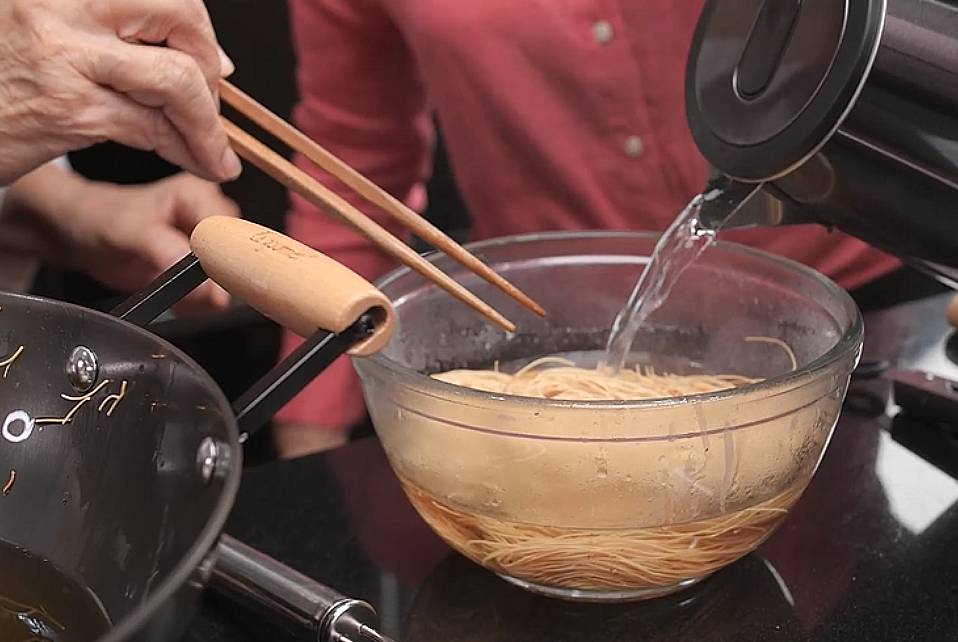
3. Transfer the fried vermicelli into the hot water. Let it soak. This will remove the oil from the vermicelli noodle. Let it sit a while until it softens.
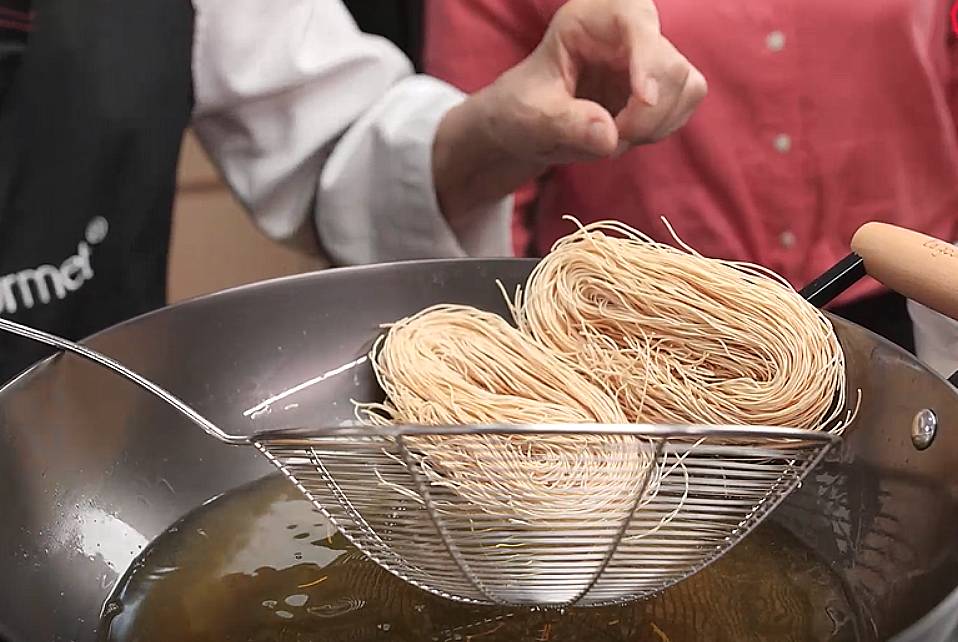



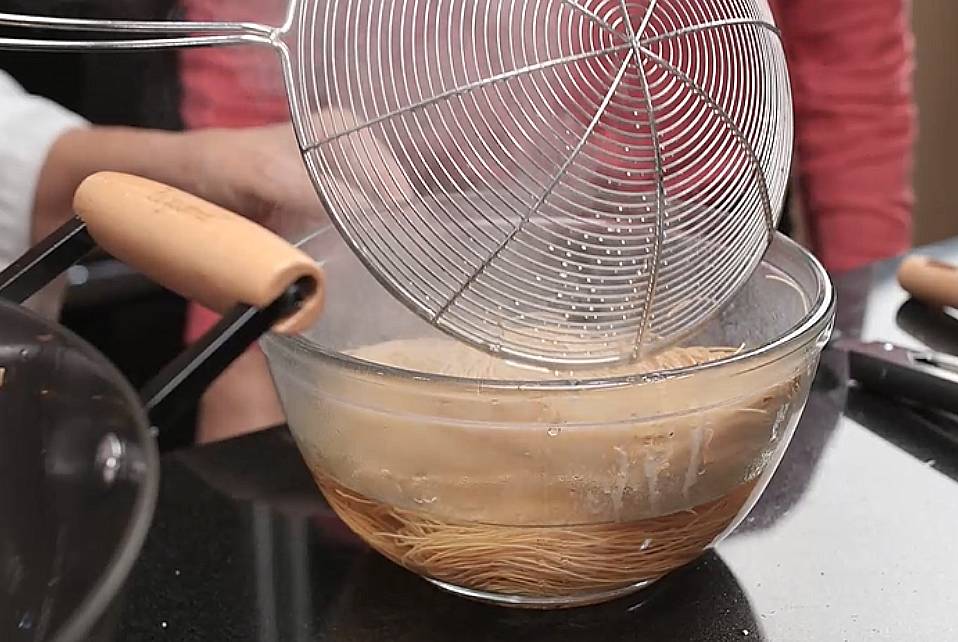

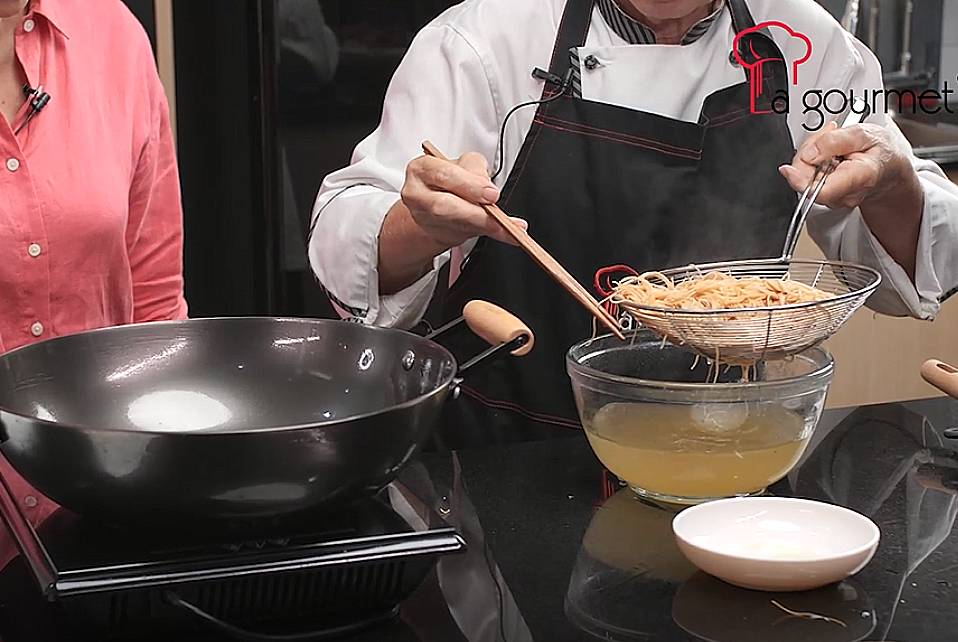

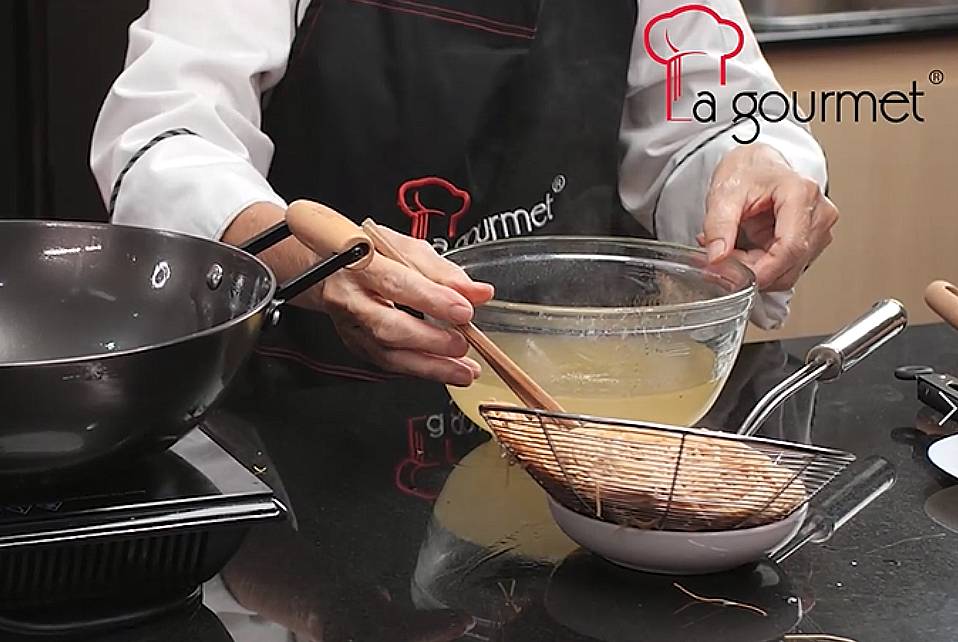
4. Once the vermicelli noodle softens, let it drip dry.

5. Now, let’s prepare the sauce. Mix dark soy sauce, oyster sauce, Shaoxing wine and light soy sauce. Then, add a little bit of hot water and stir. Add in a bit of salt, chicken stock powder, sugar and a dash of pepper and stir.
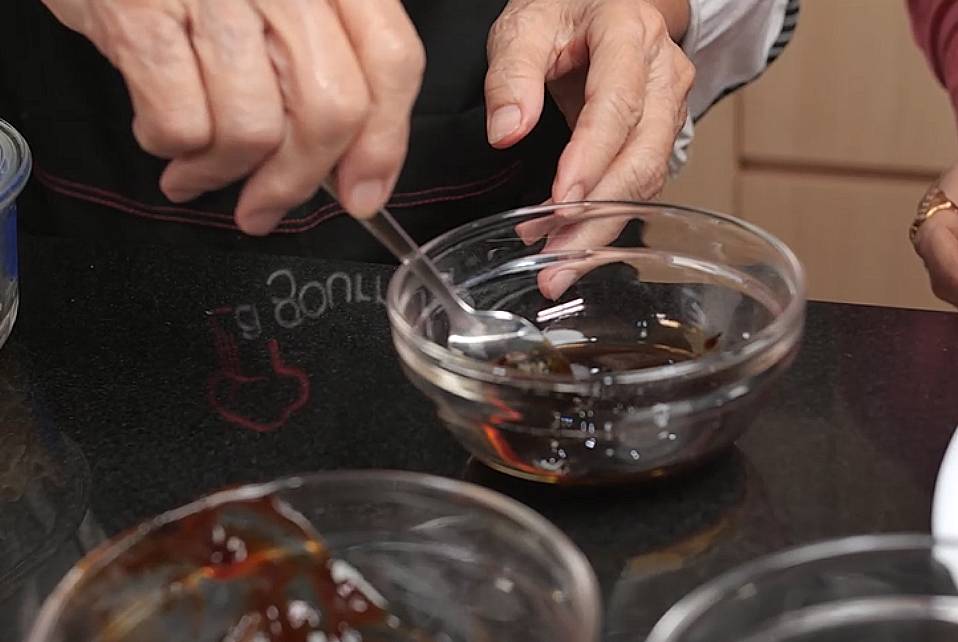

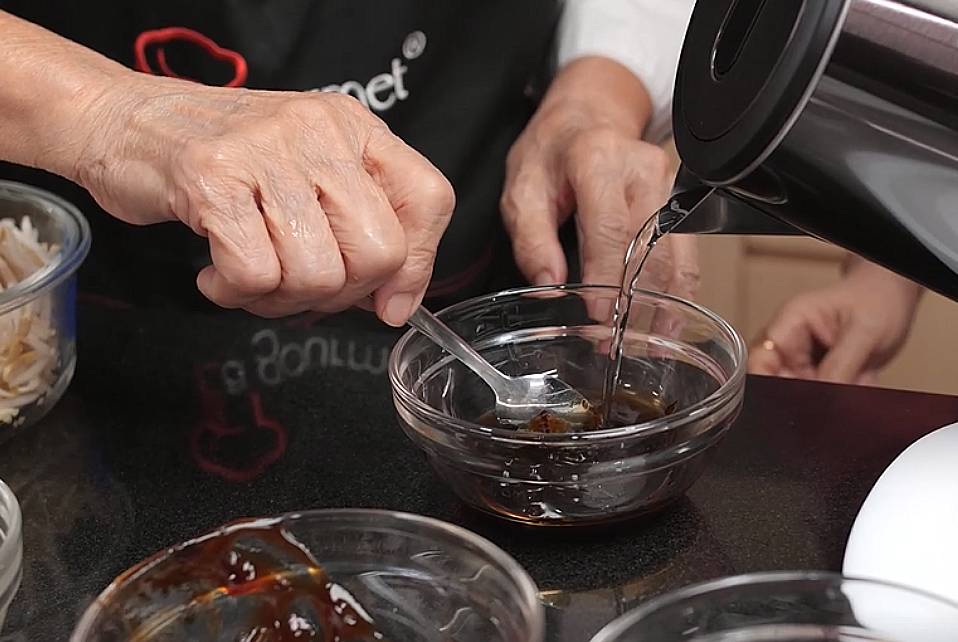

6. Next, break 3 eggs into a bowl. Lightly beat up the egg.
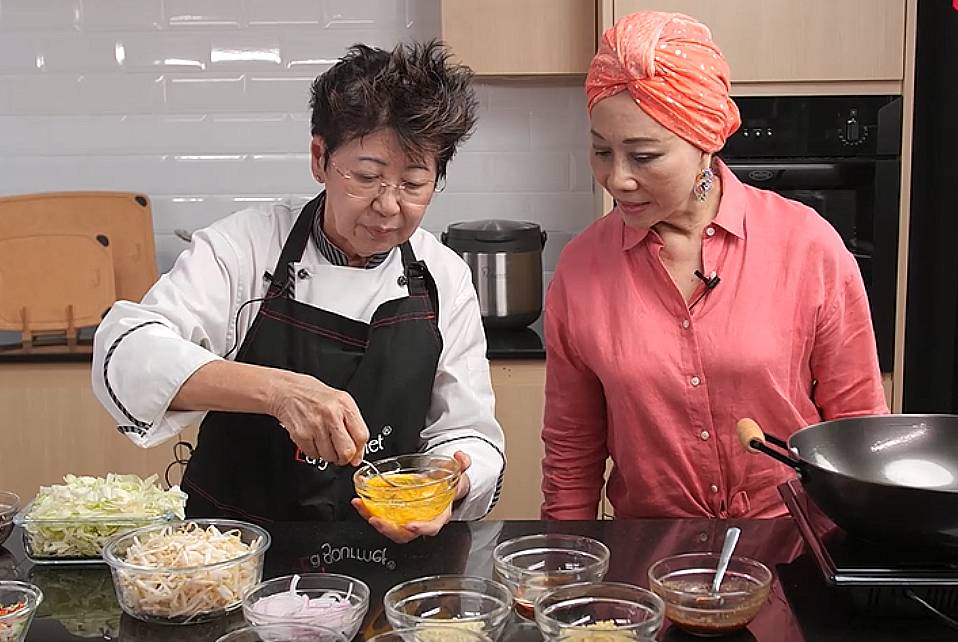

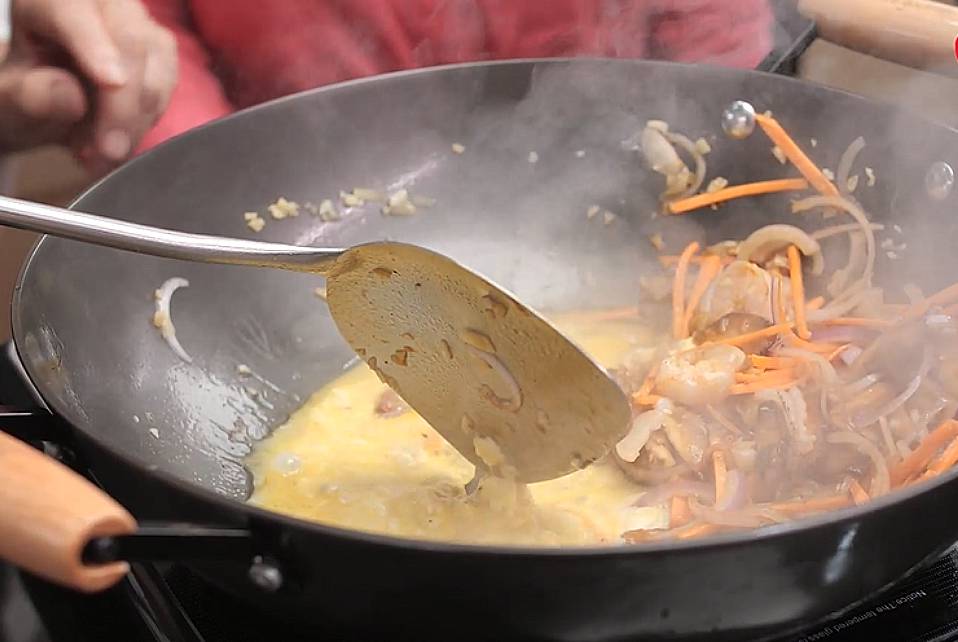
7. Put some sesame oil into the wok. Add some garlic, chopped ginger, mushrooms, prawns, carrots and onions. Then, stir fry.
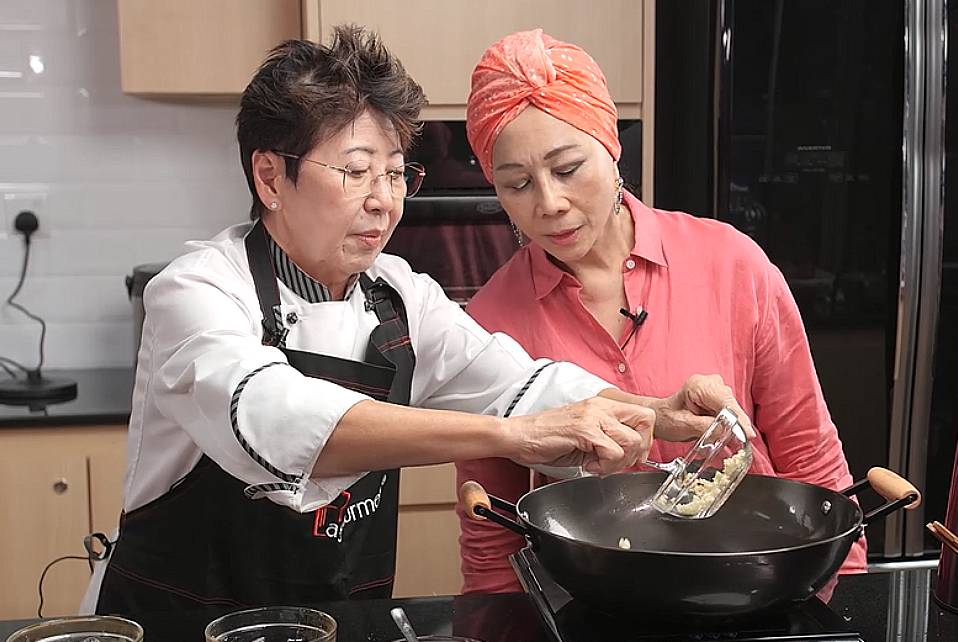

8. Push those ingredients to the side, then add in the eggs. Scramble the egg.

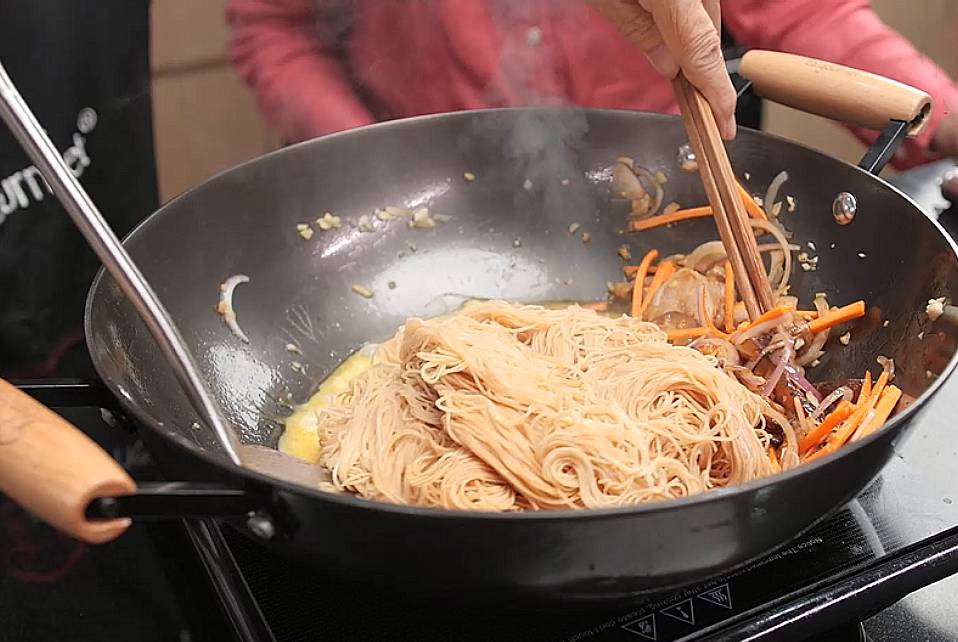
9. Add in the mee sua into the wok and toss it.

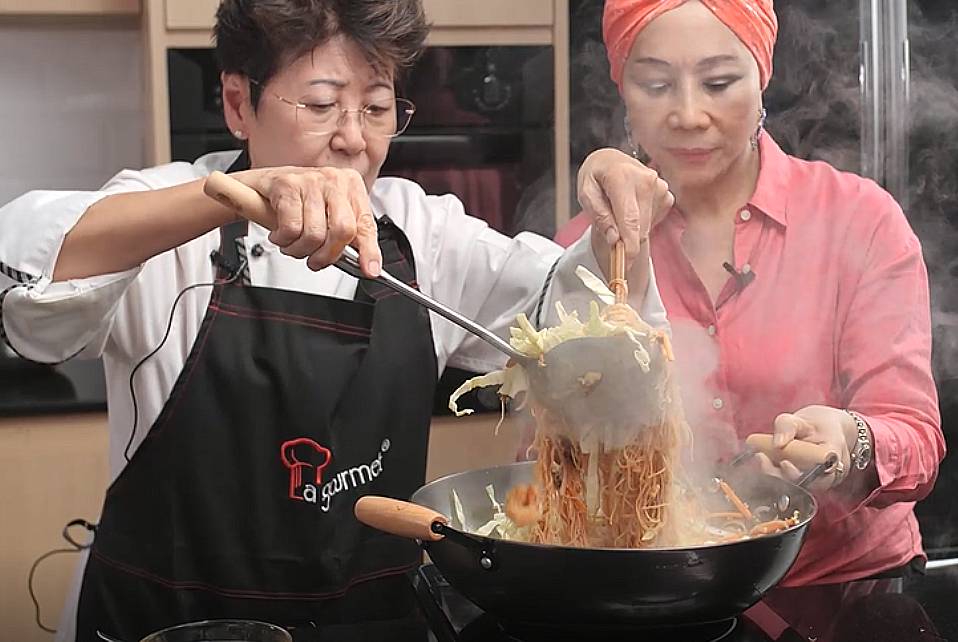

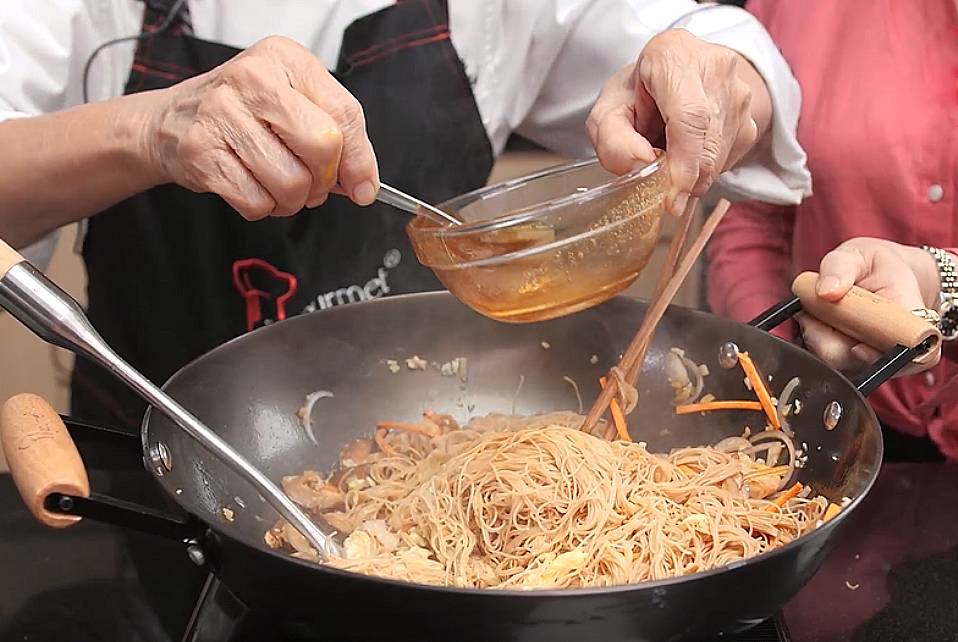
10. Add in the remaining sauce.

11. Put the cabbage in and stir fry again.
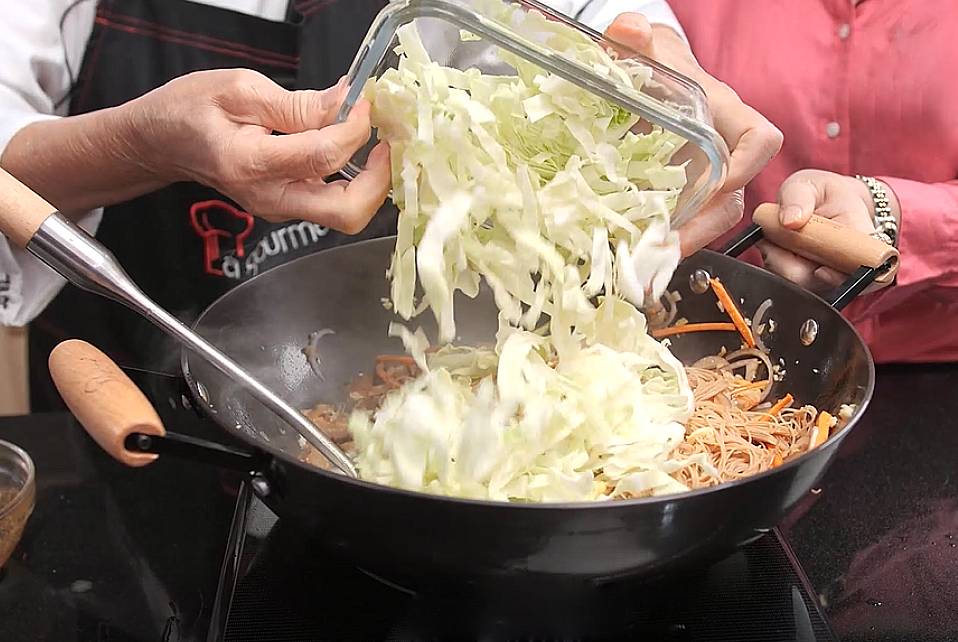

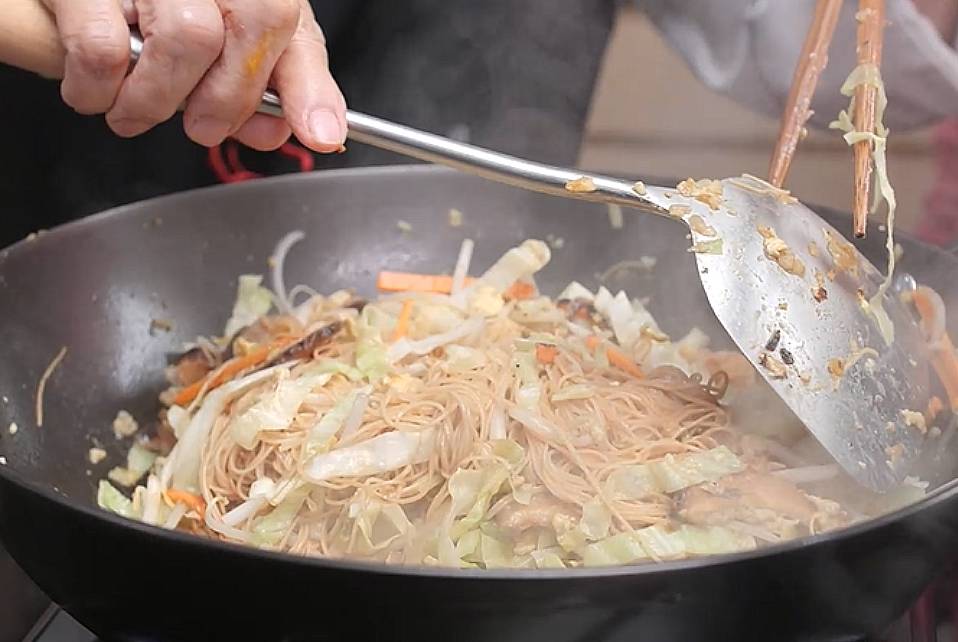

12. Pour a little bit of water before adding the beansprouts.
13. The Longevity Noodles is done and ready to serve!
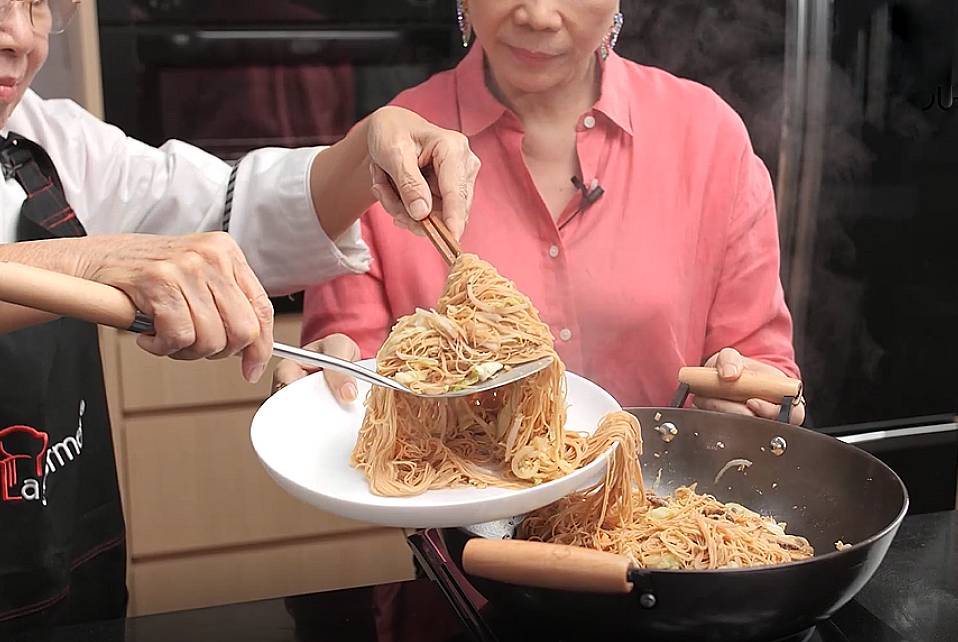

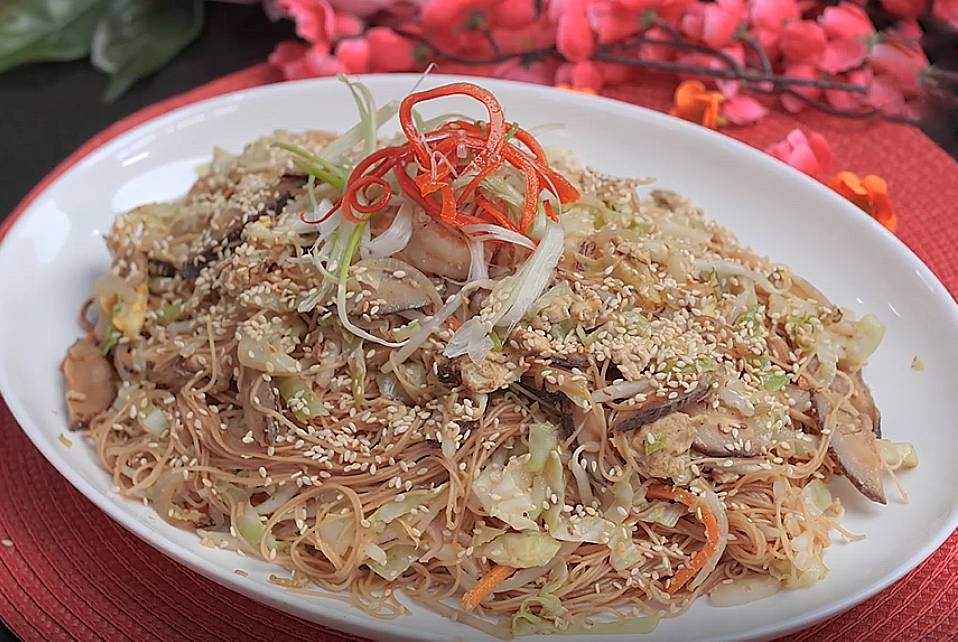

Why are they called longevity noodles?
In China, the Han people follow the custom of eating longevity noodles on their birthday.
In Chinese, the person “面” in a real sense implies noodle as well as face.
The Chinese Emperor Wu accepted that individuals with long appearances for the most part lived longer. The more extended the face, the longer the life someone will have. Since Emperor Wu, long noodles have been utilized as an analogy for life span and as a gift for birthday festivities.
The custom has been followed from that point onward. A life span noodle is a solitary noodle that fills the entire bowl, and it is better not to break it while eating.
Traditions of longevity noodles
There are a few traditions related to eating longevity noodles. One of them asks that visitors pick their noodles from their own bowl and spot them into the bowl of the individual commending his birthday as they wish them a fortune, joy, and life span.
Another custom is to hold the noodles up with your chopsticks and consider how long they are with your guests.
Likewise, never fill noodles to the edge of a bowl, as it would imply that you are demonstrating a full life expectancy.
However, the one thing that is an outright no-no is to cut a strand of noodle as you would be in danger of stopping your life expectancy!
There are a large number of longevity noodles recipes. Most frequently, they are ready with pork, chicken, or simply Chinese chive and shiitake mushrooms.
What type of noodles to use for longevity noodles recipe?
The long noodles address a long life, cutting the noodles emblematically reduce your life. So, it’s about using long noodles. Not just any long noodles, it has to be tough and not that easily break yet maintains that edible texture.
In this recipe, we’re using mee sua. Another more popular choice is the use of yi mein.
Yi Mein, is a Cantonese egg noodle comprised of wheat flour. While making the mixture, soft drink water is utilized rather than plain old water so the noodle surface is somewhat chewy, fairly supple, and absolutely cracking magnificent.
They’re permeable noodles, so they retain a portion of the sauce you use to make things considerably more enchanted. Try to get great quality noodles; it has *all* the texture.
They’ll keep up with their versatility in the wake of being boiled and sautéed, and that permits them to extend and remain scrum-diddly-umptious! That’s what makes yi mien a popular choice for this recipe.
Hope this post has been informative and makes you hungry! For the best cookware to get that wok hei, use a cast iron wok such as Nitrigan Cast Iron Wok from La gourmet.
Nitrigan Cast Iron Wok is manufactured with nitriding process to make it tougher and highly-resistant against rust. As you season and use it, it gets better as it goes!
When well taken care of, you can also pass it on to your younger generation. It’s that durable!
Drop by our website for ongoing cookware sales and offers!

